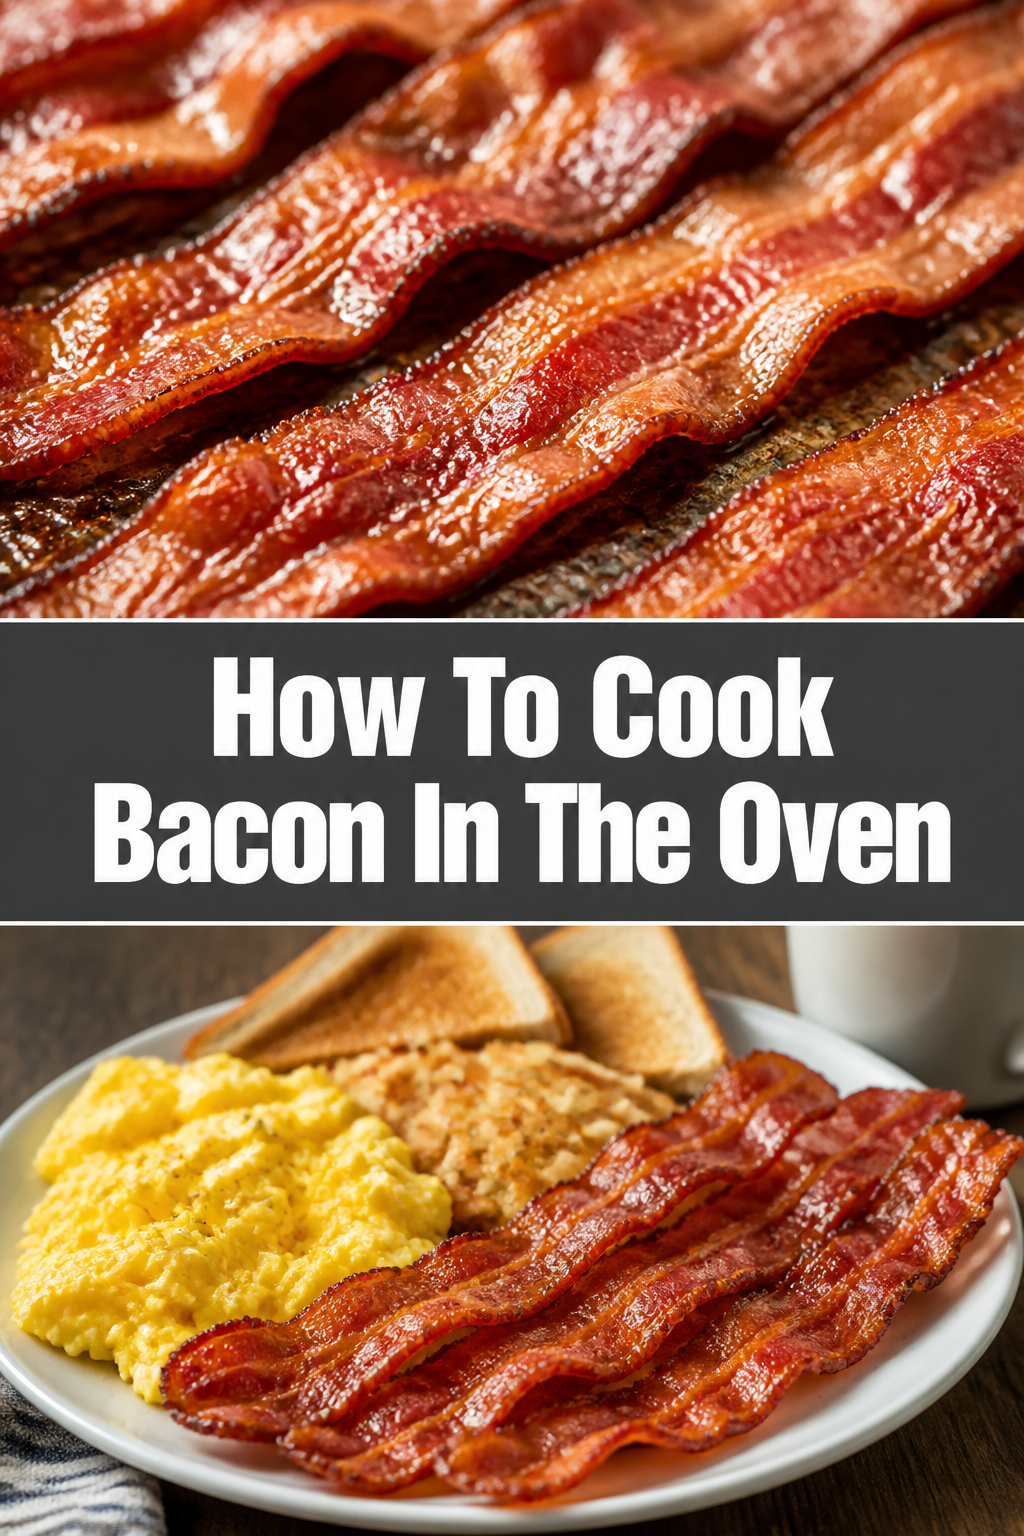
🥓 How To Cook Bacon In The Oven
Cooking bacon on the stovetop often feels like a high-stakes culinary gamble, complete with grease splatters and unevenly cooked strips.
For years, I battled with a smoking pan and bacon that was either too chewy or burnt to a crisp in spots.
Then I discovered the magic of oven-baked bacon, and my breakfast routine, along with my kitchen, was forever changed for the better.

Quick Overview
This guide will walk you through the simple, mess-free method of cooking perfect bacon in your oven, ensuring consistently crispy results every time.
You’ll learn how to achieve ideal texture, manage grease, and avoid common pitfalls, transforming your bacon game.
- Time needed: 20-30 minutes (5 minutes prep, 15-25 minutes cook time)
- Difficulty: Beginner
- What you’ll need: Bacon, baking sheet, aluminum foil or parchment paper, wire rack (optional), tongs, paper towels.
Step-by-Step Instructions
Step 1: Choose Your Bacon and Prepare Your Baking Sheet
Start by selecting your favorite bacon. Thicker-cut bacon will take a little longer to cook and yield a chewier texture, while thinner slices will crisp up faster.
Line a sturdy baking sheet with aluminum foil or parchment paper. This crucial step makes cleanup incredibly easy, saving you from scrubbing baked-on grease.
If you prefer extra crispy bacon and want to minimize grease contact during cooking, place an oven-safe wire rack on top of your lined baking sheet.
Pro Tip: Using parchment paper can sometimes prevent the bacon from sticking to the foil, especially if you’re not using a rack. It also helps with even browning.
Step 2: Preheat Your Oven
Set your oven to 400°F (200°C).
Preheating is essential for even cooking and achieving that desirable crispiness. Placing bacon into a cold oven can lead to uneven cooking and a less satisfying texture.
Allow your oven ample time to fully reach the target temperature before you introduce the bacon.
Step 3: Arrange the Bacon
Carefully lay the bacon strips in a single layer on the prepared baking sheet or wire rack.
Ensure that the strips do not overlap. Overlapping bacon will steam rather than crisp, resulting in chewy, undercooked areas.
If you’re cooking a large batch, it’s better to use two baking sheets rather than crowding one.
Step 4: Cook to Perfection
Place the baking sheet into your preheated oven. The cooking time will vary depending on the thickness of your bacon and your desired crispiness.
For regular-cut bacon, start checking around 15-18 minutes. Thicker cuts may need 20-25 minutes or even a little longer.
Keep a close eye on the bacon, especially towards the end of the cooking time, as it can go from perfectly done to burnt very quickly.
Step 5: Monitor and Adjust
Around the 15-minute mark, open the oven and visually inspect your bacon.
Look for a rich, golden-brown color and bubbling fat. If some pieces are cooking faster than others, you can carefully rotate the pan for more even results.
You generally don’t need to flip oven bacon, as the circulating hot air cooks both sides effectively, especially when using a wire rack.
Step 6: Carefully Drain Excess Fat
Once the bacon reaches your desired crispiness, use tongs to carefully transfer the strips from the baking sheet to a plate lined with several layers of paper towels.
The paper towels will absorb any excess grease, making the bacon even crispier and less greasy to eat.
Allow the bacon to rest on the paper towels for a minute or two to finish crisping up as it cools.
Step 7: Collect and Store Bacon Fat
Once the baking sheet has cooled slightly, carefully pour the rendered bacon fat into a heat-safe container.
This flavorful fat can be saved and used for cooking other dishes, adding incredible depth to roasted vegetables, eggs, or even cornbread.
Ensure the fat is completely cool before covering and storing it in the refrigerator for future use.
Step 8: Enjoy and Clean Up
Serve your perfectly crispy oven-baked bacon immediately alongside your favorite breakfast items or as a delicious addition to sandwiches and salads.
Thanks to the foil or parchment paper, cleanup is a breeze. Simply let the pan cool, then carefully gather the lining with the solidified fat and discard it.
A quick wipe-down of the baking sheet is usually all that’s needed, proving the oven method is truly less messy.
Common Mistakes to Avoid
Using a Cold Oven
Many people place bacon into a cold oven, thinking it will cook more evenly as the oven heats up. This is a common misconception.
Starting bacon in a cold oven causes it to cook slowly and unevenly, rendering out too much fat before it has a chance to crisp up properly.
Always preheat your oven fully to the recommended temperature before placing the bacon inside to ensure a quick sear and even cooking from the start.
Overlapping Bacon Strips
When bacon strips are laid too close together or overlap on the baking sheet, they don’t get proper air circulation.
Instead of crisping up, the bacon essentially steams in its own fat and moisture, leading to limp, rubbery results.
Always arrange bacon in a single layer with a little space between each strip. If you have too much bacon for one sheet, use a second pan.
Not Lining the Pan
Skipping the foil or parchment paper might seem like a small shortcut, but it leads to a significantly more difficult cleanup.
Bacon fat can bake onto the pan, creating stubborn, sticky residue that requires extensive scrubbing.
Always line your baking sheet. It catches all the rendered fat and makes discarding it and cleaning the pan incredibly simple.
Overcooking or Undercooking
Bacon can go from perfectly crisp to burnt in a matter of seconds, especially thinner cuts.
Conversely, pulling it out too early results in chewy, undercooked bacon that lacks the desired texture.
Start checking your bacon a few minutes before the estimated cook time, and trust your eyes. Look for a deep golden-brown color and bubbling fat, then remove it promptly.
Troubleshooting
Bacon Isn’t Crispy Enough
If your bacon is coming out chewy or limp, there are a few potential culprits. First, ensure your oven was fully preheated to 400°F (200°C).
Overlapping strips can also lead to steaming instead of crisping. Make sure each piece has room.
Finally, you might just need to cook it a little longer. Keep an eye on it and let it reach a deeper golden-brown color before removing it from the oven.
Bacon is Burning Too Quickly
If your bacon is charring on the edges while the middle is still cooking, your oven might be running too hot, or the bacon is too thin for the temperature.
Try lowering the oven temperature by 25°F (about 15°C) for your next batch, or cook thinner bacon for a shorter duration.
Always monitor closely, especially after the initial 10-12 minutes, as cooking times can vary significantly between ovens.
Too Much Smoke in the Kitchen
Excessive smoke usually indicates that the bacon fat is burning, often due to a very high temperature or a dirty oven.
Ensure your oven temperature isn’t set too high (400°F is usually ideal). Also, check if there’s any old, leftover grease in your oven from previous cooking that could be smoking.
Using a clean baking sheet and fresh foil/parchment paper for each batch helps prevent old fat from smoking.
Key Takeaways
- Always preheat your oven to 400°F (200°C) for consistent results.
- Line your baking sheet with foil or parchment paper for effortless cleanup.
- Arrange bacon in a single layer without overlapping to ensure even crisping.
- Use a wire rack for extra crispy bacon and better fat drainage.
- Monitor bacon closely during the last few minutes of cooking to prevent burning.
- Drain excess fat on paper towels immediately after cooking for optimal crispiness.
Frequently Asked Questions
Can I cook bacon from frozen?
It’s generally not recommended to cook bacon directly from frozen in the oven. The strips will stick together, leading to uneven cooking and potential undercooked spots.
For best results, thaw your bacon in the refrigerator overnight or use the defrost setting on your microwave before cooking.
What’s the best temperature for oven bacon?
A temperature of 400°F (200°C) is widely considered the sweet spot for oven-baked bacon. This temperature is high enough to render the fat and crisp the meat without causing excessive smoking or burning too quickly.
Some prefer 375°F (190°C) for slightly slower cooking, especially with very thick-cut bacon.
Should I flip the bacon halfway through?
Flipping bacon is usually not necessary when cooking in the oven, especially if you’re using a wire rack. The circulating hot air cooks both sides evenly.
If you’re cooking directly on the baking sheet without a rack, you can flip it once halfway through if you notice uneven browning, but it’s often not required for good results.
How do I store leftover cooked bacon?
Once cooked bacon has cooled completely, store it in an airtight container or a resealable bag in the refrigerator. It will stay fresh for up to 4-5 days.
Reheat it gently in the microwave for 10-20 seconds or crisp it up in a pan or toaster oven.
Our Top Recommended Finds
- Heavy-Duty Baking Sheets: A good quality, sturdy baking sheet ensures even heat distribution and prevents warping at high temperatures.
- Oven-Safe Wire Rack: Essential for those who prefer exceptionally crispy bacon, allowing fat to drip away and air to circulate all around the strips.
- Heat-Resistant Tongs: Perfect for safely handling hot bacon and transferring it without burning your fingers.
Your Journey to Perfect Bacon Starts Now
You now possess the knowledge and practical steps to conquer the art of oven-baked bacon. Say goodbye to grease splatters and hello to consistently perfect, crispy strips.
This method not only delivers superior results but also makes cleanup a breeze, freeing up your time to enjoy your delicious creation.
Don’t just dream of perfect bacon; make it a reality this weekend. Gather your ingredients, preheat your oven, and prepare to elevate your breakfast game forever.