🍖 How To Cook A Brisket In The Oven
Cooking a brisket in your oven might seem like a daunting task. Many home cooks shy away from this magnificent cut of meat. However, with the right technique and a good dose of patience, you can achieve incredibly tender, flavorful results right in your kitchen.
I’ve personally tackled many briskets, from backyard smokers to simple oven roasts, learning valuable lessons along the way. This guide distills years of trial and error into a foolproof method, ensuring your next brisket is a show-stopping success.

Quick Overview
This guide will walk you through preparing and slow-roasting a brisket to perfection, focusing on achieving that coveted tender texture and rich flavor without needing a smoker. You’ll learn the essential steps, from trimming to slicing, ensuring a delicious outcome.
- Time needed: 10-14 hours (including prep, cooking, and crucial resting time)
- Difficulty: Intermediate
- What you’ll need: Brisket, sharp knife, large roasting pan, reliable meat thermometer, heavy-duty foil.
Step-by-Step Instructions
Step 1: Choose Your Brisket Wisely
The first step to a great brisket begins at the butcher counter. You’ll typically find either a “flat” or a “point” cut, or a “whole packer” brisket which includes both. The whole packer offers the best flavor and moisture due to its fat content.
For oven cooking, a whole packer brisket, usually 10-15 pounds, is ideal. Look for a brisket with good marbling throughout the lean meat, as this fat will render down and keep the meat moist during the long cooking process. A good fat cap on one side is also desirable.
Step 2: Trim Your Brisket
Proper trimming is essential for even cooking and a delicious end product. You want to remove hard, thick pieces of fat that won’t render, but leave enough to keep the meat moist.
Trim the hard, deckle fat between the flat and the point, but don’t separate them completely. Remove any silver skin from the lean meat side. Reduce the thick fat cap to about 1/4 to 1/2 inch thickness across the entire surface.
Pro Tip: Cold brisket is easier to trim than room-temperature brisket. Work quickly to keep it chilled.
Step 3: Season Generously
A good rub is key to developing a flavorful bark. While many complex rubs exist, a simple salt, pepper, and garlic powder (SPG) combination works wonders and allows the beef flavor to shine.
Mix 1/2 cup coarse black pepper, 1/4 cup kosher salt, and 2 tablespoons garlic powder. Apply a thin layer of yellow mustard or hot sauce all over the brisket as a binder (this is optional but helps the rub adhere). Sprinkle the rub generously over all surfaces of the brisket, pressing it gently to ensure it sticks.
Step 4: Prepare for Roasting
Setting up your roasting pan correctly ensures good air circulation and collects flavorful drippings. This also helps prevent the bottom of the brisket from burning.
Place a wire rack inside a large, sturdy roasting pan. Pour 1-2 cups of beef broth or water into the bottom of the pan, beneath the rack, to create a moist environment and collect drippings. Position the seasoned brisket fat-side up on the wire rack.
Step 5: The Initial High Heat Roast
Starting with a higher temperature helps to set the bark and kickstart the cooking process. This initial phase is relatively short compared to the overall cooking time.
Preheat your oven to 300°F (150°C). Place the brisket in the preheated oven. Roast for 2-3 hours, or until the internal temperature reaches around 150-160°F (65-71°C).
Step 6: The Low and Slow Cook
After the initial roast, you’ll reduce the temperature for a long, slow cook. This is where the magic happens, breaking down tough connective tissues into gelatin.
Reduce the oven temperature to 250°F (120°C). Cover the roasting pan tightly with heavy-duty aluminum foil. Ensure a good seal to trap moisture. Continue to cook for another 4-6 hours, or until the internal temperature reaches 180-190°F (82-88°C).
Pro Tip: Avoid opening the oven door too often during the low and slow phase. Each time you open it, the temperature drops significantly, extending cooking time.
Step 7: The Stall and Wrapping
The “stall” is a phenomenon where the brisket’s temperature plateaus for several hours. This is due to evaporative cooling on the surface. Wrapping helps push past the stall.
Once the brisket reaches 180-190°F (82-88°C) and the stall is likely occurring, remove it from the oven. Wrap the brisket tightly in several layers of heavy-duty aluminum foil. You can also use butcher paper for a slightly different bark texture. Return the wrapped brisket to the oven.
Continue cooking at 250°F (120°C) until the internal temperature reaches 200-205°F (93-96°C) and the brisket feels probe-tender. This means a meat thermometer or skewer slides in with very little resistance, like pushing it into warm butter. This could take another 2-4 hours.
Step 8: The Crucial Rest
Resting is arguably the most important step for a tender, juicy brisket. It allows the muscle fibers to relax and reabsorb juices that have been pushed to the center during cooking.
Once the brisket reaches probe-tender, remove it from the oven, still wrapped. Place the wrapped brisket in an empty cooler or a warm oven (turned off, with the door slightly ajar for 15 minutes before closing) for at least 2-4 hours. A longer rest is always better.
Pro Tip: For an even longer rest, wrap the brisket in towels before placing it in a cooler. It can stay warm for 6-8 hours this way.
Step 9: Slice Against the Grain
Slicing correctly is vital for tenderness, even if the brisket is perfectly cooked. Brisket has two distinct muscle groups (flat and point) with grains running in different directions.
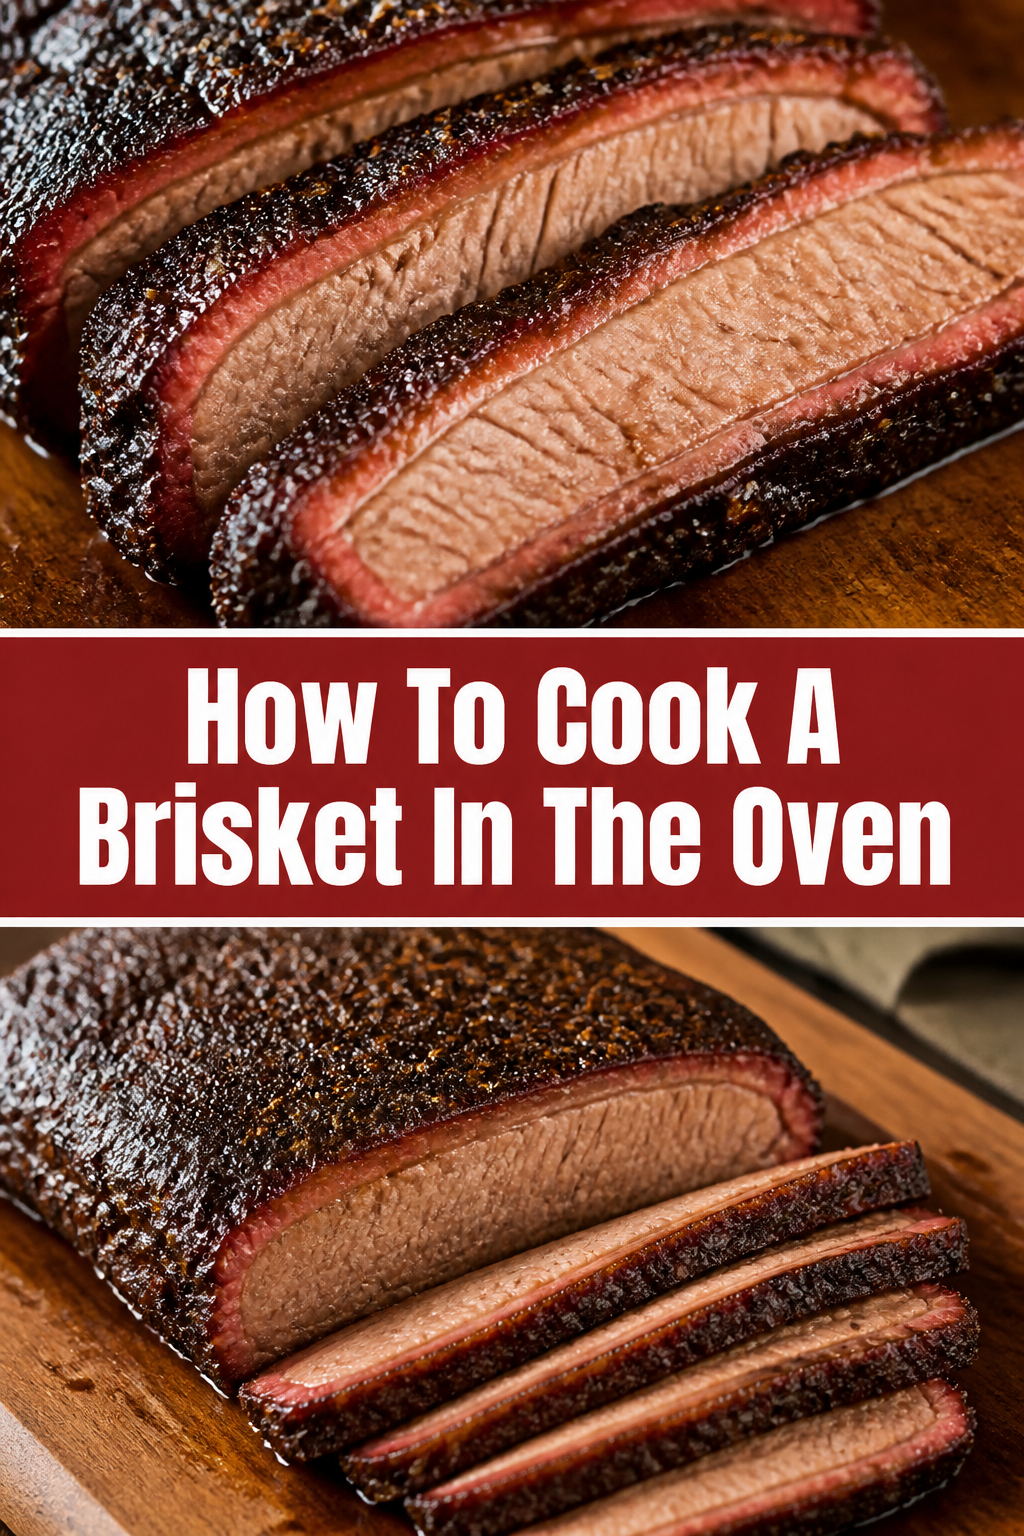
After resting, unwrap the brisket and collect any rendered juices. Separate the point from the flat if you cooked a whole packer. Identify the grain for each section. Slice the brisket against the grain into pencil-thick slices (about 1/4 inch).
Common Mistakes to Avoid
Not Trimming Enough (or Too Much) Fat
Leaving too much hard fat on the brisket can result in a greasy, unpleasant texture, as this fat won’t render properly. Conversely, removing all the fat cap can lead to a dry brisket, especially the flat. Aim for a consistent 1/4 to 1/2 inch fat cap for optimal moisture and flavor during the long cook.
Under-seasoning the Brisket
Brisket is a large, thick cut of meat that can handle a lot of seasoning. A timid application of rub will result in a bland bark and an overall lack of flavor. Don’t be shy; apply the rub generously and ensure all surfaces are covered. The slow cooking process allows the flavors to penetrate and meld beautifully.
Skipping the Stall or Wrapping Too Early/Late
The “stall” is a natural part of brisket cooking. Trying to power through it at a higher temperature can dry out the meat. Wrapping the brisket once it hits the 150-160°F (65-71°C) range helps push it through the stall efficiently by trapping moisture and heat. Wrapping too early prevents bark formation, while wrapping too late might mean you’ve already lost too much moisture.
Not Resting the Brisket Long Enough
This is perhaps the most common and detrimental mistake. Cutting into a brisket immediately after it comes out of the oven will cause all the precious juices to gush out, leaving you with dry meat. Resting allows the muscle fibers to relax and reabsorb those juices, resulting in an incredibly tender and moist brisket. Always rest for at least 2 hours, ideally 4.
Troubleshooting
Brisket is Dry
A dry brisket usually points to overcooking or insufficient resting. Ensure you cook to probe-tenderness, not just a specific temperature, as tenderness is the true indicator of doneness. Always allow a minimum 2-hour rest, wrapped, to let the juices redistribute. Using a water pan in the oven and wrapping during the cook also helps maintain moisture.
Brisket is Tough/Chewy
Toughness can stem from undercooking, meaning the connective tissues haven’t had enough time to break down into gelatin. It can also be caused by slicing with the grain instead of against it. Make sure your brisket is “probe-tender” before removing it from the oven, and always identify and slice against the grain for maximum tenderness.
Cook Time is Much Longer/Shorter Than Expected
Brisket cooking times are highly variable and depend on the size of the brisket, its fat content, oven calibration, and even atmospheric pressure. Do not rely solely on time; always use a reliable meat thermometer and cook to temperature and, more importantly, to probe-tenderness. If it’s taking longer, just be patient; it’s ready when it’s ready.
Key Takeaways
- Choose Wisely: Start with a good quality whole packer brisket with ample marbling.
- Trim Smart: Remove hard fat but leave a consistent 1/4 to 1/2 inch fat cap.
- Season Liberally: Don’t be shy with your rub; it builds the crucial bark.
- Low and Slow is Key: After an initial higher heat, cook at 250°F (120°C) for tenderness.
- Wrap to Beat the Stall: Use foil or butcher paper to push through the stall and retain moisture.
- Rest is Best: Allow at least 2-4 hours of rest for maximum juiciness and tenderness.
- Slice Against the Grain: This is critical for a tender bite, even if everything else is perfect.
Frequently Asked Questions
Do I need to sear brisket before roasting?
Searing brisket before roasting in the oven is not typically necessary for this method. The initial higher temperature roast helps to develop a flavorful bark on the exterior. Searing is more common for pan-seared or braised brisket recipes where a crust is desired quickly, but for a long, slow oven roast, it’s an optional step that might not contribute significantly to the final texture.
What’s the best internal temperature for brisket?
The ideal internal temperature for cooked brisket is typically between 200-205°F (93-96°C). However, the most important indicator of doneness is “probe-tenderness.” The brisket is ready when a thermometer probe or skewer slides into the thickest part of the meat with very little resistance, feeling like it’s entering warm butter.
Can I use a rub instead of a marinade?
Yes, a dry rub is the preferred seasoning method for this oven-roasted brisket recipe. Marinades tend to add moisture and flavor to the surface but don’t contribute to the characteristic “bark” that a rub creates during slow cooking. A good rub, applied generously, forms a delicious crust and infuses flavor throughout the meat.
How do I store leftover brisket?
To store leftover brisket, allow it to cool completely, then slice or shred it and place it in an airtight container with some of the collected pan drippings or beef broth. This helps keep the meat moist. It can be refrigerated for 3-4 days or frozen for up to 3 months. Reheat gently in the oven or microwave, often with a little added liquid.
Our Top Recommended Finds
- Wireless Meat Thermometer: Essential for monitoring internal temperature without opening the oven, ensuring consistent heat.
- Large Roasting Pan with Rack: Provides ample space for the brisket and allows for proper air circulation and fat drainage.
- High-Quality Slicing Knife: A long, sharp slicing knife with a Granton edge makes carving the tender brisket much easier and cleaner.
Your Brisket Masterpiece Awaits
You now have all the knowledge and steps needed to conquer an oven-roasted brisket. This guide provides a clear path to achieving that coveted tender, juicy, and flavorful result. The process requires patience, but the reward is absolutely worth it.
Imagine the aroma filling your kitchen, the envious glances from your family, and the pure satisfaction of slicing into perfectly cooked brisket. Don’t let the size or reputation of this cut intimidate you any longer. Gather your tools, pick up a beautiful brisket, and get ready to impress. Your culinary adventure begins today!