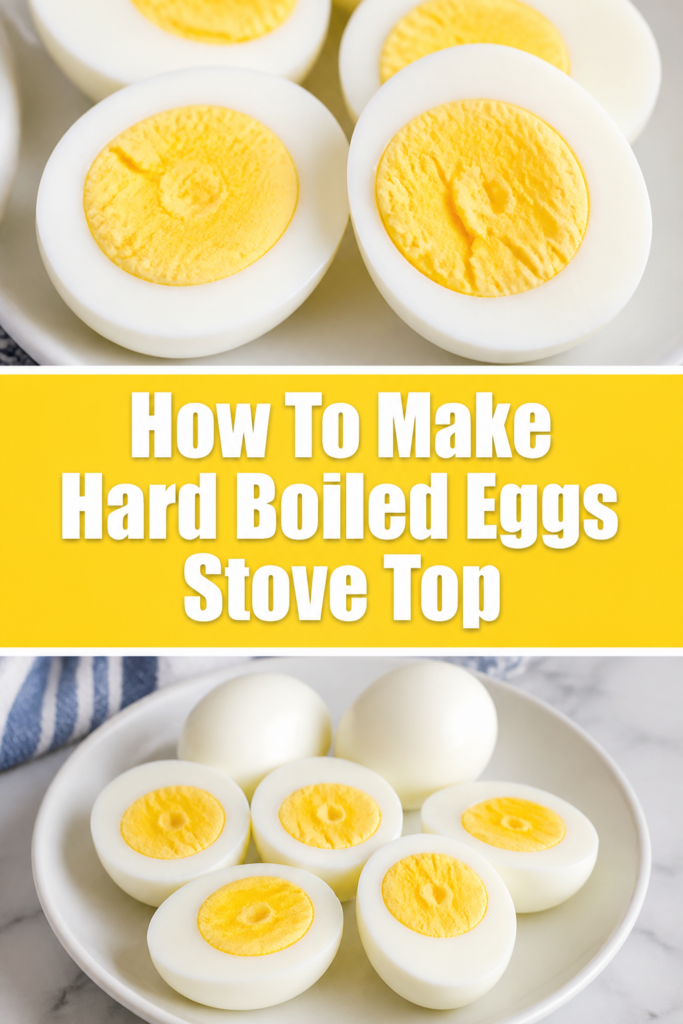
🥚 How To Make Hard Boiled Eggs Stove Top
Making perfect hard-boiled eggs might seem simple, but achieving that ideal texture and easy peel can be surprisingly tricky. I remember countless mornings wrestling with shells or finding rubbery whites.
It took a lot of trial and error to consistently get it right. This guide shares the exact method I now use, ensuring delicious, perfectly cooked eggs every time. You’ll gain the confidence to master this kitchen essential.
Quick Overview
This guide will walk you through the process of creating perfectly cooked hard-boiled eggs right on your stovetop. You’ll learn the best techniques for cooking, cooling, and peeling with ease.
You will soon be enjoying beautifully firm whites and creamy, golden yolks, ready for any meal or snack.
- Time needed: 15-20 minutes (prep to finish)
- Difficulty: Beginner
- What you’ll need: Eggs, a saucepan, water, ice, a slotted spoon
Step-by-Step Instructions
Step 1: Choose Your Eggs Wisely
Start by selecting eggs that are a little older, typically 7-10 days past their packing date. Fresher eggs tend to cling more to the membrane, making them notoriously difficult to peel. This small detail makes a big difference.
Consider using large eggs for consistency in cooking times. Ensure they are at room temperature if possible, which helps prevent cracking when they hit the hot water.
Step 2: Gently Place Eggs in a Saucepan
Carefully arrange your chosen eggs in a single layer at the bottom of a saucepan. Avoid overcrowding the pan, as this can lead to uneven cooking and potential cracking. A single layer ensures each egg cooks uniformly.
Use a slotted spoon or your hand to gently lower each egg. Dropping them in can cause hairline fractures that will expand during cooking.
Step 3: Cover Eggs with Water
Pour cold tap water into the saucepan, ensuring the eggs are fully submerged. The water level should be at least one inch above the tops of the eggs. This provides enough liquid for even heat distribution.
Starting with cold water is crucial. It allows the eggs to gradually warm up with the water, reducing the risk of cracking and promoting a more even cook from the outside in.
Step 4: Bring to a Rolling Boil
Place the saucepan on your stovetop over high heat. Bring the water to a rapid, rolling boil. You’ll see large, active bubbles breaking the surface, indicating the water is vigorously boiling.
Stay near the stove during this phase to monitor the water. As soon as it reaches a full boil, proceed immediately to the next step.
Step 5: Turn Off Heat and Cover
Once the water reaches a full, rolling boil, remove the saucepan from the heat source. Immediately place a lid tightly on the pan. This traps the residual heat inside, allowing the eggs to cook gently and efficiently.
Do not lift the lid during this crucial soaking period. The trapped steam and hot water are doing all the work, ensuring consistent cooking.
Pro Tip: For perfect yolks, timing is everything during this no-heat cooking phase. Use a timer to ensure you don’t overcook or undercook your eggs.
Step 6: Let Eggs Sit (Steep)
Allow the eggs to sit in the hot, covered water for a specific duration, depending on your desired yolk consistency. For firm, fully set hard-boiled eggs, aim for 12-15 minutes. This range typically yields a creamy, solid yolk.
If you prefer a slightly softer, jammy yolk, reduce the steeping time to 8-10 minutes. Adjusting this time is key to achieving your perfect egg.
Step 7: Prepare an Ice Bath
While the eggs are steeping, prepare an ice bath. Fill a medium-sized bowl with cold water and plenty of ice cubes. This bath is essential for stopping the cooking process and making the eggs easier to peel.
The sudden drop in temperature causes the egg whites to contract, separating them from the shell membrane. This creates a small gap, making peeling much simpler.
Step 8: Transfer Eggs to Ice Bath
Once the steeping time is complete, use a slotted spoon to carefully transfer each egg from the hot water directly into the ice bath. Work quickly but gently to avoid cracking the eggs.
Let the eggs sit in the ice bath for at least 5-10 minutes. This ensures they are thoroughly chilled, halting the cooking process completely and aiding in the peeling.
Step 9: Peel and Enjoy
Once the eggs are completely cooled, they are ready to peel. Gently tap the wider end of the egg on a hard surface to crack the shell. Roll the egg between your palms to create more cracks all around.
Start peeling from the wider end, where there is usually an air pocket. The shell should come off relatively easily under cold running water, which helps wash away small shell fragments.
Common Mistakes to Avoid
Overcooking
Leaving eggs in hot water for too long results in an unappetizing greenish-gray ring around the yolk. This discoloration is caused by a reaction between iron in the yolk and sulfur in the white. The texture also becomes rubbery and dry.
To prevent this, stick to the recommended steeping times of 12-15 minutes for a firm yolk. Immediately transfer eggs to an ice bath once the timer is up to halt cooking.
Using Fresh Eggs
While fresh eggs are great for scrambling or frying, they are a nightmare for hard-boiling. The membrane beneath the shell adheres very tightly to the fresh egg white. This makes peeling incredibly frustrating, often tearing away large chunks of the egg white.
Always opt for eggs that are at least a week old. The membrane naturally separates over time, making peeling significantly easier.
Starting with Hot Water
Placing cold eggs directly into boiling water can cause them to crack due to the sudden temperature shock. The rapid expansion of the egg inside the shell leads to ruptures. This results in unsightly, unevenly cooked eggs.
Always start your eggs in cold water. This allows for a gradual increase in temperature, preventing stress on the shell and promoting even cooking.
Skipping the Ice Bath
Failing to immediately cool the eggs in an ice bath after cooking is a common error. This allows residual heat to continue cooking the eggs, leading to overcooked, rubbery whites and that undesirable greenish yolk. It also makes peeling much harder.
The ice bath instantly stops the cooking process and helps the egg whites contract away from the shell, creating that crucial air gap for easy peeling.
Troubleshooting
Eggs are hard to peel
Difficulty peeling often points to using very fresh eggs or not cooling them properly. Fresh eggs have a membrane that strongly bonds to the white. Insufficient cooling means the white hasn’t fully contracted from the shell.
Ensure you use eggs that are at least a week old. Always transfer cooked eggs immediately to an ice bath for at least 5-10 minutes to cool them completely.
Yolk has a greenish ring
A greenish-gray ring around the yolk indicates that the egg has been overcooked. This happens when the iron in the yolk reacts with sulfur in the white due to prolonged heat. The texture can also become chalky.
Reduce your steeping time in the hot water. Aim for 12-15 minutes for a firm yolk, and promptly cool the eggs in an ice bath to stop the cooking process.
Eggs cracked during cooking
Cracked shells usually occur from placing cold eggs directly into hot water or overcrowding the pan. The sudden temperature change causes the shell to expand rapidly and break. Overcrowding means eggs bump into each other.
Always start eggs in cold water and bring them to a boil gradually. Ensure eggs are in a single layer in the saucepan to prevent collisions.
Key Takeaways
- Use slightly older eggs for easier peeling.
- Always start eggs in cold water for even cooking and to prevent cracking.
- Bring water to a rolling boil, then remove from heat and cover.
- Steep eggs for 12-15 minutes for perfectly firm, creamy yolks.
- An immediate ice bath is crucial for stopping cooking and aiding peeling.
- Peel under cold running water for best results.
Frequently Asked Questions
How long do hard-boiled eggs last in the refrigerator?
Peeled hard-boiled eggs can be stored in an airtight container in the refrigerator for up to 5-7 days. Unpeeled eggs can last for about a week in the fridge. Always ensure they are properly cooled before storing.
Can I make a large batch of hard-boiled eggs at once?
Yes, you can make a large batch, but avoid overcrowding your saucepan. Cook eggs in batches if necessary, ensuring they are in a single layer and fully submerged in water. This ensures even cooking for all eggs.
What if my eggs float in the water?
If an egg floats, it indicates that a large air cell has formed inside due to moisture loss over time. This usually means the egg is older. While older eggs are good for peeling, a floating egg could be very old or even spoiled. It’s best to discard any eggs that float upright or completely.
How can I tell if a hard-boiled egg is cooked without cracking it?
Spin the egg on a flat surface. A hard-boiled egg will spin quickly and smoothly, like a top. A raw egg will wobble and spin slowly because its liquid interior sloshes around. This is a reliable trick to check doneness.
Our Top Recommended Finds
- Stainless Steel Saucepan: A sturdy, medium-sized saucepan with a tight-fitting lid is essential for even heat distribution. Look for one with a heavy bottom.
- Slotted Spoon: A good quality slotted spoon makes transferring eggs into and out of hot water and ice baths safe and easy. Silicone or heat-resistant nylon are gentle on shells.
- Kitchen Timer: A reliable kitchen timer, either digital or mechanical, is invaluable for precise steeping times. This prevents overcooking and ensures perfect yolks.
Mastering Your Hard-Boiled Egg Game
You now have all the tools and knowledge to consistently make perfect hard-boiled eggs right on your stovetop. No more green rings, no more frustrating peels. This simple skill elevates so many dishes and makes healthy snacking effortless.
Take these steps into your kitchen today. Experiment with steeping times to find your ultimate yolk consistency. Share your perfectly peeled creations with friends and family. Your culinary journey with eggs has just begun!