🥣 How To Make Bone Broth From Beef Bones
I still remember the first time I pulled a jar of homemade beef bone broth out of the refrigerator and saw it had turned into a thick, wobbling gelatin.
That was the moment I realized I had finally mastered the art of extracting every bit of nutrition and flavor from simple kitchen scraps.
After years of simmering hundreds of gallons in my own kitchen, I have refined this process to ensure you get a rich, dark, and deeply nourishing broth every single time.
Quick Overview
This guide will take you through the traditional method of slow-simmering beef bones to create a versatile base for soups, stews, or a restorative warm drink.
- Time needed: 14 to 26 hours (mostly hands-off)
- Difficulty: Beginner
- What you’ll need: 4-5 lbs beef bones, large stockpot or slow cooker, apple cider vinegar, various aromatic vegetables, and filtered water.
Step-by-Step Instructions
Step 1: Source a Variety of Quality Bones
Select a mix of different types of beef bones to ensure your broth has both deep flavor and a high gelatin content.
Look for “knuckle” or “joint” bones specifically, as these are packed with the collagen necessary to give your broth that signature jelly-like consistency when cooled.
Incorporate marrow bones for richness and “meaty” bones like neck or oxtail to provide the savory, umami depth that makes the broth delicious on its own.
Prioritize grass-fed and finished beef bones whenever possible to ensure you are getting the highest concentration of minerals and healthy fats without unwanted additives.
Pro Tip: Visit a local butcher and ask for “soup bones” or “pipe bones”; they are often much cheaper than pre-packaged bones in the grocery store.
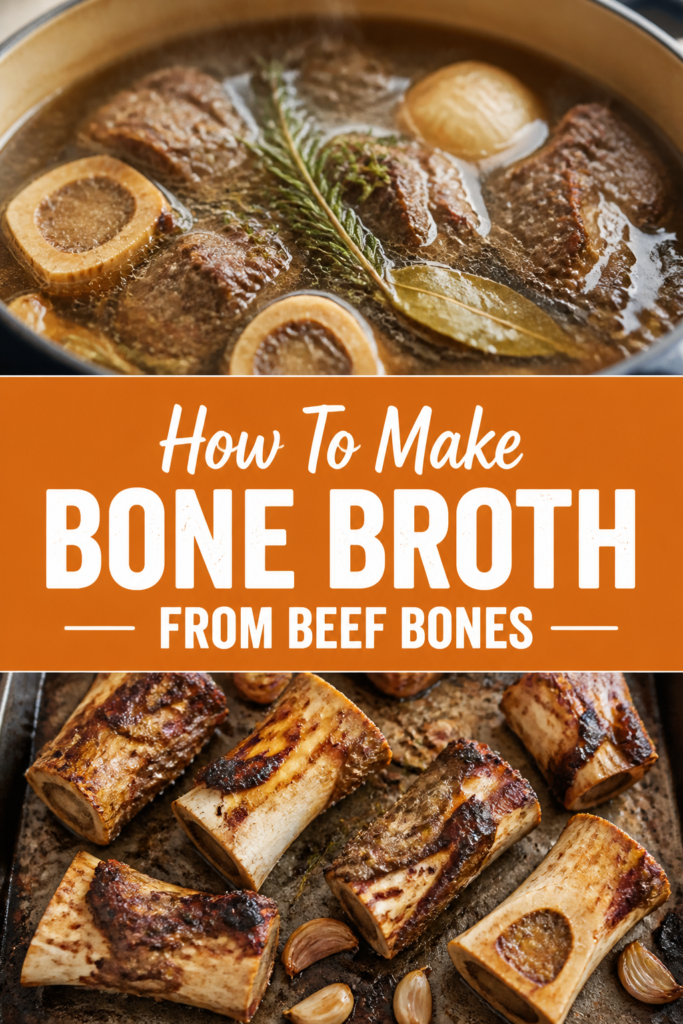
Step 2: Roast the Bones for Maximum Flavor
Preheat your oven to 400°F (200°C) and arrange your bones in a single layer on a heavy-duty roasting pan or rimmed baking sheet.
Roast the bones for 30 to 45 minutes, turning them halfway through the process to ensure even browning on all sides.
Watch for the bones to turn a deep, mahogany brown and for the fat to begin rendering out into the bottom of the pan.
Avoid burning the bones, as charred bits will impart a bitter, scorched taste to your finished broth that is impossible to remove later.
Save all the liquid fat and browned bits (the fond) from the bottom of the roasting pan, as these contain incredible amounts of concentrated beef flavor.
Step 3: Blanch the Bones for a Clearer Result
Place your roasted bones into your large stockpot and cover them with cold water if you prefer an exceptionally clear, restaurant-quality broth.
Bring the water to a rapid boil for about 10 to 15 minutes, allowing the gray foam and impurities to rise to the surface of the water.
Drain the water entirely and rinse the bones under cool tap water to remove any stuck-on debris or coagulated proteins.
Scrub the pot quickly to remove any residue before returning the clean, roasted bones to the vessel for the long simmer.
Step 4: Combine with Acid and Water
Place the roasted (and optionally blanched) bones back into your clean stockpot or a large 6-quart slow cooker.
Add two tablespoons of apple cider vinegar to the pot, which helps to break down the bone matrix and pull minerals like calcium and magnesium into the liquid.
Fill the pot with cold, filtered water until the bones are covered by at least two to three inches of liquid.
Let the bones sit in the water and vinegar mixture for about 30 minutes before turning on the heat to give the acid a head start on the extraction process.
Pro Tip: Never start with hot water; cold water allows the proteins to dissolve slowly, leading to a clearer and more flavorful end product.
Step 5: Begin the Low and Slow Simmer
Turn the heat to medium-high just until the liquid reaches a very gentle simmer, then immediately reduce the heat to the lowest possible setting.
Maintain a “lazy” simmer where only a few bubbles break the surface every few seconds, rather than a rolling boil which can damage the delicate collagen.
Cover the pot with a tight-fitting lid to prevent too much evaporation, though you may need to leave it slightly ajar if the temperature stays too high.
Simmer beef bones for a minimum of 12 hours, though 24 to 48 hours is the ideal range for total nutrient extraction and flavor development.
Step 6: Skim the Surface Regularly
Check the pot every few hours during the first half of the cooking process to look for any foam or “scum” that rises to the top.
Use a wide spoon or a fine-mesh skimmer to gently lift these impurities off the surface and discard them.
Remove the layer of rendered fat if it becomes excessively thick, though leaving some fat during the simmer can help protect the broth from oxidation.
Refill the water levels if they drop below the top of the bones, ensuring that every piece of bone remains submerged throughout the entire duration.
Step 7: Add Aromatics and Vegetables
Wait until the last 4 to 6 hours of the simmering process before adding your vegetables and herbs to the pot.
Chop onions, carrots, and celery into large chunks—leaving the onion skins on can actually provide a beautiful golden-amber color to the broth.
Toss in a few cloves of smashed garlic, a handful of peppercorns, and two or three bay leaves for a classic savory profile.
Avoid adding cruciferous vegetables like broccoli, cabbage, or kale, as these will turn bitter and overpower the delicate beef flavor during a long simmer.
Step 8: Strain and Cool Safely
Turn off the heat and use a slotted spoon or tongs to remove the large bones and vegetable chunks from the liquid.
Pour the broth through a fine-mesh strainer lined with cheesecloth into a large heat-proof bowl or another clean pot.
Cool the broth as quickly as possible to prevent bacterial growth, perhaps by placing the bowl in an ice-water bath in your sink.
Transfer the cooled liquid into glass jars, leaving at least an inch of headspace at the top if you plan to freeze them, as the liquid will expand.
Pro Tip: Once the broth is completely chilled in the fridge, the fat will solidify into a hard white cap on top; leave this in place to act as a natural seal until you are ready to use the broth.
Common Mistakes to Avoid
Using Too Much Water
One of the most frequent errors is filling the pot to the brim with water while using too few bones. This results in a weak, watery liquid that lacks the body and nutritional density of a proper broth. Aim for a ratio of about one pound of bones per quart of water to ensure a concentrated result that gels properly when chilled.
Boiling Instead of Simmering
If you keep your broth at a hard boil, you will likely end up with a cloudy, greasy liquid that has a slightly burnt or “off” flavor. High heat emulsifies the fats into the water rather than letting them float to the top for removal. A gentle, barely-there simmer is the secret to a clean taste and a perfect texture.
Adding Salt Too Early
Because bone broth reduces significantly over 24 hours, adding salt at the beginning can lead to an oversalted final product. The minerals in the bones already provide a level of natural saltiness that concentrates as the water evaporates. Always wait until the very end of the process to taste and season your broth according to your needs.
Discarding the Fat Cap Prematurely
Many people skim and discard the fat while the broth is still hot, which is difficult and messy. If you let the broth chill in the refrigerator overnight, the fat will form a solid, easily removable disc. This fat, known as tallow, can be saved and used for roasting potatoes or searing steaks, providing incredible flavor to other dishes.
Troubleshooting
The Broth Did Not Gel
If your broth remains liquid even after a night in the refrigerator, you likely didn’t use enough “joint” bones like knuckles or feet. These specific bones contain the highest amounts of collagen which converts to gelatin. You can still use the broth as-is, or you can simmer it down further to concentrate the proteins, or simply add more knuckle bones to your next batch.
The Flavor is Bitter or Sour
Bitterness usually comes from two sources: over-roasting the bones until they are charred or adding vegetables too early in the process. Vegetables like carrots and onions can break down and release bitter compounds if cooked for more than six or eight hours. Next time, ensure your bones are a golden brown rather than black, and wait until the final stretch to add your aromatics.
The Broth is Very Cloudy
Cloudiness is usually a sign that the broth was boiled too vigorously or that the bones weren’t blanched properly. While cloudiness doesn’t affect the nutritional value or the taste significantly, it can be unappealing in clear soups. To fix this in future batches, start with a cold water soak, blanch the bones first, and keep the heat at the lowest possible simmer.
Key Takeaways
- Always roast your bones first to develop a deep, complex flavor and a rich color.
- Use a mix of marrow bones for flavor and knuckle bones for a high gelatin content.
- Add a splash of apple cider vinegar to help extract essential minerals from the bone matrix.
- Keep the temperature at a very low simmer to prevent the broth from becoming cloudy or greasy.
- Wait until the final few hours of cooking to add vegetables and herbs for the best flavor profile.
- Cool the broth quickly and store it in glass jars to maintain freshness and safety.
Frequently Asked Questions
Can I make bone broth in a pressure cooker?
Yes, you can use a pressure cooker to significantly speed up the process, usually reaching a finished product in about 2 to 4 hours. While this method is much faster, some purists argue that the high pressure doesn’t produce the same depth of flavor as a 24-hour slow simmer. However, it is an excellent option for those with limited time who still want the health benefits of homemade broth.
How long does homemade beef bone broth last?
In the refrigerator, fresh bone broth will typically stay good for 5 to 7 days, especially if the fat cap remains undisturbed on top. For longer storage, you can freeze the broth in glass jars or silicone molds for up to 6 months. Just remember to leave plenty of room for expansion in the jars so the glass does not crack in the freezer.
Why is my bone broth jiggly like Jello?
A “jiggly” broth is actually the gold standard and a sign of a perfectly made batch. This texture indicates that you successfully extracted a high amount of gelatin from the collagen in the bones. Once you heat the broth up, it will turn back into a smooth, silky liquid that feels incredibly rich on the palate.
Should I remove the meat from the bones before simmering?
You do not need to remove every scrap of meat, as those small bits of beef will actually contribute a lot of savory flavor to the water. If you are using meaty bones like neck or short ribs, you can even remove the meat after the first few hours of simmering to use in a soup or stew. The bones should then be returned to the pot to continue their long extraction process.
Our Top Recommended Finds
- Fine Mesh Stainless Steel Strainer: Essential for removing small bone fragments and vegetable bits to ensure a smooth texture.
- Large 12-Quart Stainless Steel Stockpot: A heavy-bottomed pot provides even heat distribution and prevents scorching during long simmers.
- Wide-Mouth Mason Jars: These are the perfect vessels for storing broth in the fridge or freezer and are easy to clean.
Master Your Kitchen Alchemy
Now that you have the knowledge to create a perfect batch of beef bone broth, it is time to put your stockpot to work.
The beauty of this process is that it turns what most people consider trash into one of the most nutrient-dense foods in your kitchen.
Once you have a steady supply of “liquid gold” in your freezer, you will find yourself using it for everything from deglazing pans to cooking rice and grains.
Start your first batch this weekend and experience the incredible difference that patience and quality ingredients can make in your cooking.