🍚 How To Cook Basmati Rice On The Stove
Cooking the perfect pot of basmati rice shouldn’t feel like a gamble.
I spent years serving mushy or burnt rice until I learned the simple science of the “soak and steam” method.
This guide shares the exact process I use in my own kitchen to ensure every grain is long, separate, and aromatic.

Quick Overview
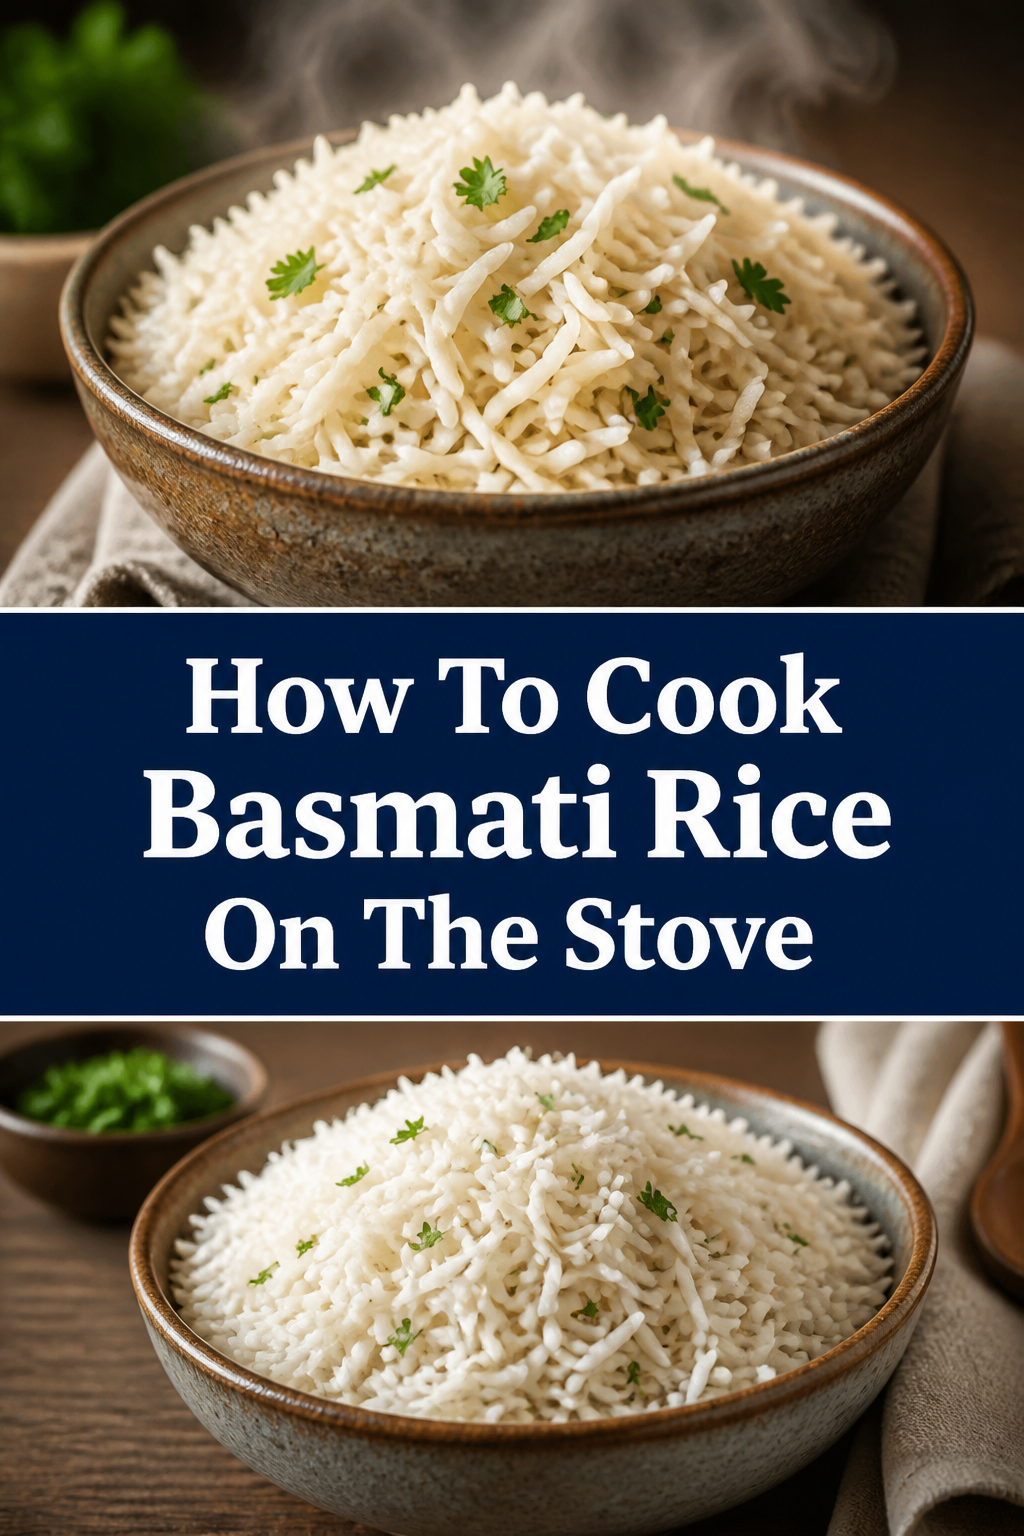
Before you turn on the burner, it helps to know what you are aiming for. Basmati is a long-grain rice known for its distinct fragrance and slender shape that elongates as it cooks.
- Time needed: 35-40 minutes (includes soaking and resting)
- Difficulty: Beginner
- What you’ll need: Aged Basmati rice, water, a heavy-bottomed pot with a tight lid, a fine-mesh strainer, and a fork.
Step-by-Step Instructions
Step 1: Measure Your Rice Carefully
Start by measuring exactly how much rice you need for your meal. A standard serving is usually about half a cup of dry rice per person.
Check the quality of your grains before they hit the water. High-quality basmati should be cream-colored rather than stark white, indicating it has been aged properly.
Avoid using broken grains if possible. Whole, intact grains are what allow the rice to stay separate and fluffy after the cooking process is complete.
Pro Tip: Look for “Extra Long Grain” or “Aged” on the packaging to get the best texture and the most intense nutty aroma.
Step 2: Rinse Away the Surface Starch
Place your measured rice into a fine-mesh sieve or a large bowl. This is perhaps the most critical step for preventing a sticky, gummy mess.
Run cool water over the grains while gently swirling them with your fingers. You will notice the water turning a milky, cloudy white almost immediately.
Continue rinsing until the water runs completely clear. This process removes the excess surface starch that causes grains to clump together during the simmer.
Drain the rice thoroughly once the water is clear. You want to start with a clean slate before you move on to the hydration phase.
Step 3: The Essential Twenty Minute Soak
Submerge the rinsed rice in a bowl of fresh, room-temperature water. Let it sit undisturbed for at least 20 minutes, though 30 minutes is even better.
Observe how the grains change from translucent to a solid, opaque white. This means the rice is absorbing moisture into its core, which prevents it from breaking when it gets hot.
Understand that soaking allows the rice to cook evenly. Without this step, the outside of the grain might turn to mush while the center remains hard and chalky.
Pro Tip: If you are in a rush, you can skip the soak, but you will need to add about two tablespoons of extra water per cup of rice to compensate.
Step 4: Use the Correct Water Ratio
Transfer the soaked and drained rice into your heavy-bottomed pot. The weight of the pot is important because it distributes heat evenly and prevents the bottom from scorching.
Add exactly 1.5 cups of water for every 1 cup of dry rice you started with. This 1:1.5 ratio is the “sweet spot” for stovetop basmati that has been pre-soaked.
Season the water with a generous pinch of salt. Unlike pasta water, the rice will absorb all this liquid, so don’t overdo it, but do make sure it is seasoned enough to bring out the flavor.
Step 5: Bring to a Controlled Boil
Place the pot over medium-high heat without the lid. You want to watch the water as it reaches a boil so you can react quickly.
Stir the rice once or twice very gently. Do not over-stir, as this can break the softened grains and release more starch into the water.
Wait for the water to reach a vigorous boil where bubbles are breaking the surface consistently across the entire pot.
Step 6: Simmer and Seal the Pot
Turn the heat down to the lowest possible setting as soon as the water boils. This low heat is what gently steams the rice into its final elongated shape.
Cover the pot with a very tight-fitting lid. If your lid is a bit loose, place a clean kitchen towel between the pot and the lid to create a better seal.
Set a timer for 12 minutes. Resist every urge to lift the lid during this time, as the steam trapped inside is doing all the heavy lifting.
Pro Tip: If you use a towel to seal the lid, make sure the edges are folded up over the top so they don’t catch fire on the burner.
Step 7: The Crucial Resting Period
Remove the pot from the heat once the 12 minutes are up. Do not open the lid yet, even though the temptation will be strong.
Let the pot sit undisturbed for another 5 to 10 minutes. This allows the moisture to redistribute evenly throughout every grain of rice.
Realize that the rice is still technically cooking during this phase. The carryover heat ensures that the top layer of rice is just as tender as the bottom layer.
Step 8: Fluff and Serve
Open the lid and take in that incredible popcorn-like aroma. The rice should look dry on top with small “steam holes” visible between the grains.
Use a fork or a wide rice paddle to gently lift and turn the rice. Never use a metal spoon to “stir” the rice, as this will mash the delicate grains.
Serve immediately while the rice is hot and light. You now have the perfect base for curries, stews, or grilled meats.
Common Mistakes to Avoid
Peeking Under the Lid
Lifting the lid is the fastest way to ruin a pot of rice. Every time you peek, you let out the pressurized steam and drop the internal temperature significantly.
This results in rice that is unevenly cooked. The bottom might be done, but the top will remain hard because the steam escaped before it could finish the job.
Using the Wrong Pot
A thin, cheap pot will have “hot spots” that burn the rice in one area while leaving it raw in another. The rice at the bottom often sticks and turns into a blackened crust.
Always choose a pot with a thick, heavy base. Stainless steel or cast iron pots work best because they hold a steady temperature throughout the simmering process.
Stirring During the Simmer
Stirring rice while it is simmering is a recipe for disaster. It breaks the grains and activates the starches, turning your basmati into something resembling risotto or porridge.
Once the lid goes on and the heat goes down, your job as a cook is over until the timer rings. Let the water and heat do the work without interference.
Troubleshooting
The Rice is Still Crunchy
If the timer goes off and the rice is still too firm, you likely had a lid that wasn’t tight enough. Steam escaped, and the rice didn’t hydrate fully.
To fix this, add two tablespoons of boiling water to the pot and put the lid back on tightly. Simmer on the lowest heat for another 3 minutes, then let it rest again.
The Rice is Mushy or Wet
Mushy rice usually happens because too much water was used or the rice wasn’t drained properly after soaking. It can also happen if the rice was overcooked on the simmer setting.
If it is just a little wet, you can leave the lid off and let it sit over very low heat for 2 minutes to evaporate the excess. If it is already mushy, it is best used for fried rice the next day.
Key Takeaways
- Always rinse the rice in cold water until the water is completely clear to remove excess starch.
- Soak the grains for 20-30 minutes to ensure even cooking and prevent the rice from breaking.
- Stick to a strict 1:1.5 ratio of rice to water for the best stovetop results.
- Never lift the lid during the simmer or the resting phase to keep the steam trapped inside.
- Rest the rice for at least 5 minutes after cooking to allow the moisture to settle.
- Use a fork to fluff the rice gently, avoiding heavy spoons that might mash the grains.
Frequently Asked Questions
Do I need to add oil or butter to the water?
Adding a teaspoon of oil or butter is optional but can be very helpful. The fat coats the grains and provides an extra layer of insurance against sticking, while also adding a subtle richness to the flavor.
Can I use this method for Brown Basmati rice?
No, brown basmati requires a different approach because the bran layer is still intact. Brown rice usually needs a 1:2 ratio of rice to water and a much longer cooking time, often around 40 to 45 minutes.
How do I store and reheat leftover Basmati rice?
Store leftovers in an airtight container in the fridge for up to four days. To reheat, add a splash of water to the rice and microwave it covered, or steam it briefly on the stove to restore the moisture.
Why does my rice always stick to the bottom of the pot?
This usually happens if your heat is too high during the simmer phase or if your pot is too thin. Make sure your burner is on the lowest possible setting, and consider using a “heat diffuser” if your stove runs hot.
Our Top Recommended Finds
- Heavy-Bottomed Stainless Steel Saucepan: A 2-quart or 3-quart pot with a thick base is the ideal vessel for even heat distribution.
- Fine-Mesh Stainless Steel Strainer: This is essential for rinsing the rice thoroughly without losing any grains down the kitchen sink drain.
- Aged Himalayan Basmati Rice: Look for brands that source directly from the foothills of the Himalayas for the most authentic flavor and texture.
Master Your Kitchen One Grain At A Time
Now that you have the technique down, you can start experimenting with different flavor infusions.
Try adding a cinnamon stick, a few green cardamom pods, or a couple of whole cloves to the water before you start the boil.
These small additions will make your kitchen smell incredible and give your rice a professional, restaurant-quality finish.
Go ahead and put a pot on the stove tonight to see the difference a good soak and steam can make.