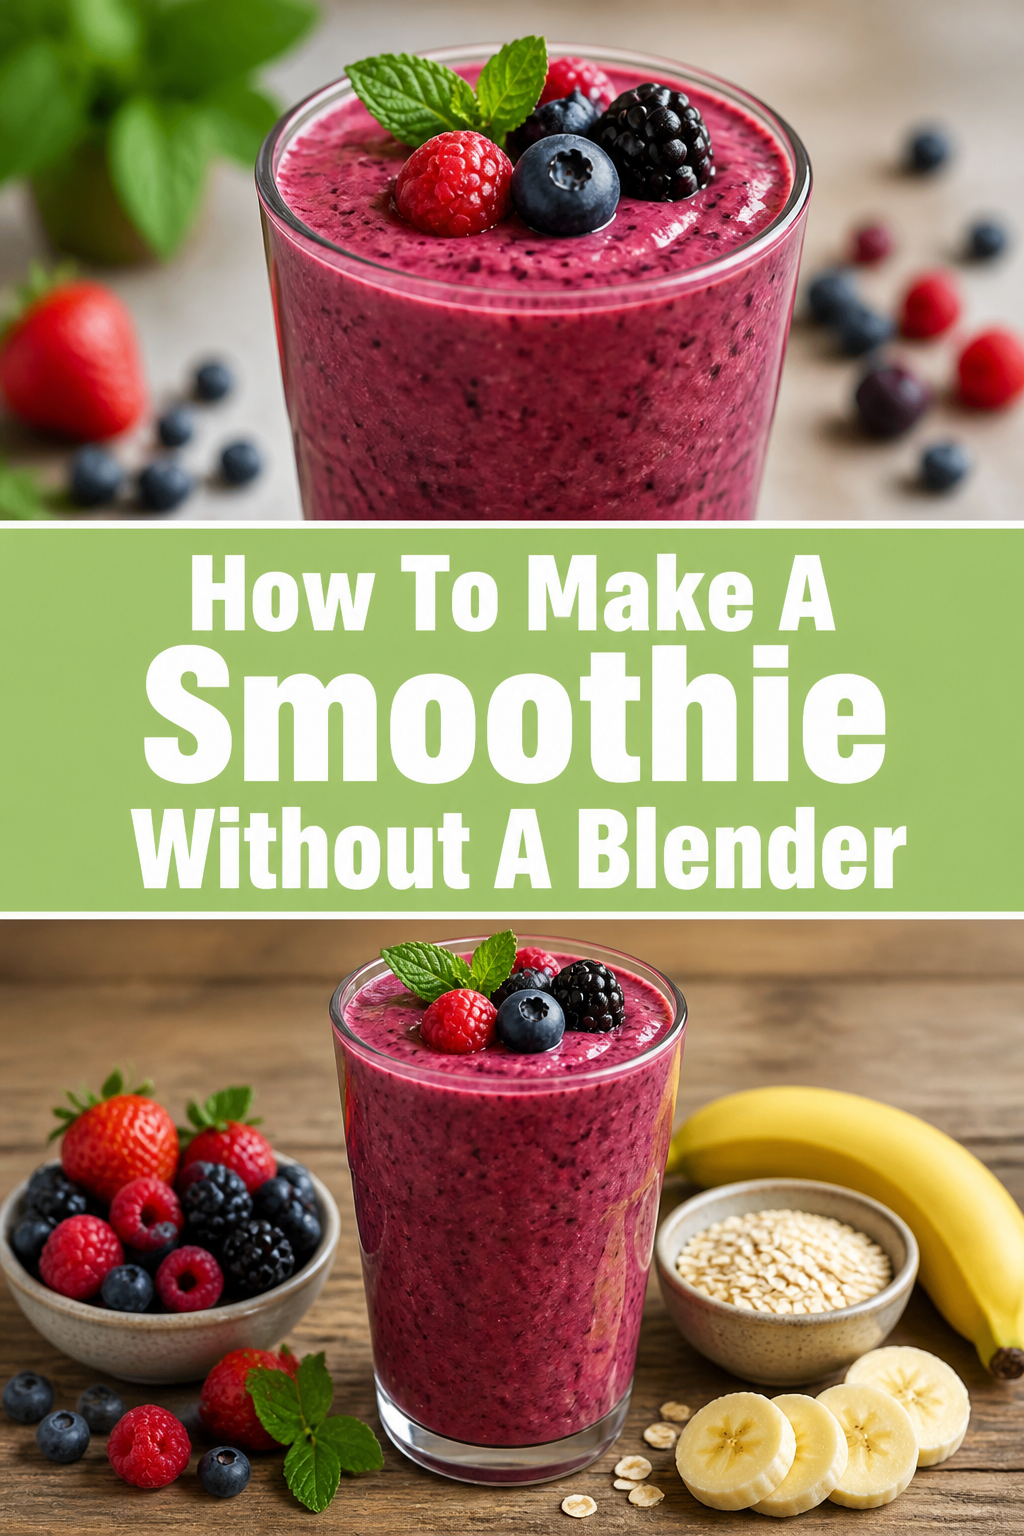
How To Make A Smoothie Without A Blender
I once spent an entire summer in a tiny mountain cabin with zero electricity and a massive craving for a cold fruit smoothie.
Through a lot of trial and error with a fork and a mason jar, I discovered that you don’t actually need a motor to get a delicious, creamy result.
This guide comes from my own kitchen experiments to help you enjoy a healthy drink even when the power is out or your blender is broken.

Quick Overview
Making a smoothie by hand is a simple process of manual emulsification and mechanical mashing.
You will focus on using soft ingredients and physical force to create a uniform texture.
- Time needed: 10-15 minutes
- Difficulty: Beginner
- What you’ll need: A sturdy fork or potato masher, a sealable jar, soft fruits, and a little bit of elbow grease.
Step-by-Step Instructions
Step 1: Select Your Base Fruits
Choose fruits that are naturally soft and low in fiber to ensure they break down easily without a blade.
Opt for overripe bananas, as they provide the creamy backbone that usually comes from frozen ingredients in a blender.
Include soft berries like raspberries or blackberries, which have thin skins that collapse under slight pressure.
Avoid hard fruits like apples, pears, or underripe melons, as these will remain chunky no matter how hard you work.
Pro Tip: If you have fruit that is slightly firm, let it sit at room temperature for a day or two to soften the pectin before you try to mash it.
Step 2: Prepare the Ingredients
Peel your bananas and remove any stems or leaves from your berries or stone fruits.
Slice larger items into very small pieces before you start the mashing process.
Bring any refrigerated fruit to room temperature for about ten minutes to make the fibers more pliable.
Place the fruit into a wide-bottomed bowl rather than a tall glass to give yourself more surface area for the next step.
Step 3: Perform the Initial Mash
Use a heavy fork or a potato masher to press down firmly on the fruit pieces.
Apply a twisting motion with your wrist as you press to help shear the fruit fibers apart.
Continue mashing until the mixture reaches a consistency similar to baby food or thick applesauce.
Check for any large lumps by running your fork through the mixture; if the tines catch on anything, mash that spot again.
Pro Tip: A pastry cutter or a dough blender works even better than a fork if you want a truly uniform pulp.
Step 4: Incorporate Your Creamy Base
Add a dollop of Greek yogurt, silken tofu, or a spoonful of nut butter to the fruit pulp.
Whisk these ingredients together using a small wire whisk or a fork until the color is consistent throughout.
Ensure the fats in the yogurt or nut butter are fully integrated, as they act as the “glue” that holds the liquid and fruit together.
Scrape the sides of the bowl frequently to make sure no unmixed fruit paste is left behind.
Step 5: Transfer to a Sealable Jar
Pour your thick fruit and yogurt mixture into a large mason jar or a sturdy water bottle with a wide mouth.
Leave at least three to four inches of empty space at the top of the container to allow for aeration.
Wipe the rim of the jar to ensure a tight seal, which prevents messy leaks during the shaking phase.
Add any powders at this stage, such as protein powder, cocoa, or ground flaxseeds, placing them right on top of the fruit base.
Step 6: Add Your Liquid Sparingly
Measure out your liquid of choice, such as almond milk, coconut water, or dairy milk.
Pour only half of the liquid into the jar at first to keep the mixture thick enough for effective agitation.
Stir the liquid into the paste briefly with a long spoon to prevent the powder from clumping at the top.
Seal the lid as tightly as possible, double-checking that the threads are aligned correctly.
Step 7: The Shaking Phase
Grip the jar firmly with both hands, placing one hand on the lid and one on the bottom.
Shake the jar vigorously in an up-and-down motion for at least sixty seconds.
Switch to a side-to-side “cocktail shaker” motion for another thirty seconds to break up any remaining small bits of fruit.
Listen for the sound of the liquid; as it becomes more aerated and blended, the sound will change from a sharp splash to a muffled thud.
Pro Tip: Put a clean marble or a blender ball inside the jar to act as a manual agitator and break up stubborn clumps.
Step 8: Final Adjustments
Open the lid and check the consistency of your smoothie.
Add the remaining liquid if the mixture is too thick to drink comfortably.
Taste the smoothie and stir in any liquid sweeteners like honey or maple syrup if needed.
Give it one final, quick shake to incorporate the last additions.
Common Mistakes to Avoid
Using Frozen Fruit
Trying to mash frozen strawberries or blueberries with a fork is nearly impossible and can actually bend your utensils.
Frozen fruit relies on the high-speed blades of a blender to shatter the ice crystals and fruit flesh simultaneously.
If you only have frozen fruit, you must let it thaw completely in a bowl before you attempt the manual mashing method.
Adding Too Much Liquid Too Soon
If you fill the jar with milk before you have properly mashed and shaken the fruit paste, the fruit will simply float in the liquid.
This results in a thin, watery drink with large, unappealing chunks of fruit at the bottom.
Always build your smoothie from the thickest ingredients upward, adding liquid in small increments to maintain control over the texture.
Neglecting the Sieve
Some people skip the straining process when using fruits with many small seeds, like raspberries or blackberries.
Without a blender to pulverize these seeds, they can create a gritty texture that ruins the drinking experience.
If you want a professional-grade smoothness, press your fruit pulp through a fine-mesh sieve before adding it to the jar.
Troubleshooting
The Smoothie is Too Lumpy
This usually happens when the fruit wasn’t mashed thoroughly enough in the initial bowl stage.
To fix this, pour the mixture back into a bowl and use a whisk to aggressively beat the lumps against the side of the container.
You can also try using a fork to “fish out” the largest chunks and mash them individually on a flat plate before returning them to the jar.
The Protein Powder is Clumpy
Protein powder often forms “dry pockets” that refuse to dissolve when mixed by hand.
The best solution is to mix the powder with a tiny amount of liquid to create a smooth slurry before adding it to the fruit.
If it is already in the jar, adding a whisk ball or even a few clean ice cubes and shaking harder can help break those clumps apart.
The Texture is Too Thin
If you accidentally added too much juice or milk, your smoothie might feel more like flavored water.
Mix in a tablespoon of chia seeds or a large spoonful of peanut butter to add body and thickness.
Letting the smoothie sit in the fridge for ten minutes can also help the natural fibers and thickeners settle and firm up.
Key Takeaways
- Preparation is everything: Soften your fruit at room temperature and mash it into a fine paste before adding any liquids.
- Use the right tools: A potato masher and a whisk are your best friends when you don’t have a motor.
- The jar method works: Using a sealable container allows you to use kinetic energy to emulsify the ingredients.
- Manage expectations: A hand-made smoothie will be slightly more textured than a machine-blended one, but just as delicious.
- Sequence matters: Always start with solids, move to pastes, and finish with liquids.
- Strain for quality: Use a mesh sieve if you are sensitive to fruit seeds or skin fragments.
Frequently Asked Questions
Can I use leafy greens like spinach in a hand-made smoothie?
It is very difficult to incorporate greens without a blender because they don’t mash into a paste easily.
If you must include them, you should mince the leaves extremely fine with a sharp knife until they are almost a puree before mixing them in.
Alternatively, use a green superfood powder which dissolves much more easily during the shaking process.
How do I get my smoothie cold without ice?
Since you can’t crush ice by hand, you should chill all your ingredients in the refrigerator for several hours before starting.
You can also place your finished smoothie jar in the freezer for about fifteen minutes after shaking it.
Another trick is to use a chilled metal thermos to mix and drink your smoothie, which keeps the temperature low for longer.
What are the best fruits for this method?
Bananas are the absolute gold standard for hand-made smoothies because of their starch content and soft texture.
Avocados are also excellent for adding a creamy, fatty base that mimics the mouthfeel of a traditional shake.
Peaches, plums, and very ripe mangoes also work well if they are soft enough to be squashed between your fingers.
Is a hand-made smoothie as healthy as a blended one?
Yes, the nutritional content remains exactly the same regardless of whether a blade or a fork broke down the fruit.
In fact, some argue that manual mashing preserves more of the fiber structure than high-speed blending.
You are getting all the vitamins, minerals, and enzymes without any loss of quality.
Our Top Recommended Finds
- Stainless Steel Whisk Ball: These are inexpensive and can be dropped into any jar to act as an internal agitator for smoother results.
- Fine Mesh Sieve: Essential for removing seeds and skins to achieve a “blender-like” consistency.
- Heavy-Duty Glass Mason Jars: These provide the weight and durability needed for aggressive shaking without the risk of breaking.
Master the Art of the Manual Shake
Now that you know the secrets to a blender-free smoothie, you never have to let a power outage or a lack of appliances stop your morning routine.
This method isn’t just a backup plan; it’s a great way to stay connected to the process of preparing your food and getting a little arm workout in the process.
Try experimenting with different combinations of mashed stone fruits and creamy nut butters to find your favorite manual recipe.
Grab a jar, pick some overripe fruit from your counter, and start mashing your way to a refreshing drink today.