
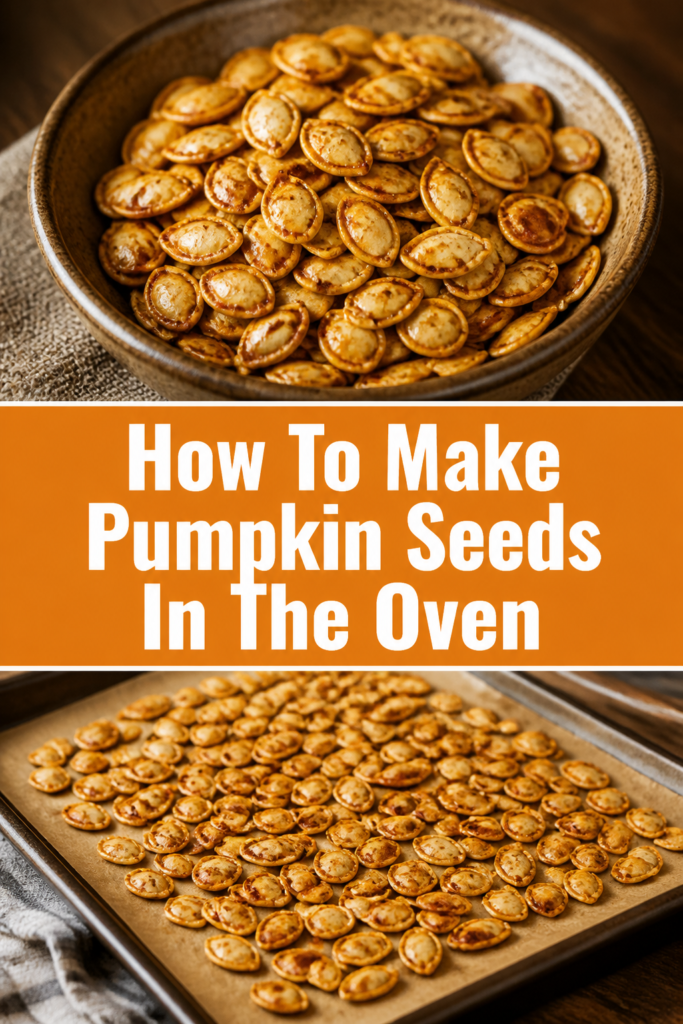
How To Make Pumpkin Seeds In The Oven
There’s nothing quite like the crisp autumn air and the joy of carving pumpkins.
But what often gets overlooked in the excitement is the treasure hidden inside: those delicious pumpkin seeds.
Having roasted countless batches over the years, I’ve perfected a simple method to transform them into a crunchy, savory snack you’ll crave.
Quick Overview
This guide will walk you through the straightforward process of cleaning, seasoning, and roasting pumpkin seeds to golden perfection.
You’ll learn how to avoid common pitfalls and achieve a consistently crispy result every time.
- Time needed: 30-45 minutes (15 mins prep, 15-30 mins roast)
- Difficulty: Beginner
- What you’ll need: Pumpkin seeds, baking sheet, parchment paper, olive oil, salt, optional seasonings
Step-by-Step Instructions
Step 1: Gather Your Seeds
The first step is to extract the seeds from your pumpkin. Whether you’re carving for Halloween or simply cooking with pumpkin, save those seeds.
Carefully scoop out all the pulp and seeds from the pumpkin cavity. Place them into a large bowl.
Don’t worry about getting every stringy bit off just yet. We’ll handle that in the next stage.
Step 2: Clean and Separate
Now, it’s time to clean your pumpkin seeds. This part can be a little messy but is crucial for a great end product.
Separate the seeds from the stringy pumpkin pulp. You can do this by hand, pulling the seeds away from the fibrous material.
Once you have a good pile of mostly separated seeds, transfer them to a colander. Rinse them thoroughly under cold running water.
As you rinse, agitate the seeds with your fingers. This helps dislodge any stubborn bits of pumpkin flesh.
Keep rinsing and agitating until the water runs clear and the seeds feel clean. They should be relatively free of any orange residue.
Pro Tip: For very sticky pulp, fill the bowl with water and let the seeds soak for a few minutes. The pulp often floats, making separation easier.
Step 3: Dry the Seeds Thoroughly
This step is often overlooked but is essential for achieving truly crispy seeds. Wet seeds will steam instead of roast.
After rinsing, spread the clean seeds in a single layer on a clean kitchen towel or several layers of paper towels.
Pat them dry vigorously with another towel. You want to remove as much surface moisture as possible.
For best results, allow them to air dry for at least 30 minutes, or even a few hours. Spreading them out on a dry baking sheet can speed this up.
The drier your seeds are before roasting, the crispier they will become in the oven.
Pro Tip: If you’re not in a hurry, leave them on a towel overnight. Super dry seeds equal super crunchy results.
Step 4: Prepare for Roasting
Before seasoning, preheat your oven. Set it to 300°F (150°C).
While the oven heats, line a large baking sheet with parchment paper. This prevents sticking and makes cleanup a breeze.
In a medium bowl, toss your dried pumpkin seeds with a small amount of olive oil. About one teaspoon for every cup of seeds is usually enough.
The oil helps the seasonings adhere and promotes even browning.
Step 5: Season Your Seeds
This is where you can get creative and tailor the flavor to your liking.
After coating with oil, sprinkle the seeds generously with salt. Start with about half a teaspoon per cup of seeds, then adjust to taste.
For a classic savory flavor, add a pinch of black pepper, garlic powder, or onion powder.
If you prefer a spicy kick, mix in a dash of cayenne pepper or chili powder.
For a sweet and salty treat, try a sprinkle of cinnamon and a tiny pinch of sugar.
Toss everything together well, ensuring each seed is evenly coated with oil and seasonings.
Pro Tip: Experiment with different spice blends like smoked paprika, cumin, or even a touch of curry powder for unique flavors.
Step 6: Spread and Roast
Once seasoned, spread the pumpkin seeds in a single, even layer on the prepared baking sheet.
Avoid piling them up, as this will lead to uneven roasting and some seeds steaming instead of crisping.
Place the baking sheet in your preheated oven.
Roast for 15-30 minutes, depending on your oven and the size of the seeds.
Halfway through the cooking time, about 10-15 minutes in, stir the seeds gently with a spatula.
This ensures they brown evenly on all sides.
Step 7: Check for Doneness and Cool
The seeds are ready when they are golden brown and feel dry and crisp to the touch.
They should make a subtle snapping sound when you break one open. Be careful, as they will be hot.
If they still feel chewy, continue roasting for a few more minutes, checking frequently.
Once done, remove the baking sheet from the oven. Immediately transfer the roasted seeds to a cooling rack or a clean plate.
Allow them to cool completely. As they cool, they will become even crispier.
Resist the urge to eat them all at once! They taste best once fully cooled.
Step 8: Store Your Delicious Seeds
Once completely cool, store your roasted pumpkin seeds in an airtight container.
A glass jar or a sealed plastic container works perfectly.
Keep them at room temperature in a cool, dry place.
Properly stored, they will remain fresh and crispy for up to two weeks.
Enjoy them as a snack, sprinkle them on salads, or add them to granola.
Common Mistakes to Avoid
Not Drying the Seeds Properly
One of the biggest culprits behind soggy or chewy pumpkin seeds is insufficient drying. If the seeds are still damp when they go into the oven, they will steam instead of roast, preventing them from achieving that desired crisp texture.
Always take the time to pat them thoroughly dry with towels and consider air-drying them for an extra hour or two. This extra effort pays off immensely in the final crunch.
Over-Oiling the Seeds
While a little oil helps with seasoning adhesion and browning, too much can make your seeds greasy and heavy. They won’t get as crispy and can feel unpleasantly oily to eat.
Use just enough oil to lightly coat the seeds, typically about a teaspoon per cup. You should see a light sheen, not a pool of oil, when you toss them.
Overcrowding the Baking Sheet
When seeds are piled on top of each other, hot air can’t circulate effectively around them. This leads to uneven roasting, with some seeds burning while others remain soft or undercooked.
Always spread your seeds in a single layer with a little space between each. If you have a large batch, use two baking sheets and rotate them in the oven for best results.
Roasting at Too High a Temperature
A common mistake is trying to rush the roasting process by using a very high oven temperature. While this might seem faster, it often results in burnt exteriors and still-chewy interiors.
A lower temperature, like 300°F (150°C), allows the seeds to slowly dry out and become uniformly crispy without scorching. Patience is key for perfectly roasted seeds.
Troubleshooting
Seeds Aren’t Crispy Enough
If your seeds come out of the oven feeling chewy or soft, the most likely culprit is moisture. They may not have been dried thoroughly enough before roasting, or they were roasted at too low a temperature for too short a time.
To fix this, spread them back on a baking sheet and return them to the oven at 275°F (135°C) for another 5-10 minutes, checking frequently. Ensure they are in a single layer. Next time, dry them longer and ensure your oven temperature is accurate.
Seeds are Burning on the Edges
Burning seeds often indicate an oven that’s too hot or uneven heat distribution. It can also happen if they’re not stirred halfway through the roasting process, allowing one side to get too much direct heat.
Try lowering your oven temperature slightly, perhaps to 290°F (145°C). Make sure you stir the seeds well at the halfway point. If your oven has hot spots, rotate the baking sheet as well as stirring the seeds.
Seasoning Doesn’t Stick
If your salt and spices seem to fall right off the seeds, it’s usually because there wasn’t enough oil to create a sticky surface, or the seeds weren’t completely dry, preventing the oil from adhering properly.
Ensure your seeds are very dry before adding any oil. Then, use just enough oil to lightly coat them, tossing well. The oil acts as the glue for your seasonings. You can also try adding a tiny pinch of egg white, whisked, before the oil and seasoning, which acts as a binder.
Key Takeaways
- Thorough drying is the single most important step for crispy pumpkin seeds.
- Use a moderate oven temperature (around 300°F/150°C) for even roasting.
- Spread seeds in a single layer on the baking sheet to prevent steaming.
- Stir the seeds halfway through roasting for uniform browning.
- Experiment with different seasonings to find your favorite flavor profile.
- Cool seeds completely before storing to maintain crispness.
Frequently Asked Questions
Can I boil pumpkin seeds before roasting?
Some people like to boil pumpkin seeds in salted water for 5-10 minutes before roasting. This can make them a bit more tender and ensure the salt permeates the seed. If you do this, make sure to dry them extremely well afterwards, as thorough drying is even more critical after boiling.
What’s the best way to store roasted pumpkin seeds?
Store your fully cooled roasted pumpkin seeds in an airtight container at room temperature. A glass jar with a tight-fitting lid or a sealed plastic container works perfectly. They will stay fresh and crispy for up to two weeks, sometimes even longer.
Can I roast pumpkin seeds without oil?
While you can technically roast pumpkin seeds without oil, they tend to be less flavorful and can have a drier, sometimes chalky, texture. The oil helps them brown beautifully, become crispy, and allows seasonings to adhere better. A very small amount of oil makes a big difference in taste and texture.
Are pumpkin seeds healthy?
Yes, pumpkin seeds are very healthy! They are packed with nutrients like magnesium, zinc, iron, and protein. They’re also a good source of healthy fats and antioxidants. Enjoying them in moderation as a snack is a great way to boost your nutrient intake.
Our Top Recommended Finds
- Large Baking Sheets: Essential for spreading seeds in a single layer. Look for sturdy, non-stick options.
- Parchment Paper: Makes cleanup effortless and prevents seeds from sticking to the pan.
- Airtight Glass Jars: Perfect for storing your crispy seeds and keeping them fresh for weeks.
Savoring Your Homemade Harvest
You’ve just transformed a humble pumpkin byproduct into a delightful, crunchy snack.
Embrace the satisfaction of making something delicious from scratch, especially during the autumn season.
Now that you’ve mastered this skill, consider trying different seasoning combinations next time, or even exploring other roasted seeds like sunflower or squash seeds.
Don’t wait for another pumpkin carving session. Go ahead and make a batch today!