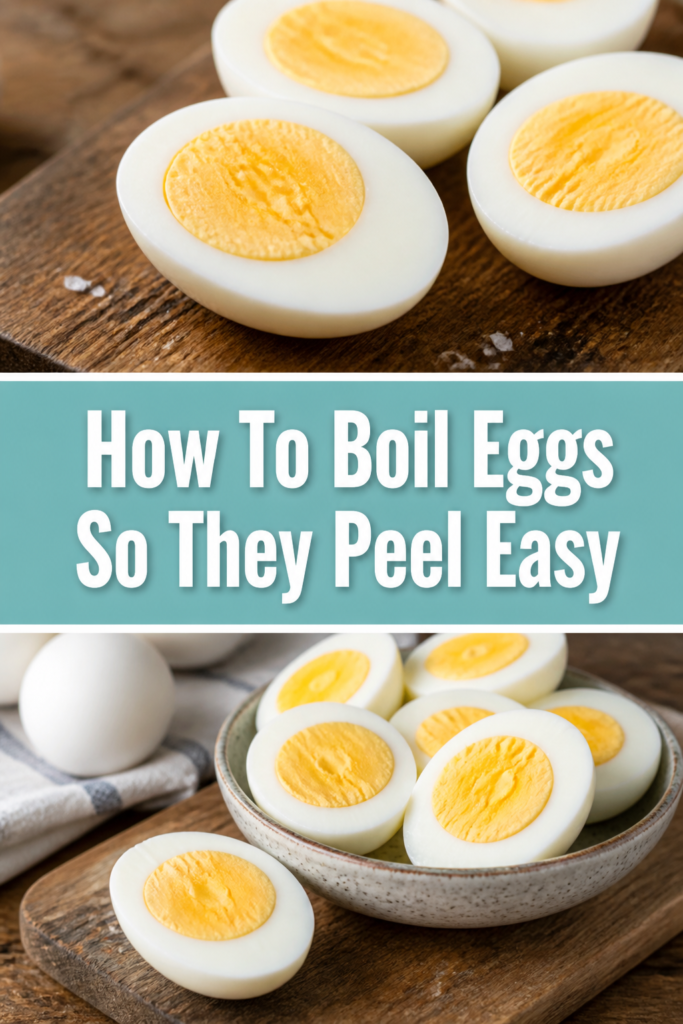
🥚 How To Boil Eggs So They Peel Easy
There’s nothing quite as frustrating as trying to peel a hard-boiled egg only to have half the white stick stubbornly to the shell.
I’ve been there countless times, leaving behind a cratered mess of an egg and a pile of tiny, clinging shell fragments.
After years of trial and error, I’ve perfected a method that consistently delivers beautifully smooth, easy-to-peel eggs. Let me show you how.
Quick Overview
This guide will walk you through a foolproof process to boil eggs that peel effortlessly every single time. You’ll learn the secrets to perfect texture and easy removal.
- Time needed: 15-20 minutes (including prep and cooling)
- Difficulty: Beginner
- What you’ll need: Eggs, a saucepan with a lid, water, ice, a slotted spoon, and a timer.
Step-by-Step Instructions
Step 1: Choose Your Eggs Wisely
Start with eggs that are not super fresh. Older eggs, typically a week or two past their purchase date, tend to peel much easier than very fresh ones.
This is because the pH of the egg white increases over time, making it less likely to bond with the inner membrane of the shell.
Step 2: Prepare Your Pot and Eggs
Place your eggs in a single layer at the bottom of a saucepan. Do not overcrowd the pot; ensure they have enough space.
Gently add cold water to the pot, covering the eggs by about one inch. This ensures even cooking.
Pro Tip: Adding a pinch of salt or a teaspoon of white vinegar to the water can sometimes help. Salt may prevent cracks from leaking, while vinegar can slightly soften the shell.
Step 3: Bring to a Rolling Boil
Place the pot on the stovetop over high heat. Bring the water to a rapid, rolling boil.
Once the water is vigorously boiling, cover the pot tightly with a lid. This traps the heat inside.
Step 4: Remove from Heat and Let Stand
Immediately remove the covered pot from the heat source as soon as it reaches a rolling boil.
Do not lift the lid. Let the eggs sit undisturbed in the hot water for your desired cooking time.
For soft-boiled eggs (runny yolk): 6-7 minutes. For medium-boiled (creamy yolk): 8-9 minutes. For hard-boiled (firm yolk): 10-12 minutes.
Step 5: Prepare an Ice Bath
While the eggs are resting, prepare a large bowl filled with ice water. Use plenty of ice to ensure the water is very cold.
This ice bath is a crucial step for easy peeling and preventing the dreaded green ring around the yolk.
Step 6: Transfer Eggs to Ice Bath
Once the resting time is complete, carefully transfer the eggs from the hot water to the prepared ice bath.
Use a slotted spoon to avoid breaking the shells and to prevent splashing hot water.
Allow the eggs to cool in the ice bath for at least 10-15 minutes. This rapid cooling helps the egg contract, separating it from the shell membrane.
Step 7: Peel Under Water (Optional but Recommended)
Once the eggs are thoroughly chilled, you can peel them. Gently tap the egg on a hard surface to crack the shell all over.
Then, peel the egg under a stream of cool running water or submerged in the ice bath. The water helps to get under the membrane and wash away shell fragments.
Start peeling from the wider end of the egg where the air pocket is typically located.
Step 8: Store Your Perfectly Peeled Eggs
If you’re not eating them immediately, store peeled hard-boiled eggs in an airtight container in the refrigerator.
They will keep well for up to 5-7 days. Unpeeled eggs can also be stored in the fridge for about a week.
Common Mistakes to Avoid
Using Super Fresh Eggs
Very fresh eggs have a lower pH, which causes the egg white to bond more strongly to the inner shell membrane. This makes them incredibly difficult to peel without tearing.
Always opt for eggs that are at least a week old for the best peeling results. If you only have fresh eggs, consider using them for scrambled eggs or baking instead.
Overcrowding the Pot
When too many eggs are crammed into a small pot, they cook unevenly and are more likely to crack as they jostle against each other.
Give your eggs space. If you need to cook a large batch, use multiple pots or cook them in smaller batches.
Skipping the Ice Bath
Transferring eggs directly from hot water to the counter allows them to continue cooking, which can lead to a rubbery texture and the unsightly green ring around the yolk.
More importantly, the rapid temperature change from hot to cold water is key to getting the egg to contract and separate cleanly from its shell membrane. Do not skip this vital step.
Overcooking Eggs
Overcooked eggs develop a rubbery texture and a greenish-gray ring around the yolk, caused by a reaction between sulfur in the egg white and iron in the yolk.
Stick to the recommended cooking times. The “boil, then remove from heat and let stand” method helps prevent overcooking while ensuring the eggs are fully cooked.
Troubleshooting
Eggs Still Hard to Peel
If your eggs are still difficult to peel despite following the steps, the most likely culprit is their freshness. Even store-bought eggs can sometimes be very fresh.
Try using eggs that are closer to their expiration date next time. Also, ensure your ice bath is truly icy and the eggs cool completely for at least 10-15 minutes.
Green Ring Around the Yolk
A green or grayish ring around the yolk indicates that the eggs have been overcooked. This happens when the sulfur in the egg white reacts with the iron in the yolk due to prolonged heat.
To prevent this, reduce your resting time in the hot water. Make sure to transfer them immediately to an ice bath after the resting period to halt the cooking process.
Cracked Shells During Cooking
Cracked shells can occur if eggs are dropped too quickly into the pot, if the water boils too vigorously, or if the eggs are too cold when they go into the hot water.
Always start with eggs at room temperature if possible, or gently place cold eggs into cold water. Bring the water to a boil gradually, and ensure the eggs are in a single layer without overcrowding.
Key Takeaways
- Use older eggs: Eggs that are a week or two old peel easiest due to pH changes.
- Start cold, then boil: Place eggs in cold water, bring to a boil, then remove from heat.
- Time carefully: Follow recommended resting times for your desired yolk consistency.
- Ice bath is essential: Rapid cooling in an ice bath separates the egg from the shell membrane.
- Peel under water: This helps the shell slip off cleanly and washes away tiny fragments.
- Avoid overcooking: Prevents rubbery whites and the green ring around the yolk.
Frequently Asked Questions
Can I use an egg steamer or instant pot for easy peeling?
Yes, many people find that steaming eggs or cooking them in an Instant Pot results in very easy-to-peel eggs. The steam method creates a gentle cooking environment, and the pressure cooker often yields similar benefits, especially when followed by an ice bath.
How long do hard-boiled eggs last in the refrigerator?
Peeled hard-boiled eggs can be stored in an airtight container in the refrigerator for up to 5-7 days. Unpeeled hard-boiled eggs can also be kept in the refrigerator for about a week.
Does adding baking soda to the water help with peeling?
Some people swear by adding half a teaspoon of baking soda to the boiling water. Baking soda is alkaline, and it’s thought to increase the pH of the water, which in turn helps the egg white separate from the shell membrane. It’s worth trying if you’re still facing peeling challenges.
Why do some eggs still have a perfectly round yolk and others are off-center?
The position of the yolk can vary depending on the age of the egg and how it was stored. In older eggs, the chalazae (strands that anchor the yolk) can weaken, allowing the yolk to shift. This doesn’t affect the taste or peeling, just the aesthetic.
Our Top Recommended Finds
- Stainless Steel Saucepan with Lid: A good quality pot ensures even heat distribution and durability.
- Slotted Spoon: Essential for safely transferring eggs without breakage.
- Kitchen Timer: Crucial for precise cooking times to achieve your desired yolk consistency.
Mastering the Perfect Peel
Say goodbye to frustrating, torn hard-boiled eggs and hello to perfectly smooth, easy-to-peel results every single time.
With these simple steps and a bit of patience, you’ll be making delicious deviled eggs, egg salads, and healthy snacks with newfound confidence.
Don’t wait; grab a carton of eggs (preferably a week or two old!) and put these techniques to the test in your kitchen today.