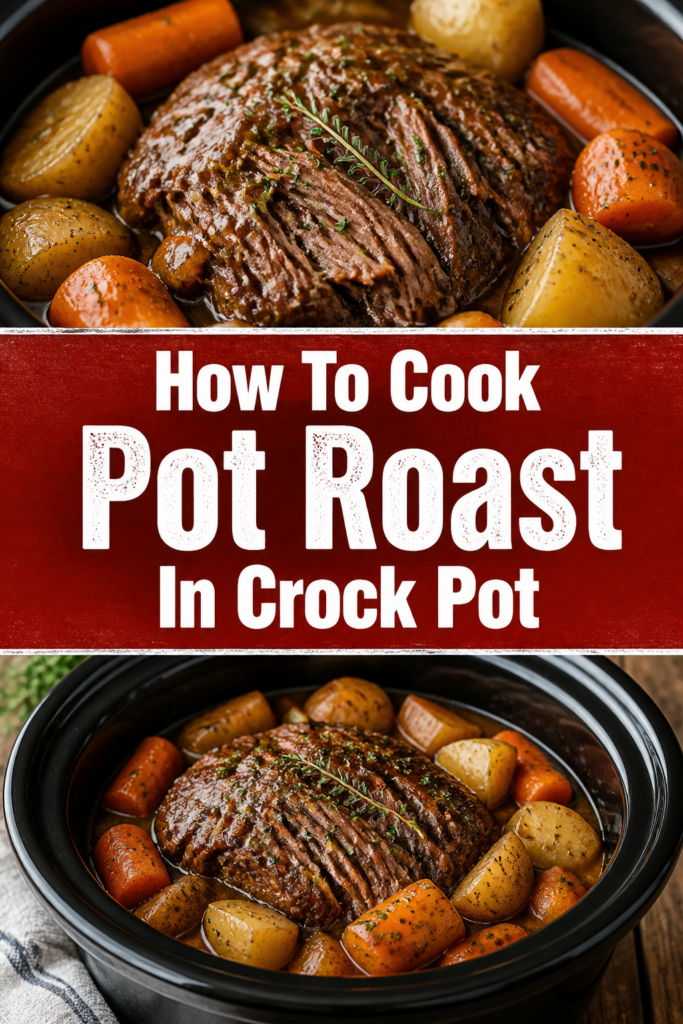
How To Cook Pot Roast In Crock Pot
There is nothing quite like walking through your front door after a long day and being greeted by the savory scent of slow-cooked beef.
I have spent years perfecting this recipe in my own kitchen, testing every cut of meat and seasoning blend imaginable to find the perfect balance.
You can trust this guide to help you create a meal that tastes like a Sunday tradition, even if it is your very first time using a slow cooker.
Quick Overview
Cooking a pot roast is a rewarding process that requires very little active work but yields a massive amount of flavor.
- Time needed: 8 to 10 hours (Low) or 4 to 5 hours (High)
- Difficulty: Beginner
- What you’ll need: 3-4 lb chuck roast, root vegetables, beef broth, aromatics, and a 6-quart slow cooker.
Step-by-Step Instructions
Step 1: Choose the Right Cut of Beef
Select a beef chuck roast for the best results. This specific cut comes from the shoulder of the cow and contains the perfect amount of connective tissue and fat marbling.
Avoid lean cuts like round roast or sirloin tip. These leaner options tend to become dry and stringy when cooked for long periods in a slow cooker.
Look for a piece of meat that has thick white veins of fat running through it. This fat will melt down during the cooking process, naturally basting the meat and keeping it juicy.
Pro Tip: If you can find a bone-in chuck roast, use it. The bone adds an extra layer of depth and richness to the final gravy that you simply cannot get with boneless cuts.
Step 2: Temper and Season the Meat
Remove the roast from your refrigerator about 30 minutes before you plan to start cooking. Bringing the meat closer to room temperature ensures it cooks more evenly from the edge to the center.
Pat the entire surface of the beef dry using paper towels. Moisture on the surface of the meat will create steam, which prevents you from getting a proper crust during the searing phase.
Apply a generous coating of kosher salt and freshly cracked black pepper to every side of the roast. Do not be afraid to use more seasoning than you think you need, as a large roast requires a lot of salt to penetrate the thick center.
Step 3: Sear for Maximum Flavor
Heat a heavy skillet or cast-iron pan over medium-high heat with a tablespoon of high-smoke-point oil like avocado or canola oil. Wait until the oil is shimmering and just starting to wisps of smoke appear.
Place the seasoned roast into the hot pan and let it sit undisturbed for three to four minutes. You want to develop a deep, dark brown crust on the outside of the meat.
Turn the meat using tongs to sear every single side, including the narrow edges. This process, known as the Maillard reaction, creates complex flavor compounds that a slow cooker cannot produce on its own.
Pro Tip: Never crowd the pan if you are cooking multiple smaller roasts. Work in batches to ensure the temperature of the pan stays high enough to brown the meat rather than boiling it in its own juices.
Step 4: Deglaze the Skillet
Remove the seared meat from the pan and set it aside on a clean plate. You will notice dark, caramelized bits stuck to the bottom of your skillet.
Pour about half a cup of beef broth or a splash of dry red wine into the hot pan while it is still on the stove. Use a wooden spoon to scrape up all those flavorful brown bits, which are called the fond.
Simmer the liquid for one minute until it reduces slightly. This liquid is liquid gold and will serve as the flavorful base for your pot roast sauce.
Step 5: Prepare the Vegetable Bed
Chop your onions, carrots, and potatoes into large, uniform chunks. If you cut the vegetables too small, they will turn into mush long before the meat is tender.
Layer the onions and garlic at the very bottom of the crock pot. These aromatics will soften and release their sweetness directly into the cooking liquid.
Place the potatoes and carrots on top of the onions. Using sturdier vegetables like Yukon Gold potatoes is better than Russets because they hold their shape much better during an eight-hour cook cycle.
Step 6: Assemble and Add Liquids
Nestle the seared roast on top of the bed of vegetables. Placing the meat on top allows it to gently steam and braise without being completely submerged in liquid.
Pour the deglazing liquid from your skillet over the meat. Add enough additional beef broth to come about halfway up the side of the roast.
Tuck in a few sprigs of fresh rosemary, thyme, and a couple of bay leaves. A tablespoon of Worcestershire sauce or a teaspoon of balsamic vinegar can also add a nice touch of acidity to balance the richness.
Step 7: Set the Cooking Time
Cover the crock pot with its lid and ensure it is seated properly to prevent steam from escaping. Resist the urge to open the lid at any point during the cooking process.
Select the “Low” setting for a duration of 8 to 10 hours. While the “High” setting works in a pinch, the low and slow method is the only way to properly break down the tough collagen in the chuck roast.
Check the meat for tenderness at the 8-hour mark. The roast is finished when it easily pulls apart with two forks and offers no resistance.
Pro Tip: Every time you lift the lid of a slow cooker, you release enough heat to add an extra 20 to 30 minutes to the total cooking time. Keep the lid closed until the very end.
Step 8: Rest the Meat
Transfer the finished roast carefully from the crock pot to a cutting board or a warm serving platter. The meat will be very fragile, so use a large slotted spoon or spatula.
Tent the meat loosely with aluminum foil and let it rest for at least 15 to 20 minutes. Resting allows the muscle fibers to relax and reabsorb the juices, ensuring every bite is moist.
Keep the vegetables inside the crock pot with the heat turned to “Warm” while the meat rests. This keeps them at the perfect serving temperature without overcooking them further.
Step 9: Create the Gravy
Strain the cooking liquid into a small saucepan if you want a smooth gravy, or keep it in the crock pot for a more rustic feel. Skim off any excess fat that has risen to the top.
Whisk together two tablespoons of cornstarch with two tablespoons of cold water to create a slurry. Pour this mixture into the simmering cooking liquid while whisking constantly.
Boil the sauce for one or two minutes until it thickens into a glossy, rich gravy. Taste the sauce and add a final pinch of salt or a splash of red wine vinegar if the flavors need brightening.
Common Mistakes to Avoid
Using the Wrong Cut of Meat
Many people reach for a lean roast because it looks “better” or healthier in the grocery store. However, lean meat lacks the fat and connective tissue required for a slow-braising environment.
Without that fat, the meat will become incredibly dry and difficult to chew. Always stick with chuck roast or brisket for the best mouthfeel and flavor profile.
Adding Too Much Liquid
A crock pot is a sealed environment, meaning very little liquid evaporates during the cooking process. If you fill the pot to the top with broth, you will end up with a bland, watery soup rather than a concentrated sauce.
The vegetables and meat will also release their own natural juices as they cook. Only add enough liquid to reach the halfway point of the meat to ensure the flavors remain intense and savory.
Cooking on High Heat Only
While the “High” setting on a crock pot is convenient, it often reaches a temperature that is slightly too aggressive for tough cuts of beef. This can cause the proteins to seize up and become rubbery before the fat has a chance to melt.
If you want that “melt-in-your-mouth” texture, the “Low” setting is your best friend. Plan ahead and give the roast the full 8 to 10 hours it deserves for the most tender results.
Troubleshooting
The Meat is Still Tough
If you try to shred the meat and it feels “bouncy” or tough, it simply hasn’t cooked long enough. This is a common issue when people try to rush the process or use a particularly large roast.
Put the lid back on and give it another hour on the “Low” setting. Pot roast is very forgiving, and it is much harder to overcook it than it is to undercook it in a slow cooker.
The Vegetables are Mushy
Mushy vegetables usually happen when they are cut into pieces that are too small or if they are placed directly against the heating element for too long. Next time, try cutting your carrots and potatoes into larger, two-inch chunks.
You can also try adding “softer” vegetables, like frozen peas or green beans, during the last 30 minutes of cooking. This prevents them from disintegrating into the sauce over the long haul.
The Sauce is Too Greasy
Because chuck roast is high in fat, the resulting liquid can sometimes have a layer of oil floating on top. This can make the gravy feel heavy or unappealing on the palate.
You can use a fat separator cup to quickly remove the oil from the broth. Alternatively, lay a piece of bread or a clean paper towel lightly over the surface of the liquid to soak up the excess grease.
Key Takeaways
- Always sear the beef in a hot pan before putting it in the crock pot to build deep, complex flavors.
- Use a chuck roast for the ideal balance of fat and collagen that breaks down into tender perfection.
- Layer your vegetables at the bottom of the pot to act as a trivet for the meat and to soak up the juices.
- Deglaze your pan with broth or wine to ensure none of the flavorful browned bits go to waste.
- Cook on low for 8 to 10 hours to achieve the best texture and moisture retention.
- Rest the meat for 15 minutes before slicing or shredding to keep the juices inside the beef.
Frequently Asked Questions
Can I put frozen meat in the crock pot?
It is generally recommended to thaw your meat completely before placing it in a slow cooker. Starting with frozen meat can keep the internal temperature in the “danger zone” for too long, which increases the risk of bacterial growth. Thawing also allows you to properly sear the meat, which is essential for flavor.
Do I have to brown the meat first?
While you can technically skip the searing step and still have a cooked meal, you will lose a significant amount of flavor. Searing creates a savory crust and a rich color that a slow cooker cannot replicate. If you are in a massive hurry, you can skip it, but your pot roast will taste much more “boiled” than “braised.”
How much liquid do I really need?
You need much less liquid than you might think. About 1 to 2 cups of broth is usually plenty for a 3-pound roast. Remember that the meat and vegetables will release about a cup of their own liquid as they cook, so don’t overdo it.
What are the best potatoes to use?
Yukon Gold potatoes are the gold standard for pot roast. They have a creamy texture and a thin skin that doesn’t require peeling. More importantly, they hold their shape during long cooking times, whereas Russet potatoes tend to fall apart and become grainy.
Our Top Recommended Finds
- Cast Iron Skillet: A heavy-duty skillet is the best tool for getting a perfect, dark sear on your roast before it hits the slow cooker.
- Digital Meat Thermometer: This helps you ensure the meat has reached the internal temperature of about 200°F, which is when collagen fully melts.
- Slow Cooker Liners: If you hate scrubbing the ceramic pot after a long day, these heat-safe liners make cleanup a matter of seconds.
Elevate Your Next Family Dinner
Now that you have mastered the art of the slow-cooked pot roast, you can experiment with different flavor profiles. Try adding a tablespoon of tomato paste for a richer red sauce or a splash of soy sauce for an umami boost.
This dish pairs beautifully with a side of buttery mashed potatoes or a thick slice of crusty sourdough bread to soak up the gravy. There is no better time than today to start your slow cooker and prepare a meal that everyone will remember.