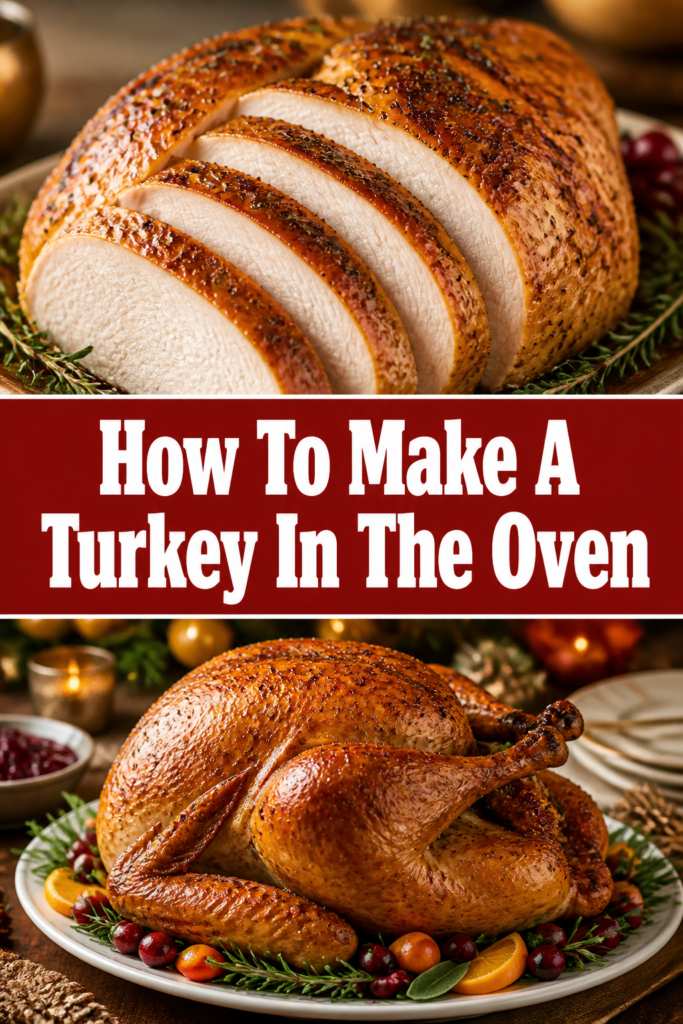
🦃 How To Make A Turkey In The Oven
Making a turkey in the oven can feel like a monumental task, especially if it’s your first time.
I remember my own apprehension before roasting my very first bird, but with a clear plan, it became surprisingly manageable.
This guide shares practical steps and insights gleaned from many successful roasts, helping you achieve a beautifully cooked turkey with confidence.
Quick Overview
This guide will walk you through preparing and roasting a delicious, moist turkey, ensuring a memorable meal.
You’ll learn everything from thawing to carving, turning a potentially daunting task into an enjoyable culinary experience.
- Time needed: 1-3 days for thawing (depending on size), 30 minutes active prep, 2.5-5 hours roasting, 30-45 minutes resting.
- Difficulty: Intermediate (requires attention to detail and temperature management).
- What you’ll need: A whole turkey, roasting pan with rack, meat thermometer, basic seasonings, kitchen twine, aluminum foil.
Step-by-Step Instructions
Step 1: Thaw Your Turkey Safely
A frozen turkey needs ample time to thaw completely before cooking. This is a crucial step for food safety and even cooking.
The safest method is thawing in the refrigerator.
- Calculate thawing time: Allow approximately 24 hours for every 4-5 pounds of turkey. A 15-pound turkey will need 3-4 days.
- Place the wrapped turkey on a tray or in a pan to catch any drips. This prevents cross-contamination in your refrigerator.
- Ensure the refrigerator temperature is consistently 40°F (4°C) or below for safe thawing.
Pro Tip: Never thaw a turkey at room temperature. This allows bacteria to multiply rapidly on the outer layers before the inside thaws. For faster thawing, you can use the cold water method, changing the water every 30 minutes.
Step 2: Prepare for Brining (Optional but Recommended)
Brining adds moisture and flavor deep into the turkey meat, helping to prevent it from drying out during roasting.
You can choose between a wet brine or a dry brine.
- For a wet brine: You’ll need a large container (a clean cooler or brining bag works well) and enough space in your refrigerator.
- Mix water, salt, sugar, and aromatics like herbs, peppercorns, and citrus peels. Submerge the turkey completely.
- For a dry brine: This involves rubbing a salt and herb mixture directly onto the turkey’s skin. It’s less messy and still incredibly effective.
- Allow 12-24 hours for brining in the refrigerator, depending on the method and your turkey’s size.
Step 3: Preheat the Oven and Prepare the Roasting Pan
Proper oven preheating ensures an even cooking temperature from the start, which is vital for a perfectly roasted bird.
The right roasting setup also contributes to crispy skin and even cooking.
- Set your oven to the desired roasting temperature, typically between 325°F (160°C) and 425°F (220°C), depending on your recipe. A common starting point is 375°F (190°C).
- Place a V-rack or sturdy wire rack inside your roasting pan. This elevates the turkey, allowing air to circulate and the skin to crisp all around.
- Add about 1-2 cups of water or chicken broth to the bottom of the roasting pan. This helps keep the oven moist and prevents drippings from burning, which are essential for gravy.
Step 4: Season and Truss the Turkey
Seasoning is key to a flavorful turkey, and trussing helps the turkey cook evenly and look appealing.
Make sure the turkey is at room temperature for about an hour before roasting for more even cooking.
- Remove the turkey from its packaging. Take out the neck and giblets from the cavities (usually from both the neck and body cavity). Save them for gravy if you wish.
- Pat the turkey completely dry with paper towels, inside and out. Dry skin is crucial for crispiness.
- Rub the turkey all over with softened butter or olive oil.
- Season generously with salt, black pepper, and your choice of herbs like rosemary, thyme, and sage. You can also place aromatics (onion, lemon, garlic) inside the cavity.
- Truss the turkey by tying the legs together with kitchen twine and tucking the wing tips under the body. This prevents the wing tips from burning and helps the breast cook more evenly.
Step 5: Load the Turkey and Begin Roasting
Carefully transfer your prepared turkey to the preheated oven.
Initial high heat can help brown the skin, followed by a lower temperature for thorough cooking.
- Place the turkey, breast-side up, on the rack in the roasting pan.
- Insert an oven-safe meat thermometer into the thickest part of the thigh, avoiding the bone. This will be your primary guide for doneness.
- Roast the turkey according to your chosen temperature and estimated cooking time. A general guideline is 13-15 minutes per pound at 325°F (160°C) for an unstuffed turkey.
- Baste the turkey every 45 minutes to an hour with its pan juices or melted butter. This helps keep the skin moist and flavorful, contributing to a golden-brown finish.
Pro Tip: If the turkey skin starts to brown too quickly, loosely tent it with aluminum foil. This protects the skin while the rest of the turkey finishes cooking.
Step 6: Monitor Temperature and Ensure Doneness
Accurate temperature monitoring is the most reliable way to know when your turkey is done and safe to eat.
Don’t rely solely on visual cues or estimated cooking times.
- The turkey is done when the internal temperature reaches 165°F (74°C) in three places: the thickest part of the thigh, the thickest part of the breast, and the innermost part of the wing.
- Check the temperature in multiple spots to ensure even cooking, being careful not to touch any bones.
- Remove the turkey from the oven immediately once it reaches the target temperature. Overcooking will lead to dry meat.
Step 7: Rest the Turkey
Resting is a non-negotiable step for a juicy turkey.
It allows the meat fibers to relax and reabsorb the juices, which would otherwise run out if you carved it immediately.
- Transfer the cooked turkey from the roasting pan to a large cutting board.
- Tent the turkey loosely with aluminum foil. This keeps it warm without steaming the crispy skin.
- Allow the turkey to rest for at least 20-30 minutes for a smaller bird, and up to 45-60 minutes for a larger one.
During this time, you can make your gravy using the pan drippings.
Step 8: Carve and Serve
Carving a turkey can seem intimidating, but with a sharp knife and a little technique, it’s straightforward.
Presenting your beautifully carved turkey is the final rewarding step.
- Use a sharp carving knife and a carving fork.
- Start by removing the legs and thighs, then separate the drumsticks from the thighs.
- Slice the breast meat by cutting along the breast bone and then slicing horizontally.
- Arrange the carved meat on a warm platter.
- Serve immediately with your favorite sides and gravy.
Common Mistakes to Avoid
Not Thawing Completely
Trying to roast a partially frozen turkey leads to uneven cooking. The outside will overcook and dry out while the inside remains dangerously undercooked.
Always plan several days ahead for proper refrigeration thawing. If you’re short on time, use the cold water bath method, changing the water frequently.
Overcooking the Turkey
This is perhaps the most common mistake, resulting in dry, stringy meat. Many people cook by time alone or until the skin is deeply browned.
Always use a reliable meat thermometer. Remove the turkey from the oven as soon as it reaches 165°F (74°C) in the thickest parts of the breast and thigh. Remember, it will continue to cook slightly during resting.
Forgetting to Rest the Turkey
Cutting into a hot turkey immediately after it leaves the oven is a recipe for dry meat. All the delicious juices will simply run out onto the cutting board.
Give your turkey at least 20-30 minutes (or longer for bigger birds) to rest, loosely tented with foil. This allows the juices to redistribute throughout the meat, resulting in a much juicier bird.
Not Seasoning Enough
A large turkey requires a good amount of seasoning to penetrate the meat and flavor it properly. Don’t be shy with salt, pepper, and herbs.
Consider brining for added flavor and moisture, or use a generous dry rub. Also, remember to season the cavity of the turkey, not just the exterior.
Troubleshooting
Turkey Skin Isn’t Crispy
If your turkey skin is flabby instead of crisp, it’s likely due to too much moisture or not enough direct heat.
Ensure the turkey is thoroughly patted dry before roasting. You can also increase the oven temperature to 400-425°F (200-220°C) for the last 20-30 minutes of cooking, after the turkey is mostly done and tented, to crisp up the skin. Avoid basting too frequently towards the end of cooking.
Turkey Breast is Dry, Thighs are Undercooked
This is a common challenge because breast meat cooks faster than thigh meat.
To address this, consider roasting the turkey breast-side down for the first hour or so, then flipping it. Alternatively, you can tent the breast with foil earlier in the cooking process to shield it from direct heat, allowing the thighs more time to catch up. Another strategy is to remove the turkey from the oven when the breast reaches 160°F (71°C), as it will continue cooking while resting.
Gravy is Too Thin or Lumpy
Thin gravy lacks body, while lumpy gravy is unpleasant.
To thicken thin gravy, make a slurry of equal parts cornstarch and cold water, then whisk it gradually into the simmering gravy until it reaches your desired consistency. To avoid lumps, always whisk flour or cornstarch into a cold liquid first before adding it to hot drippings. If lumps still occur, strain the gravy through a fine-mesh sieve.
Key Takeaways
- Thaw your turkey safely and completely in the refrigerator, allowing ample time.
- Brining (wet or dry) significantly improves moisture and flavor, making a noticeable difference in the final result.
- Always use a meat thermometer to ensure the turkey reaches 165°F (74°C) in the thickest parts, preventing both undercooking and overcooking.
- Resting the turkey after roasting is crucial for juicy meat; allow at least 20-30 minutes before carving.
- Pat the turkey dry and season generously to achieve crispy skin and flavorful meat.
- Don’t be afraid to tent with foil if the skin is browning too quickly, protecting it from burning.
Frequently Asked Questions
Should I stuff my turkey?
Stuffing a turkey can be done, but it adds significantly to the cooking time and presents a food safety challenge. The stuffing must reach 165°F (74°C) to be safe, which often means the turkey meat becomes overcooked. For best results and safety, it’s generally recommended to cook stuffing separately in a casserole dish.
How do I make gravy from the pan drippings?
After removing the turkey, drain the pan drippings into a fat separator. Skim off the fat. In the roasting pan, deglaze with some broth or wine, scraping up any browned bits. Combine the deglazed liquid with the separated drippings. Thicken with a roux (butter and flour) or a cornstarch slurry, then season to taste.
Can I prepare the turkey the night before?
Yes, you can do a good amount of prep the night before. You can brine the turkey, remove the giblets and neck, pat it dry, and apply your dry rub or seasoning. Store it uncovered in the refrigerator overnight. This helps the skin dry out even more, leading to a crispier finish.
What if my turkey is still frozen in some spots?
If you discover small frozen spots on roasting day, especially near the bone, you can try the cold water thawing method for a few hours. Submerge the turkey in cold water, changing the water every 30 minutes. Ensure it’s fully thawed before roasting to avoid uneven cooking.
Our Top Recommended Finds
- Digital Meat Thermometer: Essential for accurate temperature readings, ensuring your turkey is cooked perfectly and safely.
- Large Roasting Pan with Rack: A sturdy pan with an elevated rack allows for even heat circulation and prevents the turkey from sitting in its own juices.
- Kitchen Twine: Useful for trussing the turkey, helping it cook more evenly and maintain its shape for a beautiful presentation.
Your Masterpiece Awaits
Roasting a turkey in the oven is a rewarding culinary achievement, bringing warmth and delicious aromas to your home.
With these practical steps and a little patience, you have all the tools to create a tender, juicy, and flavorful centerpiece.
Don’t hesitate to embark on this cooking journey; the satisfaction of serving your perfectly roasted turkey is truly unmatched.