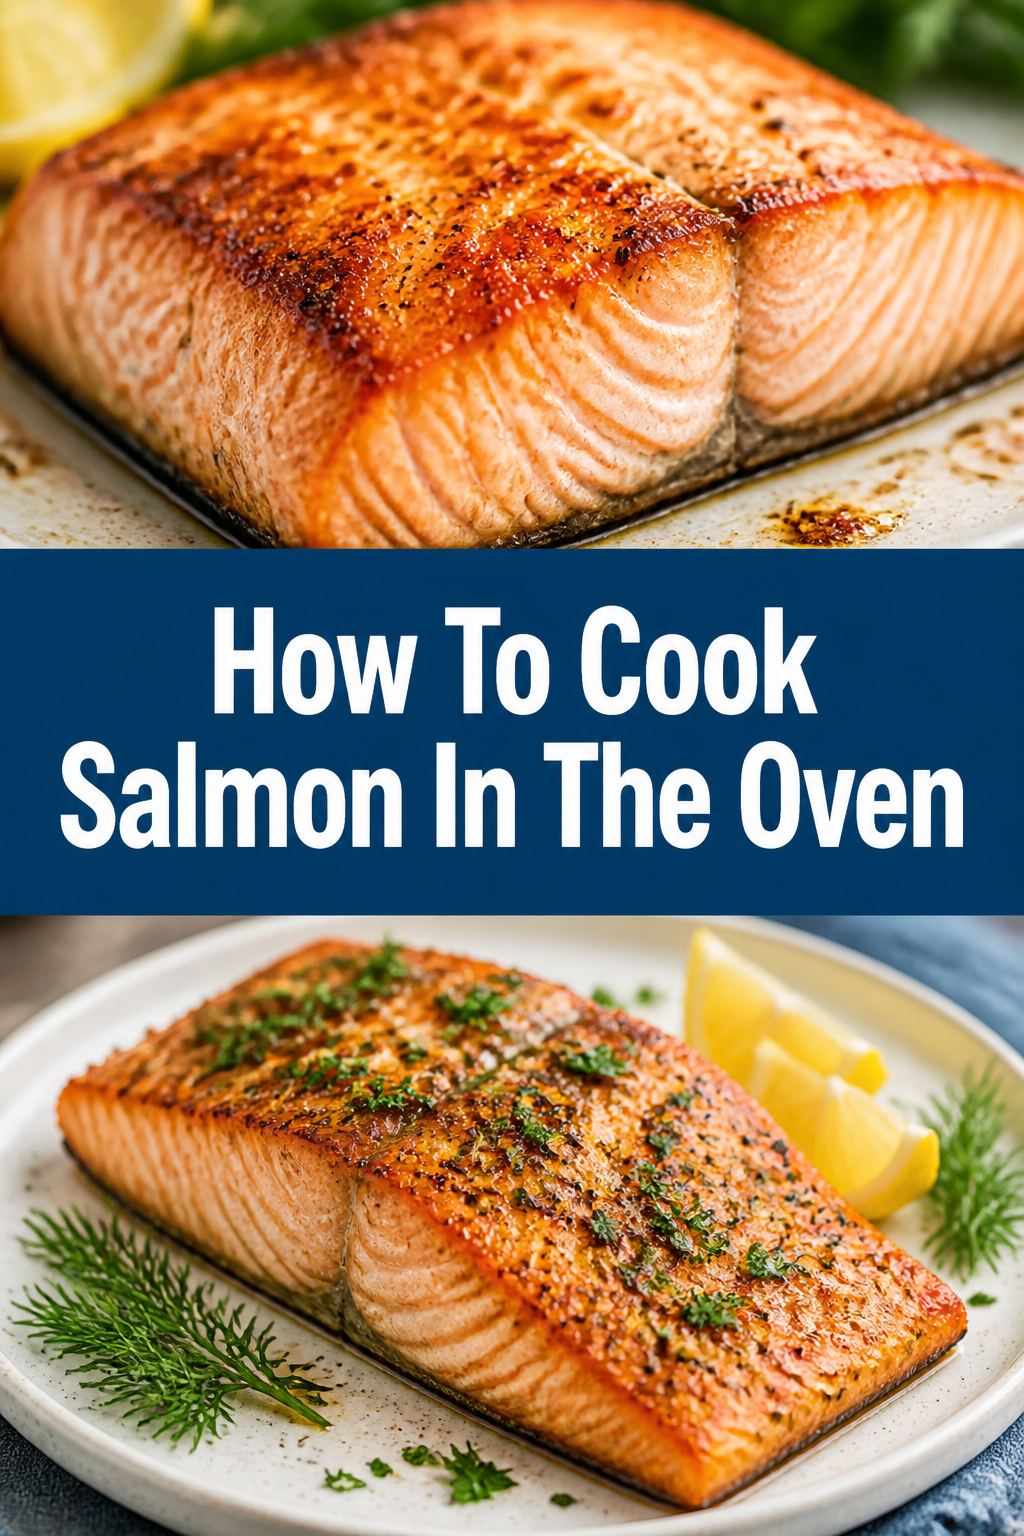
🐟 How To Cook Salmon In The Oven
There is nothing quite like the smell of perfectly roasted salmon wafting through a kitchen on a busy weeknight.
I spent years overcooking my fish until it was dry and chalky, but after hundreds of attempts, I found the secret to that buttery, flake-apart texture.
This guide represents everything I have learned about mastering the oven-roasting technique to ensure your salmon is restaurant-quality every single time.

Quick Overview
Baking salmon is perhaps the most reliable way to feed a family or meal prep for the week without standing over a hot stove.
- Time needed: 20-25 minutes (including prep)
- Difficulty: Beginner
- What you’ll need: Salmon fillets, olive oil, salt, pepper, a baking sheet, and parchment paper.
Step-by-Step Instructions
Step 1: Preheat Your Oven to High Heat
Set your oven to 400°F (200°C) and ensure the oven rack is positioned in the center of the unit.
High heat is the secret to a beautiful exterior and a moist interior because it cooks the outside quickly while the inside remains tender.
Wait for the oven to reach the full temperature before you even think about putting the fish inside.
Pro Tip: Using a higher temperature like 400°F or 425°F mimics the sear of a pan while providing the even heat distribution of an oven.
Step 2: Bring the Salmon to Room Temperature
Remove the salmon from the refrigerator about 15 to 20 minutes before you plan to cook it.
If you put ice-cold fish into a hot oven, the outside will overcook and become tough before the center is even warm.
Place the fillets on a plate on your counter to take the chill off, which ensures the muscle fibers relax and cook evenly.
Step 3: Pat the Fish Completely Dry
Grab a few paper towels and press them firmly onto the surface and the sides of the salmon fillets.
Moisture is the enemy of a good roast because any water on the surface will turn into steam, making the fish mushy rather than flaky.
Ensure the skin side is also dry if you are cooking skin-on fillets, as this helps prevent the fish from sticking to the pan.
Pro Tip: If you have time, let the salmon sit uncovered in the fridge for an hour after patting it dry to create a “pellicle,” which helps seasonings stick better.
Step 4: Prepare Your Baking Surface
Line a large rimmed baking sheet with parchment paper or a silicone baking mat to prevent sticking.
Avoid using aluminum foil if you can, as salmon skin tends to bond to foil, making it difficult to remove the fish in one piece.
Space the fillets out so they are not touching, which allows the hot air to circulate around each piece of fish for a uniform cook.
Step 5: Apply Fat and Seasoning
Drizzle a generous amount of high-quality olive oil or melted butter over each fillet to act as a heat conductor.
Rub the oil into the flesh with your fingers or a brush to ensure every millimeter is coated, which protects the delicate proteins.
Sprinkle kosher salt and freshly cracked black pepper from a height to get an even distribution across the entire surface area.
Step 6: Add Aromatics and Herbs
Place thin slices of lemon directly on top of the fillets or tucked underneath them to infuse the fish with bright acidity.
Scatter fresh herbs like dill, parsley, or thyme over the oil-coated fish so they stick and release their essential oils during the roasting process.
Consider a small dollop of minced garlic or a sprinkle of smoked paprika if you want to add depth and a hint of smokiness to the profile.
Step 7: Monitor the Roasting Time
Slide the baking sheet into the oven and set a timer for 10 to 12 minutes, depending on the thickness of your fillets.
A general rule of thumb is to cook salmon for about 4 to 6 minutes for every half-inch of thickness at the thickest point.
Check the fish early to prevent overcooking, as salmon can go from perfect to dry in a matter of sixty seconds.
Pro Tip: If you are cooking a large side of salmon rather than individual fillets, increase the cooking time to 15-20 minutes.
Step 8: Test for Doneness
Insert a fork or a knife into the thickest part of the salmon and gently twist to see if the meat flakes easily.
The fish should look opaque on the outside and slightly translucent in the very center, which indicates it is still juicy.
Use an instant-read thermometer if you want to be precise; you are looking for an internal temperature of 125°F to 130°F for medium-rare.
Step 9: Let the Salmon Rest
Remove the baking sheet from the oven and transfer the fillets to a warm plate or serving platter immediately.
Allow the fish to rest for at least 5 minutes before serving to let the juices redistribute throughout the muscle fibers.
This resting period allows for “carryover cooking,” where the internal temperature rises slightly even after the fish is out of the heat.
Common Mistakes to Avoid
Cooking the Fish Directly from the Freezer
Attempting to bake a frozen or partially frozen fillet will lead to a disaster where the outside is burnt and the inside is raw.
The uneven temperature causes the proteins to contract violently, squeezing out all the natural fats and leaving you with a rubbery texture.
Always thaw your salmon overnight in the refrigerator or in a sealed bag under cold running water before starting the recipe.
Overcrowding the Baking Sheet
When you pack too many fillets onto one tray, you lower the temperature of the oven surface and create a steaming environment.
Instead of roasting, the fish ends up boiling in its own juices, which ruins the texture and prevents any browning from occurring.
Give each piece of salmon at least two inches of space so the dry heat can crisp the edges and cook the fish properly.
Ignoring the White Substance (Albumin)
Many people panic when they see a white, gooey substance seeping out of their salmon, but this is just a protein called albumin.
While it is perfectly safe to eat, it is usually a sign that you are cooking the fish too fast or at a temperature that is too high for that specific cut.
Brining your salmon in a simple salt and water solution for ten minutes before cooking can significantly reduce the amount of albumin that appears.
Troubleshooting
The Skin is Stuck to the Pan
This usually happens because the pan wasn’t properly greased or the fish was moved before the skin had a chance to crisp and release.
If your salmon is stuck, use a thin metal spatula and gently wiggle it between the skin and the parchment paper to lift it slowly.
Next time, try starting the salmon skin-side up for the first half of cooking, or ensure you use a generous layer of oil on the parchment.
The Salmon is Dry and Chalky
This is the classic symptom of overcooking, which happens when the internal temperature exceeds 145°F for too long.
If you find your salmon is dry, you can save the meal by flaking the fish and mixing it with a bit of Greek yogurt, lemon juice, and herbs.
To prevent this in the future, pull the fish out of the oven when it still looks a tiny bit “underdone” in the center, as it will finish cooking on the plate.
Key Takeaways
- Temperature matters: Always preheat your oven to at least 400°F to ensure a quick roast that locks in moisture.
- Dryness is key: Patting the fish dry with paper towels is the most important step for achieving a flaky texture.
- Room temperature: Letting the fish sit out for 15 minutes prevents the “thermal shock” that leads to uneven cooking.
- Don’t overcook: Use a thermometer to hit 125-130°F for a buttery, restaurant-style finish.
- Rest the fish: Five minutes of resting time makes a massive difference in how juicy the final bite feels.
Frequently Asked Questions
Should I cook salmon with the skin on or off?
It is almost always better to cook salmon with the skin on, even if you don’t plan on eating the skin itself.
The skin acts as a safety barrier between the hot pan and the delicate flesh, helping to retain moisture and preventing the fish from falling apart.
Once the salmon is cooked, the skin will peel off effortlessly if you prefer to discard it before serving.
How do I know if my salmon has gone bad?
Fresh salmon should have a mild, oceanic scent rather than a strong “fishy” or ammonia-like odor.
The flesh should be firm to the touch and spring back when pressed, rather than leaving a permanent indentation or feeling slimy.
If the color looks dull or gray, or if there is a thick, milky residue on the surface, it is best to err on the side of caution and toss it.
Can I use this method for frozen salmon?
You can use this method, but you must ensure the salmon is completely defrosted before you begin the seasoning process.
Frozen salmon often contains extra water weight, so you will need to be even more diligent about patting the fillets dry.
Expect frozen-then-thawed salmon to cook slightly faster than fresh salmon because the freezing process breaks down some of the cell walls.
Our Top Recommended Finds
- Instant-Read Digital Thermometer: This tool removes all the guesswork and ensures you never serve dry, overcooked fish again.
- Pre-cut Parchment Paper Sheets: These prevent sticking and make cleanup as simple as throwing away a piece of paper.
- Heavy-Duty Rimmed Baking Sheet: A thick pan distributes heat more evenly, which prevents the bottom of your salmon from burning before the top is done.
Elevating Your Home Cooking Game
Now that you have mastered the foundational technique for oven-roasted salmon, the possibilities for customization are endless.
Try experimenting with different glazes like miso-honey or balsamic reduction to see how the high heat caramelizes the sugars.
You might also want to explore side dishes like roasted asparagus or quinoa salad that can be prepared while the fish is in the oven.
Pick up some fresh fillets today and put these steps into practice to see just how easy a gourmet meal can be.