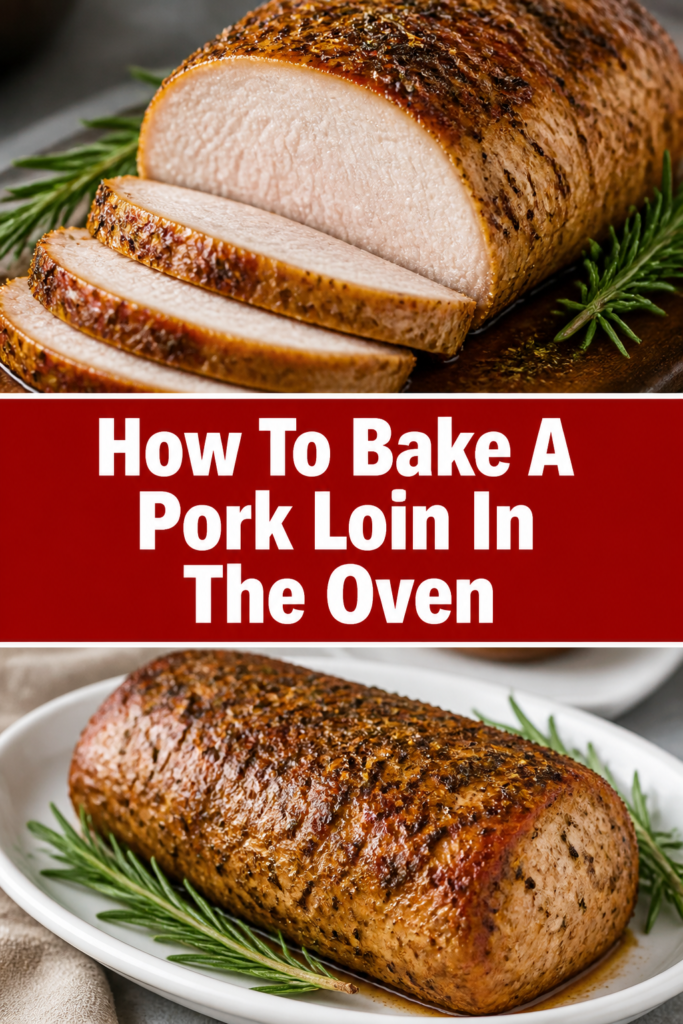
🐷 How To Bake A Pork Loin In The Oven
Cooking a perfect pork loin might seem daunting at first glance. Many people struggle with dry, flavorless results.
But with the right approach, you can achieve a tender, juicy, and incredibly flavorful meal. I’ve baked countless pork loins, refining techniques that guarantee success every time.
This guide shares my proven methods, ensuring your next pork loin is a culinary triumph.
Quick Overview
Preparing a succulent pork loin in your oven is a rewarding experience. You’ll learn how to season, sear, and roast this versatile cut to perfection. Get ready to impress your family and friends.
- Time needed: 1 hour 15 minutes – 1 hour 45 minutes (including prep)
- Difficulty: Beginner
- What you’ll need: Pork loin, basic seasonings, oven-safe pan, meat thermometer
Step-by-Step Instructions
Step 1: Prepare Your Pork Loin
Remove the pork loin from its packaging. Pat it thoroughly dry with paper towels. This crucial step helps create a beautiful crust during searing.
Trim any excess silver skin or thick fat cap if present. Silver skin is tough and won’t render, while too much fat can prevent a good sear. Leave a thin layer of fat for flavor and moisture.
Step 2: Season Generously
Rub the entire pork loin with a tablespoon of olive oil. This helps the seasonings adhere and promotes browning.
Season the loin liberally on all sides. A simple blend of salt, black pepper, garlic powder, onion powder, and paprika works wonderfully. Don’t be shy with the salt; it’s essential for flavor penetration.
Pro Tip: For deeper flavor, season the pork loin at least 30 minutes before cooking, or even better, overnight in the refrigerator. This allows the salt to work its magic and tenderize the meat.
Step 3: Preheat and Sear
Preheat your oven to 375°F (190°C). While the oven heats, place an oven-safe skillet (cast iron works best) over medium-high heat on your stovetop.
Add a tablespoon of high-smoke-point oil, like canola or grapeseed oil, to the hot pan. Once the oil shimmers, carefully place the seasoned pork loin in the skillet.
Sear the pork loin for 2-3 minutes per side until a deep golden-brown crust forms. This searing step is vital for locking in juices and developing rich flavor. Make sure to sear all sides, including the ends.
Step 4: Roast in the Oven
Transfer the seared pork loin, still in the oven-safe skillet, to your preheated oven. If you don’t have an oven-safe skillet, transfer the loin to a roasting pan.
Insert a meat thermometer into the thickest part of the loin, avoiding any bone if present. Ensure the probe is in the center of the meat for an accurate reading.
Roast for approximately 25-40 minutes, depending on the thickness of your loin. The cooking time will vary, so rely on the internal temperature.
Step 5: Monitor Internal Temperature
Continue roasting until the internal temperature reaches 135-140°F (57-60°C). This is the sweet spot for a juicy, slightly pink pork loin. Remember, the temperature will rise during resting.
Avoid overcooking, as this is the primary cause of dry pork. A digital meat thermometer is your best friend here.
Pro Tip: Modern pork is safe to eat at a lower internal temperature than traditionally thought. The USDA recommends 145°F (63°C) followed by a 3-minute rest, which often results in a perfectly juicy, slightly pink center. Pulling it at 135-140°F accounts for carryover cooking.
Step 6: Rest the Loin
Remove the pork loin from the oven once it reaches the target temperature. Immediately transfer it to a cutting board.
Tent the loin loosely with aluminum foil. This allows the juices to redistribute throughout the meat, ensuring every slice is moist and tender.
Let the pork rest for at least 10-15 minutes. Do not skip this step, no matter how hungry you are.
Step 7: Slice and Serve
Carve the rested pork loin against the grain into ½-inch thick slices. Cutting against the grain shortens the muscle fibers, making the meat more tender to chew.
Arrange the slices on a platter and serve immediately. A sprinkle of fresh herbs like parsley or thyme can add a nice finishing touch.
Enjoy your perfectly baked pork loin with your favorite side dishes.
Common Mistakes to Avoid
Not Drying the Pork Loin
Many home cooks skip the crucial step of patting the pork loin dry. A wet surface prevents a proper sear, leading to a steamed rather than browned exterior. Always use paper towels to remove all surface moisture before seasoning and searing.
Under-Seasoning
Pork loin is a relatively lean cut and needs generous seasoning to develop flavor. A light sprinkle of salt and pepper won’t cut it. Be bold with your seasoning blend, ensuring all surfaces are well-coated for maximum taste.
Overcooking the Pork
This is the most common culprit for dry, tough pork loin. Without a meat thermometer, it’s easy to guess and cook the pork too long. Always use a reliable thermometer and pull the pork from the oven when it reaches 135-140°F (57-60°C) to allow for carryover cooking.
Skipping the Rest Period
Cutting into the pork loin immediately after removing it from the oven will cause all the delicious juices to run out onto the cutting board. This results in dry meat. Always tent the pork with foil and let it rest for 10-15 minutes to allow the juices to redistribute.
Troubleshooting
Pork Loin is Dry
If your pork loin turned out dry, it was likely overcooked. Ensure you are using a reliable meat thermometer and removing the pork from the oven at 135-140°F (57-60°C). Next time, try pulling it slightly earlier.
No Good Crust on the Outside
A lack of a good crust usually means the pork loin wasn’t patted dry enough before searing, or the skillet wasn’t hot enough. Make sure to thoroughly dry the meat and preheat your oven-safe pan over medium-high heat until the oil shimmers before adding the pork.
Pork is Tough
Tough pork can be a result of overcooking, which tightens the muscle fibers. It can also happen if the meat wasn’t rested properly, or if it was sliced with the grain instead of against it. Always rest your meat and slice against the grain for maximum tenderness.
Key Takeaways
- Dry the pork loin thoroughly before seasoning for a superior sear.
- Season generously on all sides to infuse flavor into the lean meat.
- Sear for a golden-brown crust to lock in juices and develop rich flavors.
- Use a meat thermometer and aim for an internal temperature of 135-140°F (57-60°C) before resting.
- Always rest the pork loin for 10-15 minutes to ensure juiciness.
- Slice against the grain for the most tender eating experience.
Frequently Asked Questions
What’s the difference between pork loin and pork tenderloin?
Pork loin is a larger, wider cut of meat, often sold as a roast, and is typically leaner. Pork tenderloin is a long, thin cut, smaller in diameter, and cooks much faster. This guide specifically focuses on the larger pork loin roast.
Can I brine my pork loin?
Absolutely! Brining pork loin can dramatically increase its moisture content and flavor. A simple salt and sugar brine for a few hours or overnight can make a noticeable difference, especially if you tend to overcook slightly.
How do I store leftover pork loin?
Store leftover cooked pork loin in an airtight container in the refrigerator for up to 3-4 days. For best results when reheating, slice the pork thinly and gently warm it in a skillet with a splash of broth to prevent drying out.
Can I add vegetables to the roasting pan?
Yes, you can! Root vegetables like potatoes, carrots, and onions can be tossed with a little olive oil and seasonings and added to the roasting pan around the pork loin. They will cook alongside the meat, absorbing delicious pan drippings.
Our Top Recommended Finds
- Instant-Read Meat Thermometer: Essential for perfectly cooked meat every time, eliminating guesswork.
- Cast Iron Skillet: Excellent for searing on the stovetop and then transferring directly to the oven.
- Large Roasting Pan with Rack: Ideal if you prefer not to use a skillet for the oven portion, allowing air circulation.
Your Next Delicious Meal Awaits
You now possess the knowledge and confidence to bake a pork loin that’s tender, juicy, and bursting with flavor. Forget dry, bland pork; those days are over. This simple yet effective method will become your go-to.
Imagine the satisfaction of serving a perfectly cooked roast, knowing you created it with ease. Don’t wait; pick up a pork loin today and put these steps into action. Your taste buds will thank you.