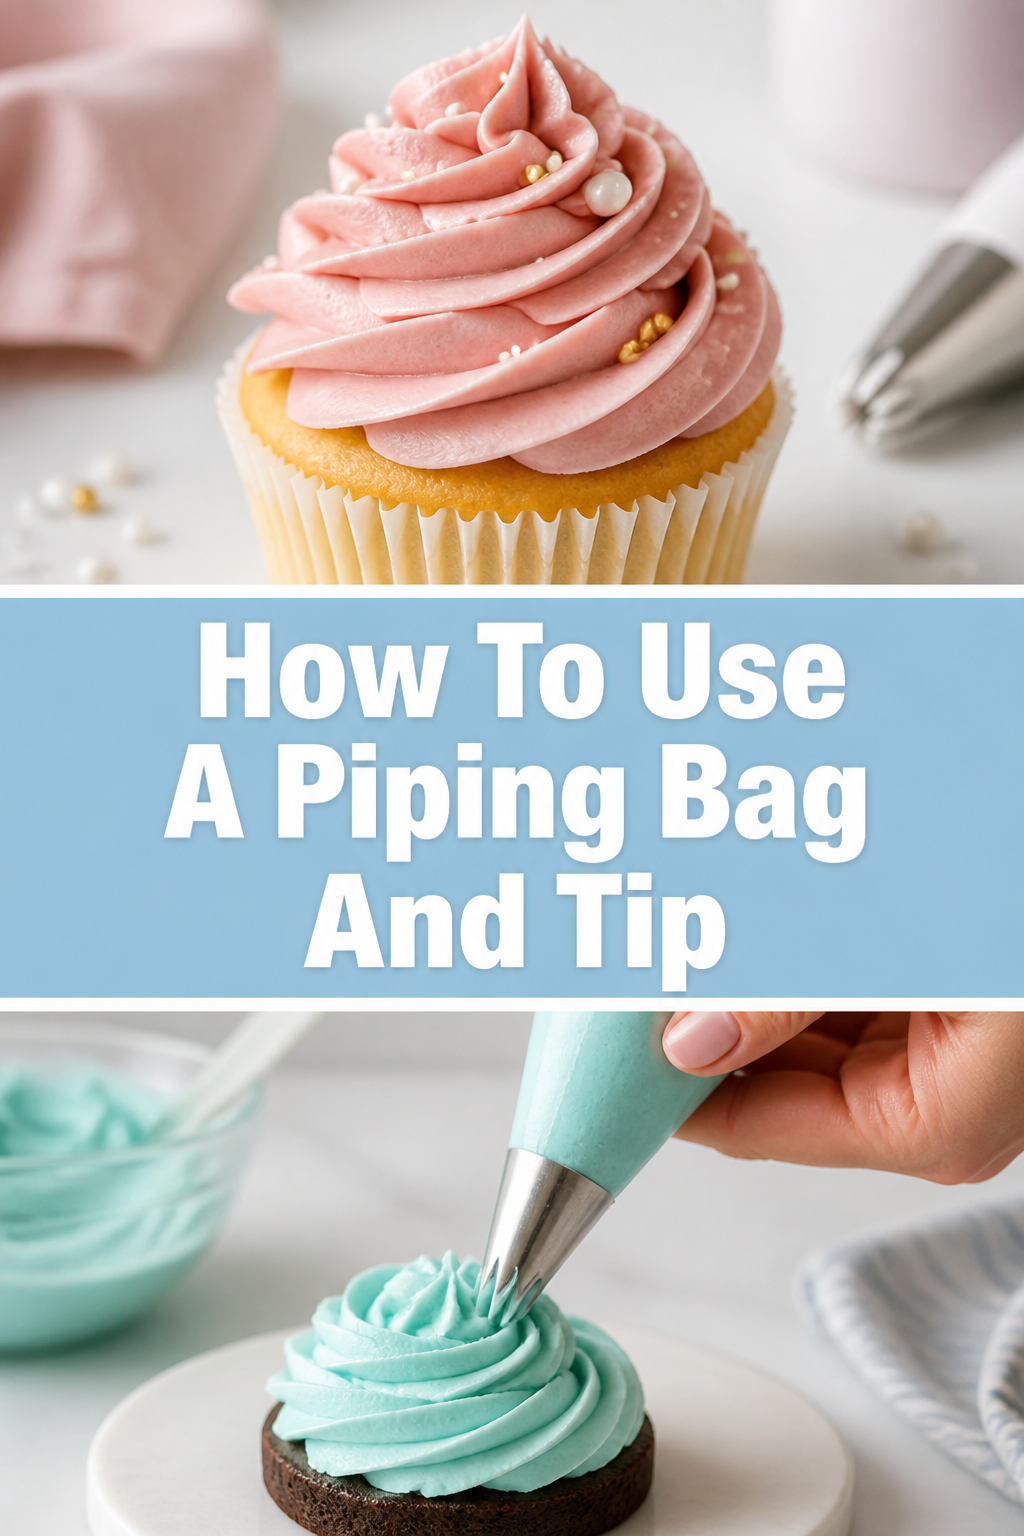
🧁 How To Use A Piping Bag And Tip
Mastering the piping bag might seem intimidating at first glance.
I remember my first attempts at decorating cupcakes, resulting in more abstract art than edible perfection.
But with a little guidance and practice, you’ll be creating beautiful designs in no time, and I’m here to share the simple techniques I’ve learned over countless batches of frosting.

Quick Overview
This guide will transform your baking and decorating skills, helping you confidently pipe frosting, batter, or even mashed potatoes with precision and flair. You’ll learn everything from choosing the right tip to executing various designs.
- Time needed: 30-60 minutes (initial setup and practice)
- Difficulty: Beginner
- What you’ll need: Piping bags (disposable or reusable), piping tips, coupler (optional), frosting/filling, scissors, tall glass
Step-by-Step Instructions
Step 1: Gather Your Supplies
Collect all your necessary tools before you begin. This includes your piping bags, a selection of tips, and a coupler if you plan on changing tips frequently.
Have your frosting or filling ready and at the correct consistency. Room temperature buttercream is usually ideal for most decorating tasks.
Step 2: Choose Your Tip
Select the piping tip that suits your desired design. Round tips are excellent for lines, dots, and writing.
Star tips create ridged designs, while petal tips are perfect for ruffles and flowers. Leaf tips, as the name suggests, make realistic leaves.
Step 3: Prepare the Piping Bag (Without a Coupler)
If you’re not using a coupler, insert the chosen tip directly into the piping bag. Push it down firmly until the narrow end of the tip is snugly in the corner.
Using scissors, snip off the very end of the bag, just enough so that the tip peeks out. Be careful not to cut too much, or the tip will fall out.
Pro Tip: Hold the tip against the outside of the bag and mark where the tip’s opening begins before cutting. This helps prevent over-cutting.
Step 4: Prepare the Piping Bag (With a Coupler)
A coupler allows you to change tips without changing bags. Separate the two parts of the coupler: the base and the ring.
Drop the base part of the coupler, narrow end first, into the piping bag. Push it down until it’s snug in the corner, just like a tip.
Snip off the end of the bag, cutting just enough so that the threaded part of the coupler base extends outside the bag.
Place your chosen piping tip over the threaded part of the coupler base, outside the bag. Then, screw the coupler ring tightly over the tip to secure it in place.
Step 5: Fill the Piping Bag
Fold down the top edges of the piping bag to create a wide cuff. This prevents frosting from getting all over the top edge of the bag.
Place the cuffed bag into a tall glass or measuring cup. This helps stabilize the bag and frees up both your hands for filling.
Using a spatula, spoon your frosting or filling into the bag. Fill it about two-thirds full. Overfilling makes the bag hard to handle and control.
Pro Tip: Don’t fill the bag completely. Leaving space at the top allows you to twist and seal the bag effectively, preventing mess.
Step 6: Seal the Bag
Once filled, lift the bag out of the glass. Gently unfold the cuff and push the frosting down towards the tip, removing any air pockets.
Twist the top of the bag tightly, just above the frosting. This creates a seal and helps build pressure for piping.
Step 7: Hold the Piping Bag Correctly
Grip the twisted end of the bag with your dominant hand. This hand controls the pressure and flow of the frosting.
Support the body of the bag with your non-dominant hand. This hand guides the tip and helps steady your movements.
Hold the bag at about a 45-degree angle to your surface for most designs, or straight up for taller elements like rosettes.
Step 8: Practice Your Pressure and Movement
Before decorating your final product, practice on a piece of parchment paper or a plate. This helps you get a feel for the consistency and how much pressure to apply.
Apply steady, even pressure with your dominant hand. As you pipe, lift the bag slightly, allowing the frosting to flow out smoothly.
Stop pressure and pull the bag away quickly to create a clean break in your design. Experiment with different pressures and angles.
Step 9: Decorate with Confidence
Now that you’ve practiced, approach your cakes, cookies, or pastries with confidence. Maintain consistent pressure and movement.
For repetitive designs, aim for uniformity. Remember, practice makes perfect, and even professional decorators had to start somewhere.
If you make a mistake, don’t worry! For frosting, often you can gently scrape it off and try again, especially before it sets.
Step 10: Clean Up
Once you’re finished, empty any remaining frosting into an airtight container for later use or discard it.
For reusable bags and tips, wash them immediately with warm, soapy water. Use a small brush to clean inside the tips thoroughly.
Allow all components to dry completely before storing them away. This prevents mold and ensures they are ready for your next decorating adventure.
Common Mistakes to Avoid
Overfilling the Bag
Filling your piping bag too much makes it cumbersome and difficult to control. Frosting can also squeeze out of the top, creating a messy situation.
Always aim to fill the bag about two-thirds full. This leaves enough room to twist the top and get a good grip.
Cutting the Bag Too Large
A common error, especially when not using a coupler, is snipping too much off the end of the bag. If the opening is too wide, the piping tip will fall out during use.
Start by cutting a very small opening, then test if the tip is secure. You can always cut a little more, but you can’t put it back.
Inconsistent Pressure
Uneven pressure from your dominant hand leads to wobbly lines, inconsistent dots, and generally messy designs. This is a common beginner struggle.
Focus on maintaining a steady, firm squeeze. Practice on parchment paper to develop muscle memory for consistent flow before moving to your final product.
Ignoring Frosting Consistency
Frosting that is too stiff will be hard to pipe and may tear the bag. Frosting that is too soft will lose its shape and spread, ruining your design.
Always ensure your frosting is at the right consistency for your task. Add a tiny bit of milk or cream to soften, or a little powdered sugar to stiffen, adjusting slowly.
Troubleshooting
Frosting Leaking from the Top of the Bag
This usually happens when the bag is overfilled or not twisted tightly enough at the top. It can be frustrating and messy.
Ensure you only fill the bag two-thirds full. After filling, twist the top firmly and keep your dominant hand’s grip on this twisted portion to maintain the seal.
Piping Tip Falls Out
If your piping tip keeps slipping out of the bag, it means the opening you cut is too large for the tip. This is a common issue without a coupler.
For a quick fix, you can try placing the entire bag inside another, uncut piping bag, then cutting the second bag to the correct size. For future use, cut smaller and test the fit before filling.
Piped Designs Are Uneven or Jagged
Uneven lines or jagged edges often point to inconsistent pressure, or air bubbles trapped in the frosting. It can also be a sign of frosting that’s too stiff.
Before piping, gently squeeze the bag to push any air bubbles out. Ensure your frosting is smooth and at the correct consistency. Practice applying steady, even pressure.
Key Takeaways
- Proper preparation, including choosing the right tip and filling the bag correctly, sets you up for success.
- A coupler offers flexibility, allowing you to change tips without changing bags.
- Always fill the piping bag only two-thirds full to prevent mess and improve control.
- Twist the top of the bag tightly to create a seal and maintain consistent pressure.
- Practice holding the bag and applying even pressure on parchment paper before decorating your final item.
- Frosting consistency is crucial; adjust it to be neither too stiff nor too soft for your desired design.
Frequently Asked Questions
Can I reuse piping bags?
Yes, you can absolutely reuse piping bags if they are made of a durable, washable material, typically silicone or heavy-duty canvas. Wash them thoroughly with warm, soapy water and allow them to dry completely before storing to prevent mildew.
What is the best type of piping bag for beginners?
Disposable piping bags are often recommended for beginners because they require no cleanup and are readily available. They allow you to focus on the piping technique without worrying about washing. As you gain confidence, you might explore reusable options.
How do I prevent air bubbles in my frosting?
Air bubbles can cause disruptions in your piped lines. To minimize them, gently press the frosting down into the bag after filling, working it towards the tip. You can also gently tap the filled bag on your counter to help release trapped air before twisting the top.
What’s the difference between a piping bag and a pastry bag?
There is no functional difference; the terms “piping bag” and “pastry bag” are used interchangeably. Both refer to a cone-shaped bag used to pipe soft, semi-liquid foods through a narrow opening or tip.
Our Top Recommended Finds
- Disposable Piping Bags: Convenient for easy cleanup, perfect for beginners, and available in various sizes.
- Basic Decorating Tip Set: A starter set usually includes essential round, star, and petal tips, offering versatility for many designs.
- Coupler Set: An invaluable tool for quickly changing tips without needing multiple bags, saving time and reducing waste.
Unleash Your Inner Decorator
Now that you have the knowledge, it’s time to put it into practice. Don’t be afraid to experiment with different tips and techniques.
Your first few attempts might not be perfect, but every squeeze of the bag builds confidence and skill.
Consider trying out a simple rosette on a cupcake, or elegant borders on a cake. The world of decorating is open to you.
Grab your bag, choose a tip, and start creating something beautiful today!