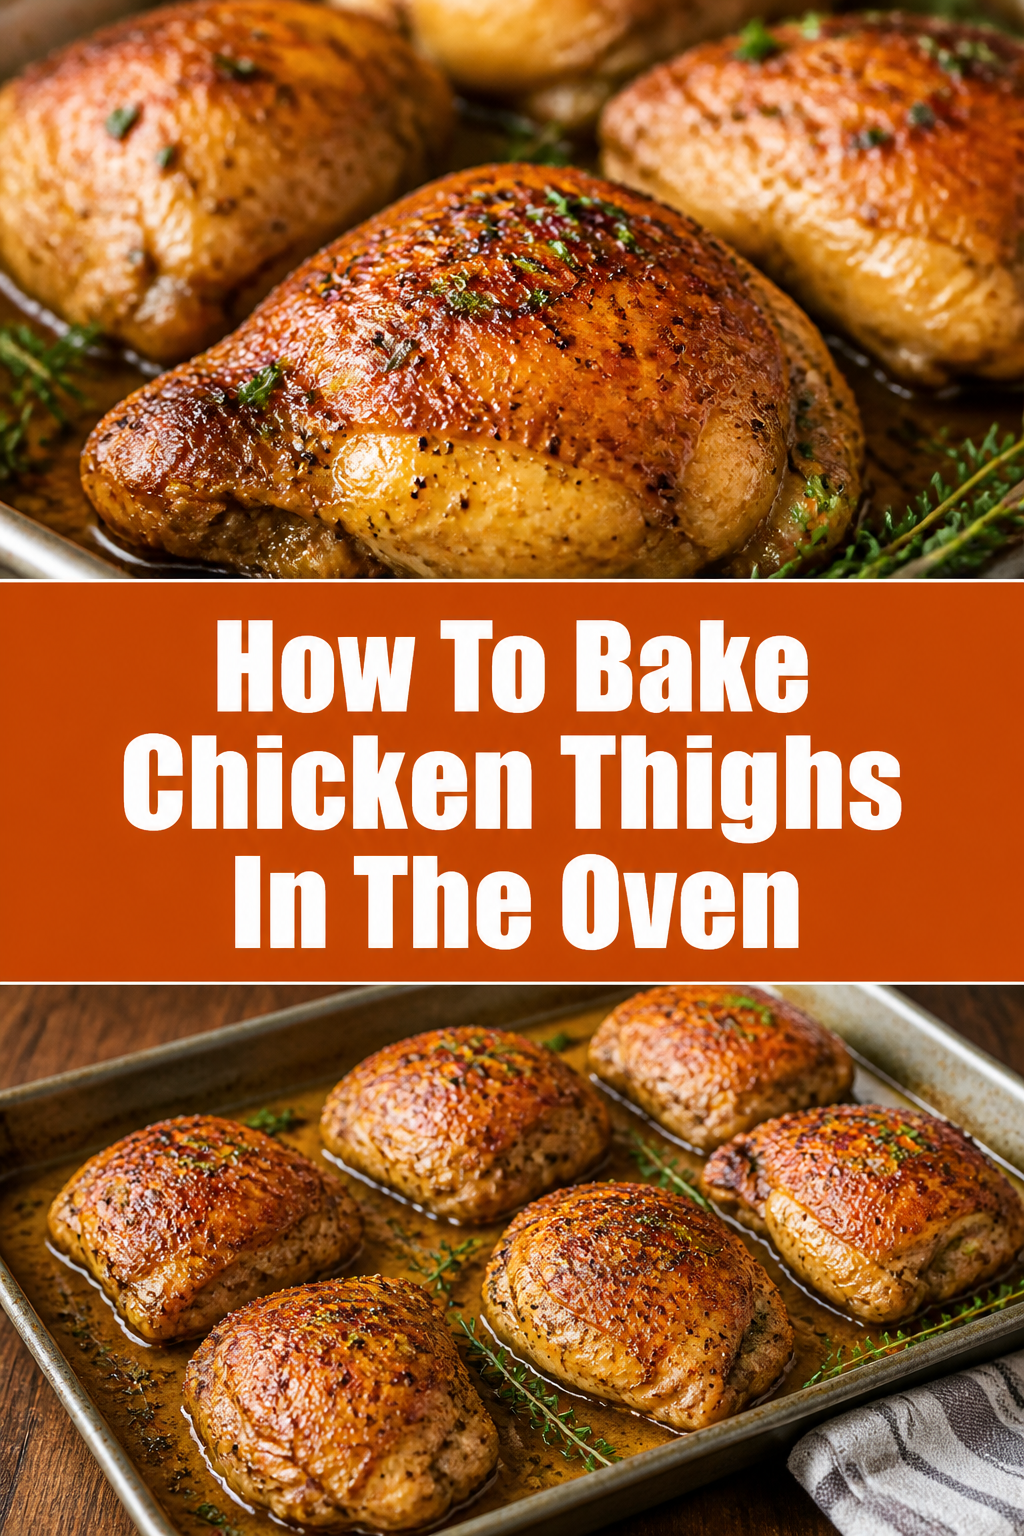
🍗 How To Bake Chicken Thighs In The Oven
I have spent over a decade perfecting the art of the humble chicken thigh in my own kitchen.
This guide will show you how to achieve that elusive combination of crackling skin and buttery, tender meat every single time.
You can trust these steps because they have been tested across hundreds of weeknight dinners and professional meal prep sessions.

Quick Overview
Baking chicken thighs is one of the most forgiving and rewarding skills a home cook can master.
Unlike chicken breasts, thighs are rich in dark meat and fat, making them difficult to overcook and incredibly flavorful.
- Time needed: 45 to 55 minutes
- Difficulty: Beginner
- What you’ll need: Bone-in skin-on chicken thighs, rimmed baking sheet, instant-read thermometer, olive oil, and seasonings.
Step-by-Step Instructions
Step 1: Prepare Your Equipment and Preheat
Set your oven to 425°F (218°C) and ensure your oven rack is positioned in the center.
High heat is the secret to rendering the fat beneath the skin, which results in a satisfying crunch.
Line a large, rimmed baking sheet with aluminum foil or parchment paper for easy cleanup later.
If you have a wire cooling rack that is oven-safe, place it inside the baking sheet to allow hot air to circulate under the meat.
Pro Tip: Always use a rimmed baking sheet to catch the rendering fat and prevent it from dripping onto the floor of your oven.
Step 2: Temper the Chicken
Remove the chicken thighs from the refrigerator about 20 minutes before you plan to put them in the oven.
Taking the chill off the meat helps it cook more evenly from the edge to the bone.
Inspect the thighs for any excess skin or loose bits of fat that might hang off the sides.
You can trim these away with kitchen shears, but try to keep as much skin over the top of the meat as possible.
Step 3: Dry the Skin Thoroughly
Pat every inch of the chicken skin dry using paper towels.
Moisture is the enemy of crispiness; if the skin is wet, it will steam rather than roast.
Press firmly on the skin to soak up any liquid that might be hiding in the folds of the meat.
Discard the paper towels immediately and wash your hands to maintain food safety standards.
Pro Tip: For the ultimate crispy skin, leave the chicken uncovered in the fridge for a few hours before cooking to air-dry the surface.
Step 4: Apply the Oil and Seasoning
Drizzle a small amount of olive oil or avocado oil over the thighs.
The oil acts as a heat conductor and helps the spices adhere to the skin.
Rub the oil into the skin and the underside of the meat so every surface is lightly coated.
Sprinkle your seasoning blend generously from a height to ensure even coverage across all pieces.
A standard mix of kosher salt, black pepper, garlic powder, and smoked paprika works beautifully for a classic flavor.
Step 5: Arrange the Chicken for Success
Place the thighs on the prepared baking sheet with the skin side facing up.
Space them out so they are not touching each other, leaving at least an inch of room between pieces.
Tuck any loose edges of skin underneath the meat to create a neat, compact shape.
If you are using a wire rack, ensure the chicken is centered over the bars so it stays stable during the bake.
Step 6: Roast Until Golden and Safe
Slide the baking sheet into the oven and set a timer for 35 minutes.
The total cooking time usually ranges between 35 and 50 minutes depending on the size of the thighs.
Check the internal temperature using an instant-read thermometer inserted into the thickest part of the meat.
Avoid hitting the bone with the thermometer probe, as the bone conducts heat differently and will give a false reading.
Pro Tip: While 165°F is the safety standard, chicken thighs actually taste better and have a superior texture when cooked to 175°F or 185°F.
Step 7: The Final Rest
Transfer the chicken from the hot baking sheet to a clean plate or cutting board once it reaches your target temperature.
Let the meat rest for at least 5 to 10 minutes before you even think about cutting into it.
Resist the urge to tent the chicken tightly with foil, as this will trap steam and soften that crispy skin you worked so hard for.
Resting allows the muscle fibers to relax and reabsorb the juices, ensuring the meat stays moist when served.
Common Mistakes to Avoid
Crowding the Baking Sheet
When you pack too many chicken thighs onto a single tray, you create a humid environment.
The moisture escaping from the meat gets trapped between the pieces, leading to soggy, pale skin.
Give each thigh plenty of breathing room to allow the dry oven air to circulate and brown the exterior.
Using Low Oven Temperatures
Many people try to bake chicken at 350°F, which is fine for cakes but poor for poultry skin.
Low heat takes too long to render the fat, often resulting in rubbery skin by the time the meat is done.
Stick to 400°F or 425°F to ensure the skin transforms into a golden, crispy crust while the interior stays juicy.
Pulling the Chicken Too Early
People often fear overcooking chicken, so they pull it out the moment it hits 165°F.
Chicken thighs contain a lot of connective tissue that needs time and heat to break down into gelatin.
Taking the thighs to 175°F or higher results in meat that literally falls off the bone and feels much more tender.
Troubleshooting
The Skin is Pale or Rubbery
If your chicken is cooked through but the skin looks light and soft, your oven might not be hot enough.
You can fix this by turning on the broiler for the last 2 or 3 minutes of cooking.
Watch the oven constantly during this time, as the skin can go from golden to burnt in a matter of seconds.
The Spices are Burning
If you notice the surface of your chicken is turning black before the meat is done, your rub might contain too much sugar.
Ingredients like brown sugar or dried herbs can burn quickly at high temperatures.
Next time, try using a simpler salt and pepper rub, or add your sugar-based sauces only during the last 10 minutes of baking.
The Meat is Dry Despite Being Thighs
While difficult to do, you can dry out a thigh if it is left in the oven for an hour or more.
This usually happens if the thighs are very small or if your oven runs much hotter than the dial suggests.
Invest in an oven thermometer to verify your appliance’s actual temperature and always use a meat probe to check for doneness.
Key Takeaways
- High heat is essential: Always bake at 400°F to 425°F for the best texture and color.
- Dryness equals crunch: Use paper towels to remove all surface moisture before adding oil or spices.
- Don’t fear the temperature: Aim for an internal temperature of 175°F to 185°F for the most tender results.
- Space it out: Ensure there is a gap between each piece of chicken on the tray to prevent steaming.
- Rest the meat: Give the juices time to redistribute for at least five minutes before serving.
Frequently Asked Questions
Can I use boneless skinless chicken thighs with this method?
You can, but you will need to adjust the timing significantly.
Boneless thighs cook much faster, usually taking only 20 to 25 minutes at 425°F.
Since there is no skin to crisp up, you may want to marinate them first to add extra flavor and moisture.
Do I need to flip the chicken halfway through?
No, flipping is not necessary when baking bone-in, skin-on thighs.
Keeping the skin side up the entire time allows it to stay dry and become as crispy as possible.
If you flip them, the skin will sit in the rendered fat and juices, becoming soggy.
How do I store and reheat leftovers?
Store your leftover chicken in an airtight container in the refrigerator for up to four days.
To reheat, place them in an oven or air fryer at 350°F until the skin crisps back up and the center is warm.
Avoid the microwave if you want to maintain the texture of the skin, as it will make the chicken rubbery.
Should I wash the chicken before seasoning?
Modern food safety guidelines strongly advise against washing raw poultry in your sink.
Washing chicken can splash bacteria onto your counters, faucets, and nearby kitchen tools.
The heat of the oven is what kills any bacteria, so simply patting the meat dry with paper towels is the safest method.
Our Top Recommended Finds
- Instant-Read Digital Thermometer: This is the single most important tool for cooking meat perfectly every time without guessing.
- Heavy-Duty Rimmed Baking Sheet: A thick aluminum pan prevents warping at high temperatures and ensures even heat distribution.
- Stainless Steel Wire Rack: Elevating the chicken allows heat to reach the bottom of the meat, preventing “soggy bottom” syndrome.
Mastering Your Weeknight Roast
Now that you have the foundation for perfect baked chicken thighs, you can start experimenting with different flavor profiles.
Try a Mediterranean rub with dried oregano and lemon zest, or go for a spicy kick with cayenne and cumin.
Once you master this high-heat roasting technique, you can apply it to other cuts of poultry or even roasted root vegetables.
Pick up a pack of chicken thighs today and put these steps into practice for your next dinner.