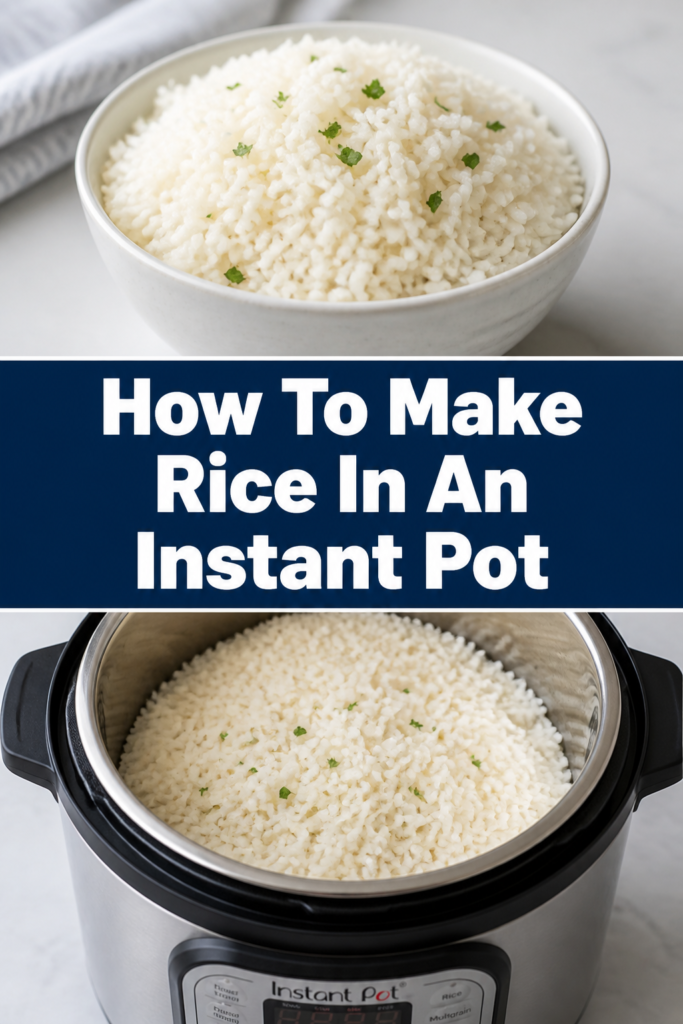
🍚 How To Make Rice In An Instant Pot
Making perfect rice can sometimes feel like a culinary mystery. Stove-top methods often lead to uneven cooking, burnt bottoms, or a sticky mess.
This is where the Instant Pot truly shines, transforming a finicky process into a consistent success. I’ve personally made countless batches of fluffy, perfectly cooked rice using this method, feeding my family and friends with ease.
Trust me, once you master this, you’ll wonder how you ever cooked rice any other way.
Quick Overview
This guide will walk you through creating perfectly fluffy, tender rice every time using your Instant Pot. You’ll achieve restaurant-quality results with minimal effort and maximum consistency.
- Time needed: 20-30 minutes (active prep: 5 mins, cook time: 5-10 mins, natural release: 10 mins)
- Difficulty: Beginner
- What you’ll need: Instant Pot, rice, water, measuring cups, fine-mesh sieve (optional), serving spoon.
Step-by-Step Instructions
Step 1: Choose Your Rice and Measure
Decide which type of rice you want to cook. White rice (like jasmine or basmati) is a great starting point for Instant Pot cooking due to its consistent results. Brown rice also works beautifully, just with different ratios and timings.
Measure your desired amount of rice. A good starting point is 1 cup of dry rice, which yields about 3 cups cooked. Always use dry measuring cups for accuracy here.
Step 2: Rinse Your Rice Thoroughly
Place the measured rice into a fine-mesh sieve. This step is crucial for achieving perfectly separated, non-sticky grains.
Rinse the rice under cool running water. Gently agitate the rice with your fingers until the water runs clear. This removes excess starch, which is the primary culprit behind gummy rice.
Pro Tip: Don’t skip rinsing, especially for white rice. It truly makes a noticeable difference in texture and prevents clumping. For brown rice, rinsing is less critical but still beneficial.
Step 3: Add Rice and Water to the Instant Pot
Transfer the rinsed rice directly into the inner pot of your Instant Pot. Ensure it’s spread somewhat evenly at the bottom.
Add the correct amount of water. For white rice (jasmine, basmati, long-grain), the general rule is a 1:1 ratio of rice to water. So, if you used 1 cup of dry rice, add 1 cup of water. Brown rice typically requires a 1:1.25 ratio (e.g., 1 cup rice to 1.25 cups water).
Step 4: Season (Optional) and Add Fat
Add a pinch of salt to the rice and water mixture. This enhances the flavor significantly. About 1/4 teaspoon per cup of dry rice is a good starting point.
Stir in a small amount of oil or butter, about 1 teaspoon per cup of rice. This helps prevent sticking and adds a lovely sheen and subtle flavor to the cooked grains.
Step 5: Secure the Lid and Set Cook Time
Place the lid on your Instant Pot. Make sure it’s properly sealed and locked into position.
Turn the steam release valve to the “Sealing” position. This is vital for pressure to build inside the pot.
Select the “Pressure Cook” or “Manual” setting on your Instant Pot. Set the cooking time based on the type of rice:
White Rice (Jasmine, Basmati, Long-Grain): 5-6 minutes on High Pressure.
Brown Rice: 10-15 minutes on High Pressure.
Step 6: Allow Natural Pressure Release
Once the cooking cycle is complete, the Instant Pot will beep and switch to “Keep Warm” mode. Do NOT immediately release the pressure.
Allow the pressure to release naturally for at least 10 minutes. This “Natural Pressure Release” (NPR) time is crucial for the rice to finish cooking evenly and absorb all the liquid, resulting in tender, fluffy grains.
After 10 minutes of NPR, you can carefully turn the steam release valve to “Venting” to release any remaining pressure. Be cautious of the hot steam.
Pro Tip: The 10-minute natural release is non-negotiable for perfect rice. Releasing pressure too quickly can lead to undercooked, hard, or gummy rice. Some people even let it fully NPR for brown rice.
Step 7: Fluff and Serve
Once the pressure is fully released and the float valve has dropped, carefully open the lid. A cloud of steam will escape, so be mindful.
Use a fork or a rice paddle to gently fluff the cooked rice. Start from the edges and work your way to the center, separating the grains. This releases steam and prevents the rice from clumping together.
Serve your perfectly cooked, fluffy Instant Pot rice immediately as a side dish, base for a meal, or incorporate it into your favorite recipes.
Common Mistakes to Avoid
Not Rinsing the Rice
Many people skip the rinsing step, especially when they’re in a hurry. However, unrinsed rice retains a lot of surface starch. This starch turns gummy and sticky during cooking, leading to a clumpy, unappealing texture rather than the desired fluffy grains. Always take the extra minute to rinse your rice until the water runs clear.
Incorrect Water-to-Rice Ratio
The water ratio is paramount in Instant Pot rice cooking. Using too much water will result in mushy, overcooked rice, while too little will leave you with hard, undercooked grains or even a “burn” error. Stick to the recommended 1:1 ratio for white rice and 1:1.25 for brown rice, measuring precisely. Different rice types can have slight variations, so it’s good to check specific recommendations if using an uncommon variety.
Using Quick Release
It’s tempting to use the quick release function immediately after the cook time ends, especially when you’re hungry. However, for rice, this is a major mistake. Quick releasing the pressure abruptly stops the cooking process and can lead to unevenly cooked rice, where the top is dry and the bottom is still wet or sticky. The 10-minute natural pressure release allows the rice to fully steam and absorb the remaining moisture, ensuring a consistent, tender texture throughout.
Opening the Lid Too Soon
Even after the 10-minute natural release, some residual pressure might remain, and the rice is still settling. Opening the lid too soon, before the float valve has fully dropped, can be unsafe and can also disrupt the rice. Wait until the pressure has fully released and the float valve is down before carefully opening the lid away from your face.
Troubleshooting
Rice is Mushy or Sticky
If your rice turns out mushy or overly sticky, the most common culprit is too much water or not enough rinsing. Ensure you are using the correct 1:1 ratio for white rice and 1:1.25 for brown rice, measured accurately. Also, make sure you thoroughly rinse your rice until the water runs clear to remove excess starch.
Another factor could be insufficient natural pressure release. While 10 minutes is usually good, sometimes a full natural release might be needed for particularly starchy rice or if your pot releases pressure very slowly.
Rice is Hard or Undercooked
Hard or undercooked rice usually points to too little water or insufficient cooking time/pressure release. Double-check your water-to-rice ratio to ensure you haven’t skimped on the liquid.
Also, confirm that your Instant Pot lid was sealed correctly and the steam release valve was set to “Sealing” to allow pressure to build. Make sure you’re allowing at least 10 minutes of natural pressure release, as this crucial period finishes the cooking process.
“Burn” Error Displayed
The “Burn” error typically indicates that the bottom of the inner pot is too hot, often due to insufficient liquid. This can happen if you used too little water, or if the liquid evaporated too quickly due to a faulty seal or if there was something stuck to the bottom of the pot.
Ensure you’re using the correct water ratio and that there are no food particles stuck to the bottom of the inner pot before cooking. If you’re doubling a recipe, sometimes this error can occur, so ensure sufficient liquid and consider adding a little extra water, perhaps a tablespoon or two, if you encounter this issue frequently.
Key Takeaways
- Always rinse your rice thoroughly to remove excess starch and achieve fluffy grains.
- Use a precise 1:1 ratio for white rice and 1:1.25 for brown rice with your Instant Pot.
- The 10-minute natural pressure release is critical for perfectly cooked, tender rice.
- Adding a pinch of salt and a bit of fat (oil or butter) enhances flavor and texture.
- Fluff the rice gently with a fork after cooking to separate the grains and release steam.
- Avoid quick release as it can lead to unevenly cooked or undercooked rice.
Frequently Asked Questions
Can I cook different types of rice in the Instant Pot?
Yes, the Instant Pot is versatile for many rice types. While white and brown rice are common, you can also cook wild rice, basmati, jasmine, arborio, and even sticky rice. Just be aware that water ratios and cooking times will vary slightly for each type, so always look up specific recommendations.
How do I store leftover Instant Pot rice?
Leftover cooked rice should be cooled quickly and stored in an airtight container in the refrigerator within one hour of cooking. It can be safely stored for 3-4 days. To reheat, you can use the microwave with a splash of water, or gently warm it on the stovetop.
Can I double the rice recipe in the Instant Pot?
Yes, you can absolutely double or even triple the rice recipe in your Instant Pot. The cooking time under pressure generally remains the same, but the time it takes for the pot to come to pressure will increase. The 1:1 water ratio for white rice (or 1:1.25 for brown) typically holds true regardless of the quantity, but ensure you don’t exceed the “Max Fill” line of your inner pot.
Can I add flavorings to my Instant Pot rice?
Absolutely! You can enhance your rice by adding bouillon cubes or broth instead of water for extra savory flavor. A bay leaf, a few cardamom pods, or a cinnamon stick can be added to the pot before cooking for aromatic rice. You can also sauté aromatics like garlic or onion in the Instant Pot on the “Sauté” setting before adding the rice and water.
Our Top Recommended Finds
- Fine-Mesh Sieve: Essential for rinsing rice effectively, ensuring every grain is separate and fluffy.
- Rice Paddle: Designed specifically for fluffing and serving rice without crushing the delicate grains.
- Instant Pot (various sizes): While you likely have one, a second, smaller pot can be handy for side dishes like rice while your main course cooks.
Embrace Your Instant Pot for Culinary Success
You now have all the knowledge and practical steps needed to conquer rice cooking with your Instant Pot. Say goodbye to guesswork and hello to consistently perfect, fluffy grains every single time. This method saves you time, reduces mess, and delivers reliable results, making it an indispensable part of your kitchen routine.
Ready to transform your meals? Start cooking your next batch of perfect rice today. You’ll be amazed at the difference it makes in your everyday cooking, turning a simple side into a star.