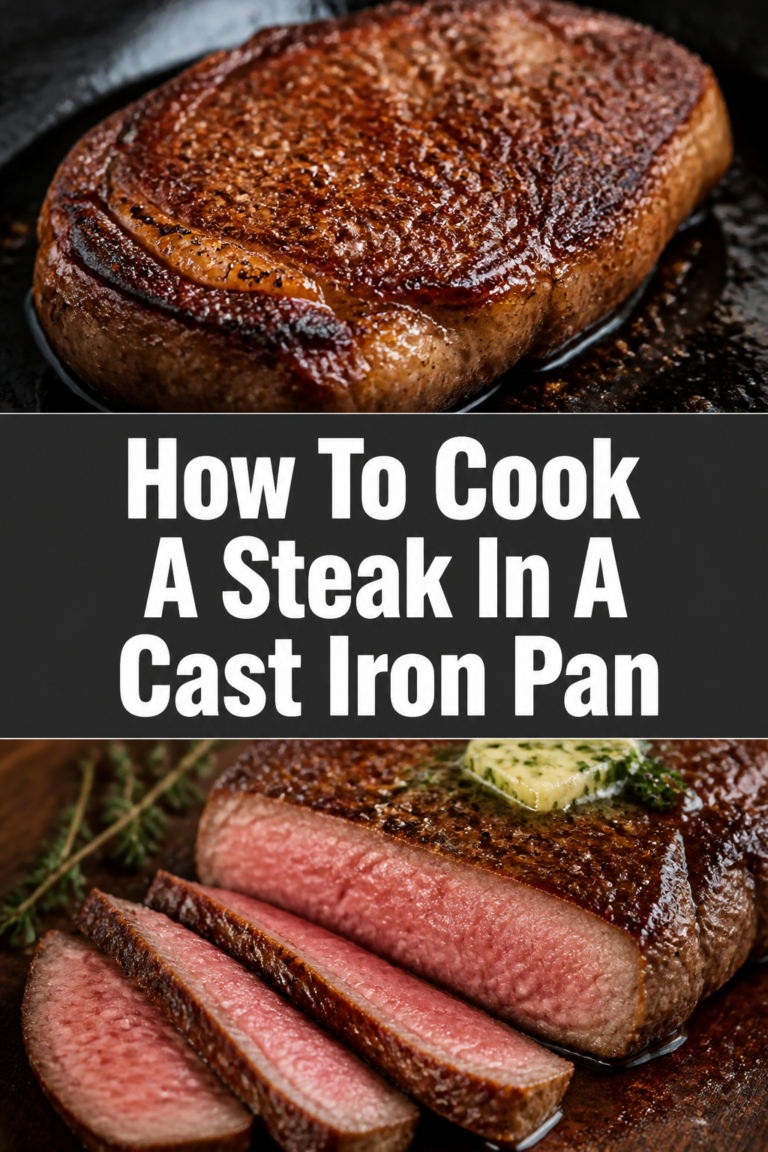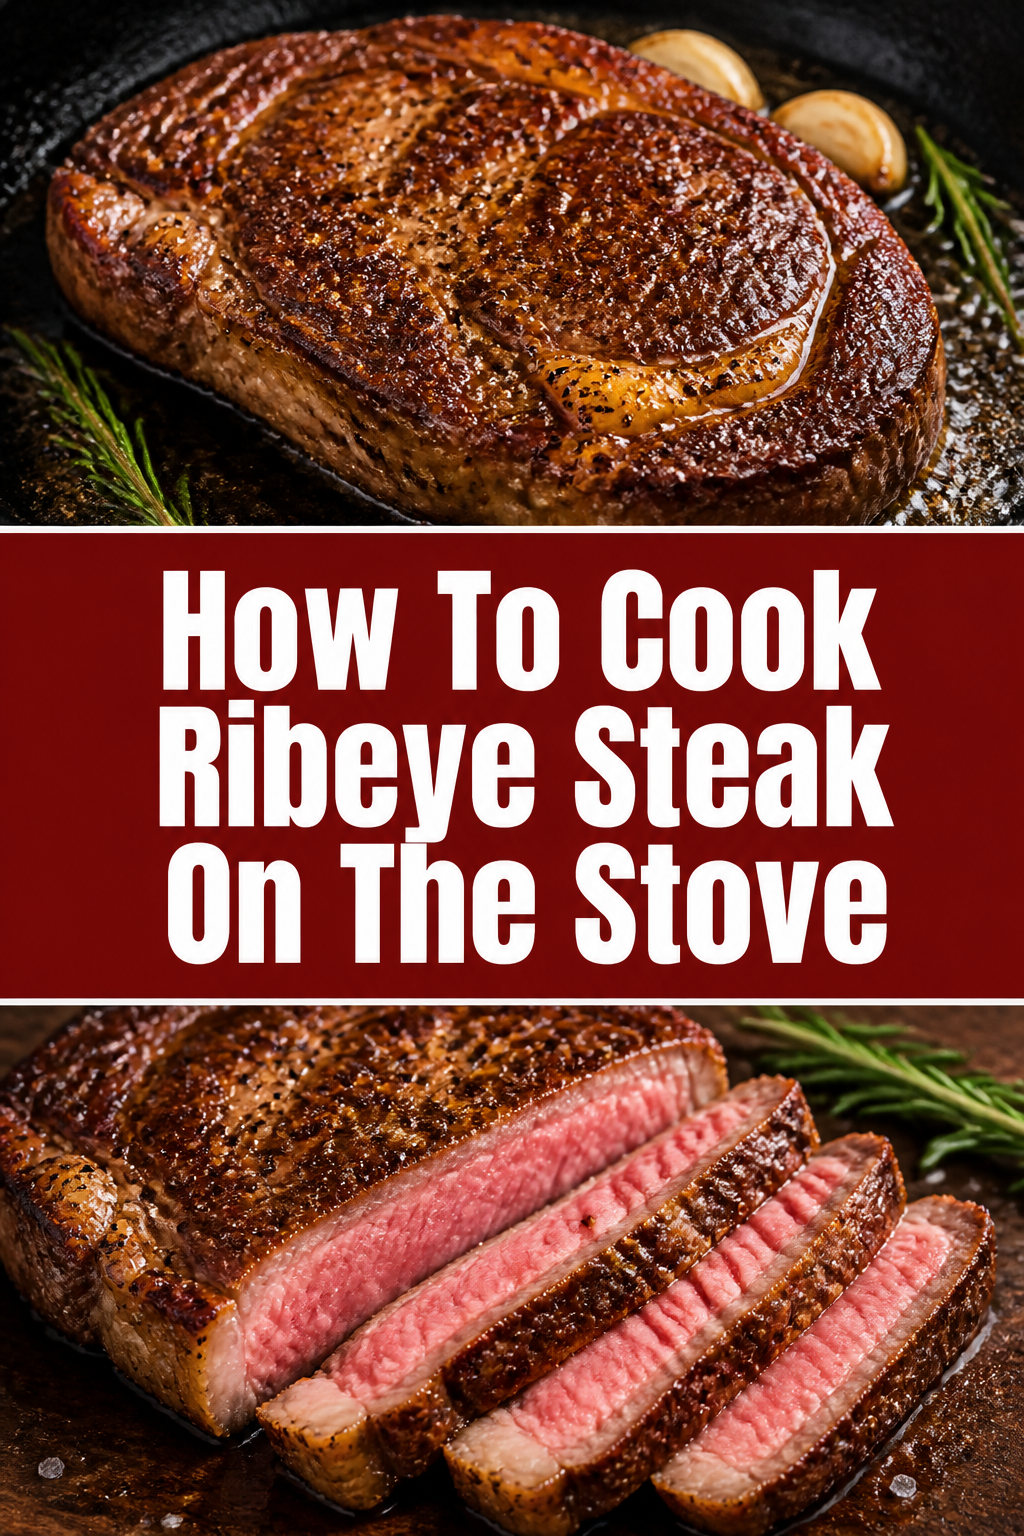
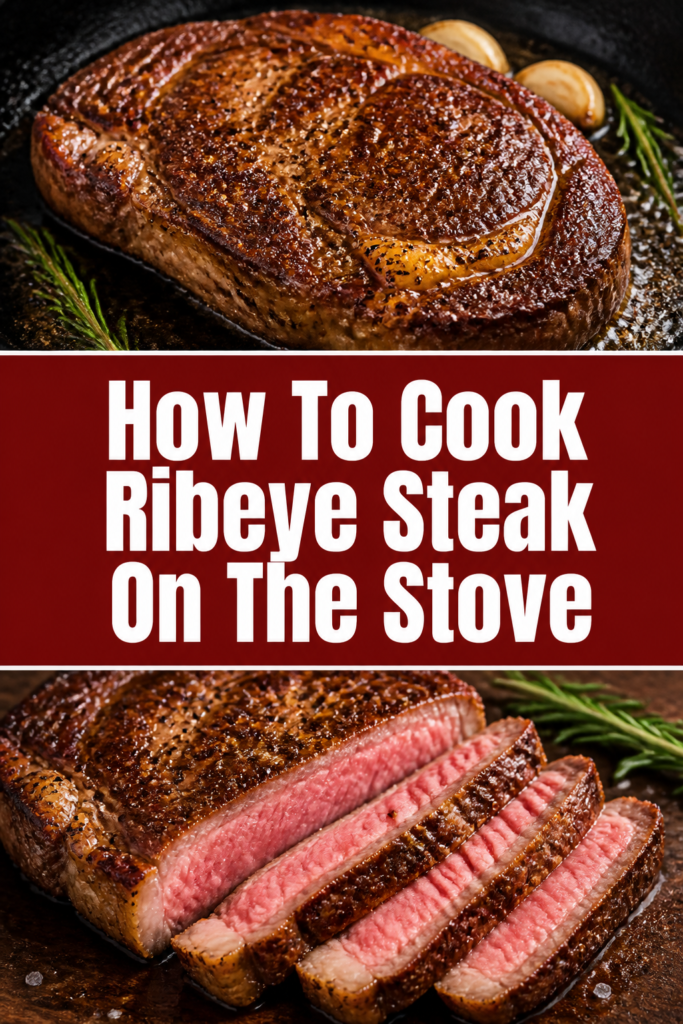
🥩 How To Cook Ribeye Steak On The Stove
Cooking a perfect ribeye steak on your stovetop is a truly rewarding experience. It’s a skill that elevates simple weeknight meals into something special. I’ve refined this method over countless evenings, transforming good cuts into spectacular ones.
This guide will walk you through every critical step, ensuring you achieve that coveted crust and juicy, tender interior. You’ll soon be searing steaks like a pro, impressing yourself and anyone lucky enough to share your table.
Quick Overview
Mastering the stovetop ribeye creates a restaurant-quality meal right in your kitchen. This method focuses on high heat and precise timing for an unforgettable steak.
- Time needed: 25-40 minutes (including resting)
- Difficulty: Intermediate
- What you’ll need: Ribeye steak, cast iron skillet, tongs, meat thermometer, butter, aromatics (garlic, rosemary)
Step-by-Step Instructions
Step 1: Prepare Your Steak
Proper preparation is the first crucial step towards a perfectly cooked ribeye. This initial care directly impacts the final texture and flavor of your steak. Neglecting these details can lead to uneven cooking and a less satisfying crust.
- Remove your ribeye steak from the refrigerator at least 30-60 minutes before cooking.
- Allow it to come closer to room temperature for more even cooking from edge to center.
- Pat both sides of the steak thoroughly dry with several layers of paper towels.
- Repeat this drying process until the surface feels completely moisture-free.
Pro Tip: A perfectly dry steak surface is essential for developing a deep, flavorful crust. Moisture on the surface will steam the meat rather than sear it.
Step 2: Season Generously
Seasoning is not just about adding salt; it’s about enhancing the ribeye’s natural, rich flavors. Don’t be shy with your seasoning, as much of it will fall off during cooking. This step builds the foundation for a delicious exterior.
- Sprinkle a generous amount of coarse sea salt or kosher salt over both sides of the steak.
- Press the salt gently into the meat, ensuring good contact.
- Grind fresh black pepper liberally over the entire surface of the steak.
- Consider adding a pinch of garlic powder or onion powder for extra depth, if desired.
Pro Tip: Seasoning ahead of time (even an hour or two) allows the salt to draw moisture out of the steak, then reabsorb, leading to a juicier interior and better crust. If you don’t have that much time, season right before cooking.
Step 3: Preheat Your Skillet
Achieving a scorching hot pan is non-negotiable for a perfect sear. This intense heat creates the Maillard reaction, developing that beautiful brown crust and rich flavor. Patience here pays off immensely.
- Place a heavy-bottomed skillet, preferably cast iron, on your stovetop over high heat.
- Allow the pan to heat for at least 5-7 minutes until it is smoking slightly.
- Test the heat by flicking a few drops of water into the pan; they should evaporate instantly.
- Ventilate your kitchen well by opening windows or turning on your range hood, as there will be smoke.
Pro Tip: A properly preheated pan is the secret to a great sear. Don’t rush this step, as a cold pan will result in a grey, unappetizing steak.
Step 4: Add Oil and Sear the First Side
Once your pan is screaming hot, it’s time to introduce the oil and the steak. The initial sear is critical for establishing that deep, golden-brown crust. This first side typically takes the longest.
- Pour a high smoke point oil, like grapeseed, avocado, or canola oil, into the hot pan.
- Swirl the oil to coat the bottom evenly, ensuring it just begins to shimmer.
- Carefully place the seasoned ribeye into the hot oil, laying it away from you to avoid splashes.
- Press down gently on the steak with tongs to ensure full contact with the pan.
- Sear undisturbed for 2-4 minutes, depending on the thickness of your steak and desired crust.
Pro Tip: Avoid moving the steak during this initial sear. Let it develop a deep, dark brown crust before even thinking about flipping. The steak will naturally release from the pan when it’s ready.
Step 5: Flip and Sear the Second Side
After achieving a beautiful crust on the first side, it’s time to flip and sear the other side. This step mirrors the first, building another layer of flavor and texture. The cooking time for this side is often shorter.
- Flip the steak using your tongs to reveal a gorgeous, caramelized crust.
- Sear the second side for another 2-3 minutes, again without moving it.
- Continue to press gently to ensure even contact and crust development.
- Observe the browning and adjust heat slightly if needed to prevent burning.
Pro Tip: If your steak has a thick fat cap on the side, use your tongs to stand the steak on its side and render that fat for 1-2 minutes. This adds incredible flavor and texture.
Step 6: Baste with Butter and Aromatics
Basting introduces incredible flavor and helps to finish cooking the steak evenly. This is where you infuse the meat with rich, aromatic notes that enhance every bite. This technique adds moisture and a beautiful sheen.
- Reduce the heat to medium-low after searing both sides.
- Add 2-3 tablespoons of unsalted butter, a few smashed garlic cloves, and a sprig of fresh rosemary or thyme to the pan.
- Tilt the pan slightly and, using a spoon, continuously baste the melting butter and aromatics over the steak.
- Continue basting for 1-3 minutes, ensuring all surfaces are coated with the flavorful butter.
- Flip the steak occasionally during basting to ensure even heat distribution.
Pro Tip: The butter and herbs not only add flavor but also help to gently finish the cooking process, ensuring the interior reaches your desired doneness without overcooking the exterior.
Step 7: Check Doneness and Rest
Accurate temperature checking is paramount for achieving your preferred doneness. Resting the steak afterward is just as important as the cooking itself. This step ensures a juicy, tender result.
- Insert an instant-read meat thermometer into the thickest part of the steak, avoiding bone or fat.
- Cook to your desired internal temperature (see chart below), remembering it will rise 5-10 degrees while resting.
- Remove the steak from the pan and transfer it to a cutting board.
- Loosely tent the steak with aluminum foil to keep it warm.
- Rest the steak for at least 5-10 minutes.
Pro Tip: Resting allows the juices to redistribute throughout the meat, preventing them from escaping when you slice it. This results in a significantly juicier steak. Resist the urge to cut into it early!
Doneness Temperature Guide:
- Rare: 120-125°F (49-52°C)
- Medium-Rare: 130-135°F (54-57°C)
- Medium: 135-140°F (57-60°C)
- Medium-Well: 140-145°F (60-63°C)
- Well-Done: 150°F+ (66°C+)
Step 8: Slice and Serve
The final step is to slice your perfectly cooked ribeye and enjoy the fruits of your labor. Proper slicing technique ensures maximum tenderness in every bite. This is the moment to savor your creation.
- Slice the rested steak against the grain into desired thickness.
- Arrange the slices on a warm plate.
- Drizzle any remaining pan juices or melted butter over the sliced steak.
- Serve immediately with your favorite sides.
Common Mistakes to Avoid
Not Drying the Steak
Leaving moisture on the steak’s surface is a common pitfall. This moisture creates steam when it hits the hot pan, preventing the steak from developing a proper sear. Instead of a crispy crust, you’ll get a grey, less flavorful exterior. Always pat your steak thoroughly dry with paper towels before seasoning.
Using a Cold Pan
Starting with a pan that isn’t screaming hot is another frequent error. A cold or moderately warm pan won’t achieve the high heat necessary for the Maillard reaction. This results in a steak that cooks slowly, dries out, and lacks that desirable, deeply browned crust. Always preheat your skillet over high heat until it’s smoking.
Flipping Too Often
Constantly moving or flipping the steak prevents a crust from forming. Each time you lift the steak, you interrupt the searing process and cool the pan. This leads to an uneven cook and a less developed crust. Sear each side undisturbed until a beautiful crust forms, then flip only once.
Not Resting the Steak
Cutting into a steak immediately after cooking is a mistake that sacrifices juiciness. The muscle fibers contract during cooking, pushing juices to the center. Resting allows these juices to redistribute throughout the meat, leading to a more tender and moist steak. Always rest your steak for 5-10 minutes before slicing.
Troubleshooting
Steak is Grey, Not Brown
If your steak lacks a deep brown crust and appears grey, your pan likely wasn’t hot enough. It might also indicate too much moisture on the steak’s surface. Ensure your pan is smoking hot before adding the steak and always pat the steak bone-dry.
Steak is Burnt on the Outside, Raw Inside
This issue arises from heat that is too high for too long, or a very thin steak. The exterior cooks too quickly before the interior has a chance to reach temperature. Reduce your heat slightly after the initial sear, or consider using a slightly thicker cut of steak. For very thin steaks, a quicker sear on both sides might be all you need.
Unevenly Cooked Steak
An unevenly cooked steak often points to not allowing the steak to come to room temperature before cooking. It can also be caused by an unevenly heated pan or not pressing the steak down to ensure full contact. Always let your steak sit out for 30-60 minutes and ensure your pan is consistently hot across its surface.
Key Takeaways
- Dry your steak thoroughly for an exceptional crust.
- Season generously to enhance the ribeye’s natural flavor.
- Preheat your skillet to screaming hot before adding the steak.
- Sear undisturbed on each side to develop a deep, rich crust.
- Baste with butter and aromatics for added flavor and even cooking.
- Always use a meat thermometer for precise doneness and consistency.
- Rest your steak for 5-10 minutes to ensure maximum juiciness.
Frequently Asked Questions
What kind of pan is best for cooking ribeye on the stove?
A heavy-bottomed cast iron skillet is by far the best choice. Its ability to retain and distribute heat evenly is unmatched, allowing for a superior sear and consistent cooking. Stainless steel can also work, but cast iron provides the best results.
Should I use oil or butter for searing?
Start with a high smoke point oil like grapeseed, avocado, or canola oil for the initial sear. Butter burns too quickly at the high temperatures needed for searing. Once the steak is seared, you can add butter along with aromatics for basting to finish cooking and add flavor.
How do I know when the steak is done without a thermometer?
While a thermometer is highly recommended for accuracy, you can use the “touch test.” A rare steak will feel soft and springy, medium-rare will have a slight give, and medium will feel firmer. This method requires practice and experience, so a thermometer is best for beginners.
Can I cook a very thick ribeye steak this way?
Yes, you can. For very thick ribeyes (1.5 inches or more), you might need to adjust the cooking time. Sear both sides as usual, then reduce the heat to low, cover the pan, and continue cooking for a few more minutes, or use the basting method for longer. Always rely on a meat thermometer for precise doneness.
Our Top Recommended Finds
- Cast Iron Skillet: Essential for its superior heat retention and even cooking, creating the perfect crust.
- Instant-Read Meat Thermometer: The only reliable way to ensure your steak reaches your desired doneness every time.
- Long-Handled Tongs: Crucial for safely handling and flipping the steak in a hot pan without burning yourself.
Ignite Your Inner Chef
You now possess the knowledge and practical steps to conquer the stovetop ribeye. This isn’t just a meal; it’s a culinary triumph waiting to happen in your own kitchen. The satisfaction of a perfectly seared steak, cooked to your exact preference, is truly unmatched.
Don’t let another night go by without experiencing this joy. Gather your ingredients, fire up that skillet, and create a masterpiece. You’ll be amazed at the restaurant-quality results you can achieve right at home.