🧁 How To Make Store Bought Frosting Better
I have spent years in both professional bakeries and my own tiny home kitchen looking for ways to save time without sacrificing quality.
There is no shame in using a shortcut, but a standard tub of frosting often lacks the depth and texture of a scratch-made buttercream.
This guide draws on my experience of “doctoring” hundreds of cakes to show you exactly how to turn that $2 tub into a gourmet topping.
Quick Overview
Transforming canned frosting is surprisingly simple once you understand the science of aeration and flavor balancing.
- Time needed: 10 to 15 minutes
- Difficulty: Beginner
- What you’ll need: Hand mixer or stand mixer, mixing bowl, rubber spatula, and your choice of “upgraders” like butter, salt, or extracts.
Step-by-Step Instructions
Step 1: Bring the Frosting to Room Temperature
Remove the foil seal from the tub and let the frosting sit on your counter for at least thirty minutes. Canned frosting is often dense and slightly oily when it first comes out of the container.
Wait until the frosting feels soft to the touch before you begin the mixing process. Trying to whip cold or stiff frosting will result in lumps that are nearly impossible to smooth out later.
Pro Tip: If you are in a rush, you can microwave the tub for five seconds, but be careful not to melt it into a liquid state.
Step 2: Transfer and Aerate
Scoop the entire contents of the tub into a large mixing bowl or the bowl of your stand mixer. You need plenty of space for the frosting to expand as you incorporate air into the mixture.
Whip the frosting on medium-high speed for a full three to five minutes. This is the single most important step because it changes the molecular structure of the frosting, making it lighter and doubling its volume.
Watch for the color to lighten and the texture to become fluffy like a cloud. This process also helps remove that “chemical” aftertaste that many store-bought brands have by dispersing the fats more evenly.
Step 3: Incorporate Real Fat
Add half a cup of softened, unsalted butter to the bowl while the mixer is running. Most canned frostings use palm oil or shortening, which can leave a greasy film on the roof of your mouth.
Beat the butter and frosting together until they are completely seamless and no yellow streaks remain. Real butter provides a rich, creamy mouthfeel that mimics a high-end Swiss meringue buttercream.
Substitute cream cheese if you prefer a tangier profile, especially for carrot cakes or red velvet layers. Ensure the cream cheese is very soft to prevent tiny white clumps from ruining your smooth finish.
Pro Tip: Using high-quality European-style butter with a higher fat content will yield an even silkier result.
Step 4: Balance the Sugar with Salt
Sprinkle in a tiny pinch of fine sea salt or kosher salt once the base is fluffy. Store-bought frosting is notoriously sweet, often to the point of being cloying.
Taste the frosting after adding the salt to see how the flavors have shifted. Salt acts as a flavor enhancer that cuts through the sugar and allows the notes of vanilla or cocoa to shine.
Mix thoroughly to ensure the salt crystals dissolve completely into the fat. You do not want your guests to bite into a concentrated grain of salt while eating their cake.
Step 5: Infuse High-Quality Extracts
Measure out one teaspoon of pure vanilla bean paste or a high-quality vanilla extract. The “vanilla” flavor in most tubs is synthetic and can taste somewhat flat or medicinal.
Experiment with other flavors like almond, lemon, or peppermint depending on your cake flavor. A little bit of almond extract goes a long way and gives the frosting a “wedding cake” vibe that tastes professional.
Pour the liquid in slowly while the mixer is on a low setting to prevent splashing. If you are making chocolate frosting, adding a teaspoon of instant espresso powder dissolved in a tiny bit of water will make the chocolate taste much deeper.
Step 6: Adjust the Consistency
Assess the thickness of your frosting by lifting the beater and seeing if the frosting holds a stiff peak. If you added butter or cream cheese, the frosting might be a little softer than it was in the tub.
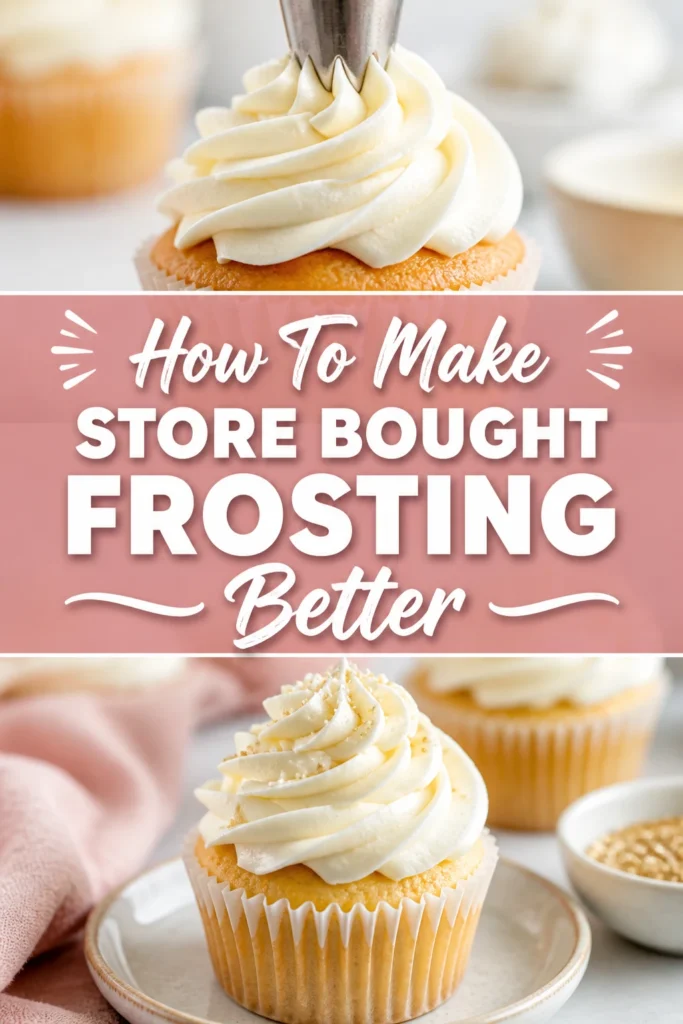
Sift in a quarter cup of powdered sugar if the mixture feels too runny for piping. The extra sugar provides structural integrity, which is vital if you plan on making tall swirls or intricate flowers.
Drizzle in a tablespoon of heavy whipping cream if the frosting feels too stiff or dry. The cream adds a luxurious fat content and helps the frosting glide over the cake without pulling up crumbs.
Pro Tip: Always sift your powdered sugar first to avoid having to over-mix the frosting to get rid of lumps.
Step 7: Add Acid for Brightness
Squeeze a few drops of fresh lemon juice into the bowl if you are working with a fruit-flavored or plain vanilla frosting. The acidity balances the heavy fats and sugar, making the entire dessert feel lighter.
Stir in the juice by hand using a rubber spatula to ensure it is evenly distributed. You only need a tiny amount—usually half a teaspoon—to make a noticeable difference in the flavor profile.
Consider using a teaspoon of sour cream or Greek yogurt for a similar effect if you don’t have citrus on hand. This is a secret trick used by many professional bakers to give their frosting a “homemade” tang.
Step 8: Fold in Texture or Color
Fold in any final additions like sprinkles, crushed cookies, or freeze-dried fruit powders. Freeze-dried strawberry powder is excellent because it adds intense natural flavor and a beautiful pink hue without adding moisture.
Use gel food coloring instead of liquid drops if you want to change the color of your frosting. Liquid colors can thin out the frosting and make it slide off the cake, whereas gels are concentrated and stable.
Sweep the spatula around the bottom and sides of the bowl one last time to make sure everything is perfectly combined. Your frosting is now ready to be used for filling, coating, or decorative piping.
Common Mistakes to Avoid
Over-microwaving the Frosting
Many people try to soften their frosting by putting it in the microwave for too long. This breaks the emulsion of the fats and sugars, leaving you with a soup that will never whip back up into a fluffy consistency. If your frosting melts, you usually have to start over with a fresh tub.
Adding Too Much Liquid at Once
It is tempting to pour in a large amount of milk or extract to change the flavor quickly. However, canned frosting can only hold a certain amount of liquid before it loses its structure. Always add liquids one teaspoon at a time and mix thoroughly between each addition to monitor the texture.
Ignoring the Temperature of Add-ins
Adding cold butter or cold cream cheese to room temperature frosting is a recipe for disaster. The cold fat will seize up and create small, hard beads throughout your frosting that are impossible to smooth out. Always ensure every ingredient you add is at the same ambient temperature as the frosting base.
Using Cheap Imitation Vanilla
The goal of doctoring store-bought frosting is to make it taste expensive and homemade. Using a low-quality imitation vanilla extract will only reinforce the artificial taste you are trying to hide. Invest in a small bottle of pure vanilla extract or vanilla bean paste for the best results.
Troubleshooting
The Frosting is Too Soft to Pipe
If your frosting feels like it is melting or won’t hold its shape, it likely got too warm during the mixing process. Place the entire bowl in the refrigerator for 15 to 20 minutes to let the fats firm up. Once chilled, give it a quick whip with the hand mixer to restore the fluffy texture before putting it into a piping bag.
The Frosting Looks Grainy or Curdled
This usually happens when there is a temperature mismatch between the frosting and the butter you added. To fix this, you can take a small bowl of the frosting and microwave it for 5 seconds until it is just barely warm. Fold that warm portion back into the main bowl to help the fats emulsify and smooth out the graininess.
The Flavor is Still Too Artificial
If you have added salt and vanilla but it still tastes like a tub, you need more “real” ingredients to mask the preservatives. Try adding a tablespoon of cocoa powder for chocolate frosting or two tablespoons of peanut butter. These strong, natural flavors will dominate the palate and hide the factory-made base.
Key Takeaways
- Whipping is essential: Always beat the frosting for several minutes to double the volume and improve the mouthfeel.
- Add real fat: Incorporating softened butter or cream cheese provides the richness that canned frosting lacks.
- Salt is your friend: A small pinch of salt is the most effective way to cut through excessive sweetness.
- Use quality extracts: High-end vanilla or almond extracts mask the chemical aftertaste of preservatives.
- Control the temperature: Ensure all ingredients are at room temperature to prevent lumps and curdling.
- Acid balances sugar: A few drops of lemon juice or a spoonful of sour cream can brighten the entire flavor profile.
Frequently Asked Questions
Can I freeze doctored store-bought frosting?
Yes, you can freeze it for up to three months in an airtight container. When you are ready to use it, let it thaw completely in the refrigerator overnight and then bring it to room temperature. You will need to whip it again for a minute or two to restore the fluffy texture before applying it to your cake.
How much butter should I add per tub of frosting?
The standard ratio is half a cup (one stick) of butter per 16-ounce tub of frosting. This ratio provides enough structure and flavor improvement without making the frosting feel like you are just eating a stick of butter. You can increase this to a full cup if you want a very stiff, buttery consistency for advanced piping.
Will adding butter make the frosting melt faster in the sun?
Adding real butter does make the frosting slightly more sensitive to heat than the original palm-oil-based version. If you are serving a cake outdoors in the summer, you might want to use a mix of butter and shortening to help it stand up to the heat. However, for indoor events, the flavor of pure butter is always superior.
Can I use a stand mixer or do I need a hand mixer?
Both tools work perfectly well for this process. A stand mixer is more convenient because it allows you to walk away while the frosting aerates for five minutes. A hand mixer gives you more tactile control, which can be helpful when you are trying to feel the consistency change as you add powdered sugar or cream.
Our Top Recommended Finds
- Pure Vanilla Bean Paste: This adds those beautiful little black specks to your frosting and provides a much deeper flavor than liquid extract.
- Offset Spatula: This tool is essential for getting that perfectly smooth finish on the top and sides of your cake.
- Gel Food Coloring Kit: These colors are highly concentrated and won’t change the consistency of your carefully doctored frosting.
Ready to Decorate Your Masterpiece
Now that you have a bowl of fluffy, gourmet-tasting frosting, it is time to put it to use on your favorite desserts. You can use this improved base for everything from birthday cupcakes to elegant tiered cakes.
If you enjoyed this guide, consider looking into basic piping techniques to take your decorating skills even further. Try experimenting with different flavor combinations like salted caramel or white chocolate to find your own signature frosting style.
Grab a spatula and start mixing your first batch today to see just how much of a difference these small changes can make. Your guests will never guess that your secret ingredient started in a plastic tub from the grocery store.